If you wear a wig, you know how important it is to keep it securely in place. Whether you’re out on a windy day, dancing at a party, or just going about your daily routine, the last thing you want is for your wig to shift or fall off. I’ve been wearing wigs for years, and I’ve picked up some great tips to help you keep your wig firmly in place, no matter what. Let’s dive into these methods!
Method 1: Wearing a Wig Grip
Step 1: Prepare Your Hair
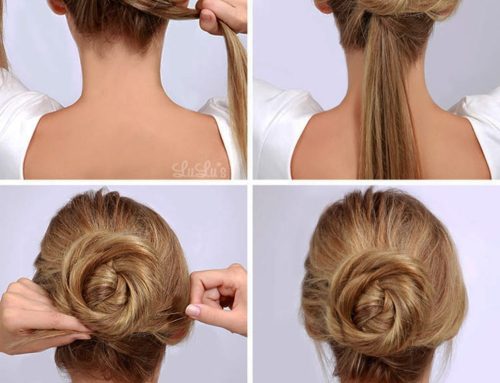
If your hair is long, you’ll need to get it out of the way. Style it into a small bun or braids, and cover it with a wig cap. Apply some gel to smooth down any baby hairs or flyaways. Align the front of the cap with your hairline, then pull it over your head so it rests at the nape of your neck.
Step 2: Use a Wig Grip
A wig grip is like a headband, typically made of double-sided velvet. It grips your hair or scalp on one side and the wig on the other. Position the wig grip about 1/2 inch back from your hairline, and tuck it behind your ears. Fasten it with the Velcro tabs at the nape of your neck. Make sure it feels secure but not too tight.
Step 3: Put on Your Wig
Hold the wig with both hands, with the back facing you. Tilt your head forward, line up the front of the wig with your hairline, and pull it on. Shake your head to check if the wig grip is secure. If the wig starts to slide, adjust the Velcro and try again.
Method 2: Using Wig Tape
Step 1: Prep Your Hair and Skin
Start by pulling your hair back into braids or a low bun and putting on a wig cap. Clean your forehead near your hairline with rubbing alcohol, toner, or astringent to remove any oil, sweat, or makeup. This helps the tape stick better.
Step 2: Apply Wig Tape
Cut 6 to 10 pieces of wig tape, each about 1 inch long. Apply the strips evenly along your hairline, pressing the sticky side against your skin. Be sure not to cover your real hair with the tape, as this can be painful to remove.
Step 3: Put on the Wig
Hold the wig with both hands, tilt your head forward, and align the front of the wig with your hairline. Adjust the wig so it looks natural. Once it’s positioned correctly, press firmly along the hairline to secure the wig to the tape. Use your fingertips to activate the adhesive.
Step 4: Remove the Wig
When you’re ready to take off your wig, use a wig-specific adhesive remover. Dip a cotton swab into the remover, lift the front edge of the wig gently, and rub the cotton swab against the tape until it loosens. Be patient and gentle to avoid damaging the wig.
Method 3: Using Wig Adhesive
Step 1: Prepare Your Hair and Skin
Put on a wig cap to cover your hair or reduce scratchiness. Clean your forehead with a cotton ball soaked in rubbing alcohol or toner to remove any oil or makeup.
Step 2: Apply the Adhesive
Using a clean makeup brush, apply a thin line of glue along your hairline from ear to ear. Wait for about 3 minutes until the glue becomes tacky.
Step 3: Put on the Wig
Hold the wig with both hands, tilt your head forward, and align the front of the wig with your hairline. Once it’s positioned correctly, press down firmly along the hairline to secure it.
Step 4: Remove the Wig
Spray wig adhesive remover along your hairline and massage it in gently with your fingers. Be patient and careful to avoid damaging the lace or your skin.
Method 4: Sewing in a Silicone Sheet
Step 1: Prepare the Silicone
Cut the silicone sheet into strips that fit your wig. You’ll need pieces for the nape of your neck, the front near the hairline, and behind your ears. Some kits come with pre-cut pieces.
Step 2: Pin the Silicone
Position the silicone strips on the wig lining and secure them with sewing pins. Make sure the anti-slip surface is facing your skin.
Step 3: Sew the Silicone
Using a needle and thread, sew the strips into the wig lining with small stitches. Remove the pins once the silicone is sewn in place.
Step 4: Wear the Wig
Put on the wig and align its hairline with your natural hairline. The silicone creates a gentle suction, keeping your wig secure. You can also apply tape to the silicone for extra security.
Personal Story: My Wig Security Journey
I remember one particularly windy day when I first started wearing wigs. I was out with friends, and I felt a sudden gust of wind. Panic set in as I imagined my wig flying off. After that, I decided to get serious about securing my wig. I tried wig grips, tape, and adhesive until I found what worked best for me. Now, I feel confident and secure, no matter the weather.
Conclusion: Find What Works for You
Securing your wig is all about finding the right method for your lifestyle and comfort. Whether you prefer the simplicity of a wig grip or the strong hold of adhesive, there’s a solution for everyone. Don’t be afraid to experiment and see what makes you feel most secure and confident.


