Transforming Synthetic Wigs with Acrylic Paint: A Creative Guide
The Complete Guide to How to Dye a Synthetic Wigs with Acrylic Paint
How to Dye a Wig Using Acrylic Paint
Revolutionizing Wig Color with Acrylic Paint
Dyeing synthetic wigs with acrylic paint is not just an art—it’s a craft that opens up a universe of vibrant possibilities. For those looking to add a splash of color to their synthetic wigs, acrylic paint offers an affordable and accessible solution. This technique allows you to customize your look with any shade imaginable, from pastel pinks to bold blues, without the commitment or cost of purchasing new wigs in various colors.
Jasmin Todd, a seasoned Curly Hair Specialist from Austin Curls, has endorsed this method, highlighting its efficacy and safety for synthetic fibers. With over two decades of experience in hair styling and care, Jasmin’s insights ensure that our approach not only preserves the quality of the wigs but also enhances their beauty. Her approval and guidance provide us with a solid foundation to explore this innovative dyeing technique confidently.
By incorporating Jasmin’s expert tips and a step-by-step guide, this article aims to equip you with all the knowledge you need to transform your synthetic wig. Whether you’re gearing up for a special occasion, trying out a new look, or just bringing some color into your daily style, dyeing your wig with acrylic paint can be an exciting and creative journey. Let’s dive into how you can achieve these stunning results at home, turning your old synthetic wig into a dazzling new accessory.
##Setting Up Your Wig Dyeing Station: A Guide to Safe and Clean Dyeing
Preparing Your Workspace: Ensuring Safety and Cleanliness
When it comes to transforming your synthetic wig with acrylic paint, the excitement of unleashing your creativity must be balanced with the importance of safety and cleanliness. Preparing your workspace properly not only protects you from potentially harmful fumes but also ensures that your dyeing project goes smoothly without staining your surroundings.
Importance of a Well-Ventilated Area
One of the crucial steps in preparing your workspace is ensuring adequate ventilation. Acrylic paint, when mixed with rubbing alcohol to dye wigs, can produce strong odors that might be overwhelming and harmful if inhaled in confined spaces. “Working in a well-ventilated area is non-negotiable,” advises Jasmin Todd, a renowned curly hair specialist. She recommends setting up your workspace outdoors if possible. If an outdoor setup isn’t feasible, choose a well-ventilated room and open all windows. Using a fan to direct the fumes outside can also be a great help in maintaining a safe breathing environment.
Setting Up a Clean Workspace
Next, it’s vital to protect your work area from any spills or splatters, which are almost inevitable when working with paint. Here’s a step-by-step approach to ensuring your workspace remains clean:
-
Choose Your Surface Wisely: Begin by selecting a sturdy table or stand that you can comfortably work around. This will be your main dyeing station, so it should be spacious enough to accommodate your wig and dyeing supplies.
-
Lay Down Protection: Cover your chosen work surface and surrounding floor with a tarp or old newspapers. This layer acts as a barrier against any dye that might escape during the application process. “I always use a thick plastic tarp because it’s durable and easy to clean up afterward,” shares Maria Gonzalez, an avid DIY wig dyer.
-
Organize Your Materials: Before you start, organize all your dyeing materials — acrylic paint, rubbing alcohol, spray bottle, gloves, and comb — and place them within easy reach. This organization prevents any frantic searches for tools mid-process, which could lead to accidents or spills.
-
Prepare for Emergencies: Have a plan for quick clean-up in case of spills. Keep some rags or paper towels handy, and a small bucket of water or a wet cloth can help you quickly wipe up any excess dye that might drip onto unwanted areas.
By taking the time to set up a safe and clean workspace, you not only ensure a more enjoyable and stress-free dyeing experience but also protect your health and your home. As Jasmin Todd puts it, “Preparation doesn’t just make the process smoother—it makes it safer and more fun, letting you focus on the creative part without worry.” So, roll up your sleeves, set up your space, and get ready to give your synthetic wig a vibrant new life!
Essential Materials for Dyeing Your Synthetic Wig with Acrylic Paint
Materials Needed: Gathering Your Supplies
Dyeing a synthetic wig with acrylic paint is a creative way to customize your look, but having the right materials on hand is crucial to achieving a successful outcome. Let’s dive into the essential items you’ll need to transform your wig, along with some pro tips and personal insights to guide you through the process.
The Essentials List
-
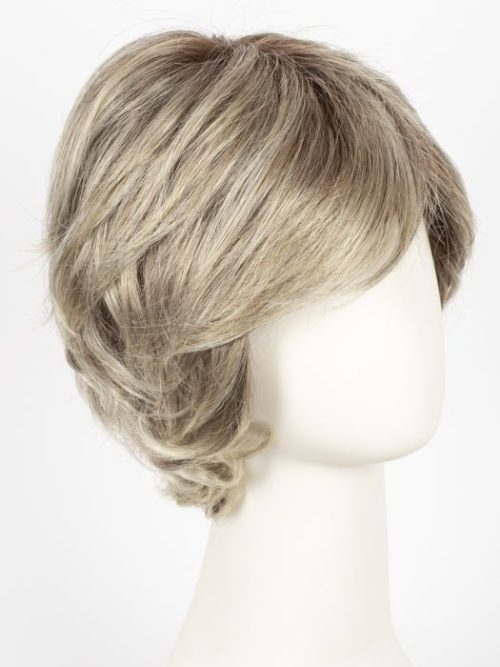
Light-Colored Synthetic Wig: Choose a wig that’s blonde, white, silver, or in a pastel shade. Darker wigs won’t show the paint as effectively. Starting with a light-colored wig is like having a clean canvas where the colors truly pop,” says Jasmin Todd, a curly hair specialist who has worked with synthetic wigs for over two decades.
-
Acrylic Paint: Opt for high-quality, non-toxic acrylic paint. The variety of colors available allows for endless creativity. Remember, the paint should be vibrant and durable but safe for synthetic fibers.
-
Rubbing Alcohol: This helps thin the paint for easier application. It also ensures that the paint adheres well to the synthetic fibers without clumping.
-
Small Spray Bottle: A spray bottle is crucial for applying the dye mixture evenly across the wig. “Using a spray bottle helps distribute the paint evenly, preventing splotches and ensuring a smooth finish,” shares Mark Lee, a DIY enthusiast who regularly dyes wigs for cosplay.
-
Latex Gloves: To protect your hands from getting stained, wear latex gloves. Dyeing can get messy, and acrylic paint can be challenging to wash off skin.
-
Tarp or Old Newspaper: Protect your work area with a tarp or layers of old newspapers. “I always lay down a tarp,” says Emma Roberts, a blogger who specializes in DIY crafts. “It makes cleanup a breeze and keeps my workspace tidy.”
-
Foam Head: A foam head is essential for securely placing the wig while you work. It makes the application process smoother and helps maintain the wig’s shape as you dye.
-
Comb: Have a comb on hand to detangle the wig and help spread the paint mixture through the fibers evenly. “A wide-tooth comb is perfect for gently combing through the wig without pulling out hairs,” notes Todd.
Why Each Item Matters
Each of these materials plays a vital role in the dyeing process. The light-colored wig acts as a perfect base for bright colors, while the acrylic paint offers versatility in color choice. Rubbing alcohol ensures the paint’s consistency is suitable for spraying, and the spray bottle allows for even application. Gloves protect your hands, the tarp safeguards your workspace, and the foam head helps you manage the wig easily. Lastly, the comb is essential for even dye distribution and preventing tangles.
By gathering these materials beforehand, you can ensure that your wig dyeing project goes smoothly and results in a beautiful, evenly dyed piece that can completely transform your appearance.
Personal Insight
“I first tried dyeing a wig as part of a Halloween costume,” recalls Julia Green, an amateur costume designer. “It was a bit daunting at first, but having all the right materials laid out beforehand made the process so much easier and more fun. The wig turned out amazing, and I received so many compliments. It really brought my whole outfit together!”
By following these guidelines and ensuring you have all the necessary materials, you’re well on your way to successfully dyeing your synthetic wig and achieving a vibrant, custom look that’s uniquely yours.
Crafting the Perfect Wig Dye: Mixing Acrylic Paint with Rubbing Alcohol
Mixing the Dye: A Step-by-Step Guide
Creating the perfect dye for your synthetic wig involves more than just choosing the right colors; it’s about mixing the right ingredients in the right proportions. Here’s how you can combine acrylic paint with rubbing alcohol to get a vibrant, even color that will bring new life to your wig.
Understanding the Ingredients
Acrylic paint is a versatile and vivid option for dyeing synthetic fibers, but its thick consistency can be a challenge when aiming for an even application. That’s where rubbing alcohol comes in. Rubbing alcohol helps thin out the acrylic paint without diluting the color intensity,” explains Jasmin Todd, a curly hair specialist with years of experience in wig styling. “It also ensures the paint adheres well to the synthetic fibers and speeds up the drying process.”
Step-by-Step Mixing Process
-
Select Your Paint and Alcohol: Start by choosing a high-quality acrylic paint in the color of your choice. For the rubbing alcohol, a standard 70% solution found in most drugstores will work perfectly.
-
Prepare Your Spray Bottle: Take a clean, dry spray bottle to mix your dye. Ensure it’s free from any previous contents to avoid unwanted chemical reactions or color mixing.
-
Add the Paint: Measure about ¼ teaspoon (1.23 mL) of acrylic paint for a subtle shade. If you’re going for a more intense color, you might want to up it to ½ teaspoon (2.46 mL). Pour or use a small brush to transfer the paint into the spray bottle. “Always start with less paint than you think you need,” advises Todd. “You can always add more to intensify the color but starting lighter gives you more control.”
-
Mix in the Rubbing Alcohol: Add about 3 tablespoons (44.36 mL) of rubbing alcohol to the spray bottle. This ratio generally works well, but you can adjust the amount of alcohol depending on the opacity you desire. Less alcohol means more opacity and vice versa. “The key is to find a balance that gives you good coverage without making the paint too runny,” shares Mark Lee, a DIY enthusiast.
-
Shake to Combine: Once you’ve added both components, tightly close the spray bottle and give it a vigorous shake. Continue shaking for a minute or two to ensure the paint and alcohol are fully integrated. The solution should look homogeneous without any visible streaks of paint.
-
Test Your Mixture: Before applying it to the wig, spray a little of the mixture onto a piece of scrap fabric or paper to see the actual color and opacity. Adjust the mixture if needed by adding more paint or alcohol.
Insight
Sarah, a seasoned costume designer, shares her first experience with this technique: “The first time I tried dyeing a wig, I used too much paint, and the mixture was too thick, leaving the wig patchy. After some trial and error, I realized less is more. Now, I start with minimal paint and gradually build up until I get the shade just right.”
Wrapping Up
Mixing your dye correctly is crucial for achieving a beautiful, even color on your synthetic wig. By following these steps and adjusting based on your specific needs, you can create a custom dye that will make your wig look as vibrant and unique as you desire. Remember, the key to success in DIY projects lies in experimentation and adjustment. So, grab your materials, mix up your dye, and transform your wig into a stunning new creation!
Mastering Wig Dyeing: Application and Post-Care Techniques
Dye Application Process: Achieving Even Coverage
Dyeing your synthetic wig with acrylic paint is an innovative way to refresh your style. But to get that salon-fresh look, it’s all about applying the dye correctly. Here’s a step-by-step guide that ensures your wig gets a vibrant, even coat of color without any patchiness.
Step-by-Step Dye Application
-
Prepare Your Materials: Before you begin, make sure your spray bottle is filled with the mixed acrylic paint and rubbing alcohol solution. Have your gloves on to protect your hands and a comb nearby to help spread the dye evenly.
-
Start Spraying: Hold the spray bottle about 6 inches away from the wig. Start at the roots and spray evenly, working in sections. “The distance helps to disperse the dye evenly, preventing any heavy spots that could lead to splotching,” advises Jasmin Todd, a curly hair expert.
-
Work the Dye In: After spraying a section, use your gloved hands to work the dye into the fibers of the wig. Ensure you cover all angles by lifting and separating different layers. “This is where the magic happens. You want to massage the dye into the wig just like you’re shampooing your hair,” explains Todd.
-
Comb Through: Once the section is saturated, use a wide-tooth comb to distribute the dye evenly throughout. This helps prevent any streaks and ensures that every strand is coated. “Combing through also helps remove any excess dye, which is crucial for an even finish,” shares Sarah, a DIY wig dye enthusiast.
-
Repeat: Continue this process section by section until the entire wig is covered. Make sure to check for missed spots, particularly around the edges and underneath layers.
Post-Dyeing Care: Ensuring Lasting Color
After applying the dye, proper care is essential to maintain the wig’s vibrant color and ensure it doesn’t transfer onto your clothes or skin.
Drying and Rinsing Steps
-
Let It Dry: Allow the wig to air dry on a wig stand or a similar setup. It usually takes about 1-2 hours for the wig to dry completely. Resist the temptation to speed up the process with a hairdryer as it can affect the final color,” notes Mark Lee. Leave the wig in a well-ventilated area on a tarp to catch any drips.
-
Rinse It Out: Once the wig is dry to the touch, rinse it under cold water until the water runs clear. This step is crucial to remove any loose pigment and prevent the color from running later. “Always rinse in cold water as it helps seal in the color,” advises Todd.
-
Air Dry Again: After rinsing, gently squeeze out any excess water and let the wig dry on a towel or hang it to dry completely. Halfway through, flip the wig to ensure both sides dry evenly.
-
Final Brush Out: When the wig is completely dry, gently brush through it to smooth out any tangles and give it a natural look. “This final step fluffs up the fibers, making your wig ready to wear,” says Sarah, reflecting on her own successful dye jobs.
By following these detailed steps for dye application and post-dyeing care, you can transform any synthetic wig with confidence. Whether you’re looking to add a pop of color for a special occasion or just want to spice up your everyday look, these techniques will help you achieve a salon-quality color at home, making your old wig look brand new.
Enhancing Your Wig Dyeing Experience: Tips, Troubleshooting, and Community Insights
Additional Tips and Troubleshooting: Perfecting Your Technique
Dyeing your synthetic wig with acrylic paint is a fantastic way to express your creativity and achieve a personalized look. However, like any DIY project, it comes with its own set of challenges. Here are some expert tips and solutions to help you master the process and overcome common hurdles.
Achieving Different Color Intensities
-
Experiment with Paint Concentrations: To control the intensity of the color, adjust the amount of acrylic paint relative to the rubbing alcohol in your mixture. “For deeper colors, increase the ratio of paint to alcohol. If you prefer a subtler shade, do the opposite,” advises Jasmin Todd, a seasoned stylist. Remember, it’s easier to build up color through multiple light applications than to fix an overly vibrant mistake.
-
Layer Your Applications: Applying several thin layers of dye can lead to a more controlled and even color distribution. Allow each layer to dry slightly before applying the next. This method helps deepen the color gradually and can prevent the saturation from becoming too overwhelming.
Solving Common Issues
-
Uneven Coverage: If you notice patchy areas, it might be due to insufficient spraying or uneven absorption. To fix this, Jasmin suggests, “Re-wet the patchy sections with a light mist of rubbing alcohol, then reapply the dye. Use a comb to spread the dye more evenly.”
-
Color Not Showing Up: This can occur if the wig’s base color is too dark for the chosen paint or if the paint/alcohol mixture is too diluted. “To ensure visibility, always start with a light-colored wig and adjust your paint-to-alcohol ratio to increase pigment concentration,” recommends Mark Lee, a DIY enthusiast.
Community Q&A: Engaging with Real Concerns
Incorporating feedback and questions from the community not only enhances understanding but also builds a supportive network for enthusiasts. Here are some commonly asked questions along with expert responses:
-
How durable is the dye?
- Community Member: “Will the color wash out after a few uses?”
- Expert Answer: “Acrylic paint is quite durable on synthetic fibers, especially when set properly with alcohol. However, like all dyes, it may start to fade after multiple washes or extensive exposure to sunlight,” shares Todd.
-
What are the best color options for a vibrant result?
- Community Member: “Which colors work best for a truly vibrant look?”
- Expert Answer: “Bright, primary colors like red, blue, and yellow tend to show up more vividly on synthetic wigs. Metallic and neon acrylics are also great for a pop of eye-catching color,” suggests Lee.
By following these additional tips and considering the insights from community questions, you can improve your wig dyeing technique and enjoy a more rewarding creative experience. Whether you’re revamping an old wig or experimenting with a new purchase, these strategies will help you achieve stunning results that reflect your unique style and creativity.
Safe and Stylish: Expert Guide to Dyeing Synthetic Wigs
Environmental and Health Considerations: Responsible Crafting
When dyeing synthetic wigs with acrylic paints, it’s essential to consider both environmental and health aspects to ensure a safe and sustainable practice. Here’s how you can keep your crafting both creative and conscientious.
Safe Handling and Disposal of Materials
-
Proper Ventilation: Always work in a well-ventilated area to avoid inhaling fumes from acrylic paints and rubbing alcohol. Jasmin Todd, an expert in curly hair care, emphasizes, “Proper ventilation is crucial not just for your immediate health but also to reduce the buildup of toxic fumes in your environment.”
-
Disposal of Paint and Alcohol: Do not pour excess paint or alcohol down the drain as they can be harmful to the water supply and the environment. Instead, follow local regulations for disposing of hazardous waste. “Check with your local waste management services to find out how to dispose of acrylic paint and solvents safely,” suggests Todd.
-
Use of Non-Toxic Materials: Opt for acrylic paints that are non-toxic and free from harmful chemicals. This not only protects your health but also reduces environmental impact.
Minimizing Environmental Impact
-
Recycling and Reusing Materials: Use reusable containers and tools wherever possible. For instance, clean and reuse spray bottles and combs instead of disposing of them after a single use.
-
Choosing Eco-Friendly Paint Alternatives: Consider using water-based acrylic paints, which are lower in volatile organic compounds (VOCs) and less harmful to the environment.
Advanced Styling Techniques: Elevating Your Wig Game
Creating unique and intricate designs on your wigs can truly elevate your styling game. Here are some advanced techniques to try:
Multi-Colored and Patterned Designs
-
Layering Colors: Start with lighter shades and gradually add darker colors. This technique allows for depth and complexity in your design. “Applying multiple layers lets you build up color gradually, giving you more control over the final appearance,” advises Todd.
-
Using Stencils for Patterns: Apply stencils to the wig before spraying to create patterns like stripes, stars, or even floral designs. Secure the stencil with a light adhesive spray to prevent it from moving.
Expert Styling Tips Post-Dyeing
Jasmin Todd recommends using specific styling techniques after dyeing to maintain the wig’s texture and quality. “After dyeing, use a wide-tooth comb to detangle without pulling out the fibers. For styling, apply a light, wig-safe conditioner to add sheen and protect the color.”
Conclusion: Unleashing Creativity with Confidence
In conclusion, dyeing synthetic wigs with acrylic paint opens up a world of creativity and personal expression. By using the correct materials and methods, you ensure not only the longevity and beauty of your wigs but also adhere to responsible crafting practices. Whether you’re aiming for a bold single-color look or an intricate multi-colored design, the possibilities are endless.
Jasmin Todd encourages everyone to experiment with different styles and share their results: “Every wig you paint is a reflection of your unique creativity. Share your creations with the community to inspire and get inspired.” Remember, every attempt is a step forward in mastering the art of wig dyeing. So grab your materials, set up your workspace, and start transforming those wigs into works of art!
Expanding Your Knowledge: Deep Dive into Wig Dyeing with Acrylic Paint
Long-term Effects of Acrylic Paint on Synthetic Wigs
Using acrylic paint to dye synthetic wigs is a popular DIY method for its affordability and vibrant results. However, what happens to a wig after repeated applications of acrylic paint? Over time, acrylic paint can affect the wig’s texture and longevity. “While acrylic paint can give your wig an exciting color, it might also lead to stiffness and tangling if not done correctly,” explains Jasmin Todd, a curly hair specialist. She suggests using a conditioning treatment post-dyeing to maintain the softness and manageability of the wig.
Repeated use of harsh paints can also cause the fibers to break down faster than they naturally would. To minimize damage, it’s crucial to dilute the paint properly and avoid excessive reapplications. “Choose high-quality, non-toxic acrylic paints to ensure the safety and longevity of your wig,” advises Todd.
Comparison with Other Dyeing Methods
When considering dyeing your wig, it’s beneficial to compare methods. Acrylic paint dyeing stands out for its cost-effectiveness and ease of application compared to commercial wig dyes. However, commercial dyes are specifically formulated for fibers, offering potentially longer-lasting and more fiber-friendly results.
“The main advantage of acrylic paint is the cost and the range of colors available,” says a DIY enthusiast. However, they note, “Commercial wig dyes often provide a more natural look and feel, and they’re less likely to damage the wig over time.”
Personal Stories and Examples
Hearing from individuals who have ventured into the world of wig dyeing can be incredibly inspiring. For instance, Emily, a cosplay enthusiast, shares her experience: “I transformed my old, faded wig into a vibrant masterpiece with just a few spritzes of acrylic paint. It brought my entire costume to life!” Accompanying before and after images show a dramatic transformation, illustrating the potential of acrylic paint dyeing.
Another story comes from Mike, who dyed his wig for a theater production. “It was my first time using acrylic paint on a wig, and I was thrilled with how it turned out. The color was bright, and it lasted through all our performances,” he recounts.
Video Tutorial: A Visual Guide to Dyeing Your Wig
For those who prefer a visual demonstration, a step-by-step video tutorial can be invaluable. Hosted by an expert like Jasmin Todd, the tutorial would cover all aspects of the dyeing process, from mixing the dye to applying it and offering tips for aftercare. “Seeing the process in action helps avoid common mistakes and gives confidence to try it out,” Todd suggests.
The video could also include tips for customizing the color intensity, fixing mistakes, and styling the wig post-dyeing. This resource would not only educate but also engage viewers, encouraging them to try out the technique themselves.
Exploring the depths of dyeing synthetic wigs with acrylic paint opens up a world of creativity and potential challenges. By understanding the long-term effects, comparing different methods, and learning from the experiences of others, individuals can make informed decisions about the best ways to achieve their desired results. With resources like video tutorials, even beginners can confidently embark on their wig dyeing journeys, ensuring their creations are both beautiful and lasting.
Leave your comment
Related posts