If you’ve just bought a lace front wig, you’re probably super excited to wear it and show off your new look. But before you get started, let’s talk about how to properly install and care for it. Whether you’re new to wigs or just looking to improve your technique, this guide is for you. I’ll share some personal tips, stories, and step-by-step instructions to help you make the most of your wig. So, let’s dive in and get your wig looking fabulous!
Part 1: Prepping Your Hair and the Lace Front
Step 1: Thread the Needle
First, you need to thread a large C-shaped needle with cotton thread that matches your wig. Trust me, matching the thread color to your wig is crucial for a seamless look. Slip the end of the thread through the eye of the needle and pull it until you have a double strand about three feet long. Knot the end of the thread and cut the string below the knot to free it from the spool.
Personal Tip: When I first started, I didn’t pay much attention to the thread color. Big mistake! The stitches were visible, and it looked so obvious. Now, I always make sure to match the thread perfectly.
Step 2: Braid Your Hair
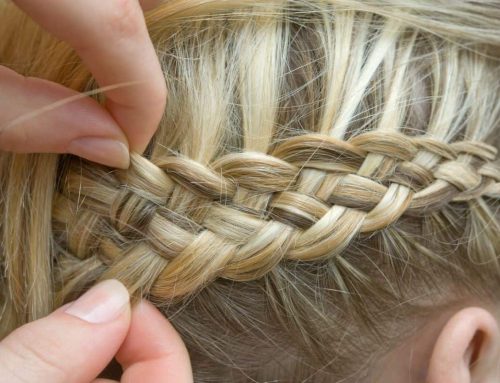
Next, braid your hair into cornrows to ensure it lays flat under your wig. Part your hair into small rows, about half an inch wide, and start braiding. Begin with a basic three-strand braid, then add a little more hair each time you cross the strands. Braid all the way to the end of your scalp and secure the ends either by pulling them into a ponytail or sewing them down.
Why This Matters: If your braids are too big or chunky, your wig won’t sit flat. But don’t braid too tightly, as this can cause discomfort or even hair loss. I learned this the hard way when my scalp was sore for days!
Step 3: Cut the Lace Frontal
If you’re using a lace frontal, measure along your hairline from ear to ear and subtract an inch to account for the lace’s stretch. Use scissors to cut the lace frontal to the correct length. For example, if your hairline measures 12 inches, cut the lace to be 11 inches long.
Pro Tip: Always double-check your measurements before cutting. Once I cut a lace frontal too short, and it didn’t cover my hairline properly. Better safe than sorry!
Step 4: Put on a Mesh or Stocking Cap
You might find that wearing a mesh or stocking cap helps reduce itching and keeps your wig in place. However, it’s fine to skip this step if you prefer. If you do wear a cap, you can sew it down with a few stitches near your temples, crown, and the base of your neck to secure it.
Comfort Tip: I usually sew my cap down because it makes the wig feel more secure and reduces itching, which can be a real lifesaver during long days.
Part 2: Placing and Sewing the Lace Front
Step 1: Position the Wig
Place the wig on your head with the hairline exactly where you want it. Use your fingers to slide the wig into place, aligning the hairline of the wig with your natural hairline. This positioning is crucial, as it’ll be hard to adjust once it’s sewn down.
Quick Story: The first time I installed my wig, I didn’t pay attention to the placement. It ended up too far back, and it looked really odd. Now, I always make sure it’s perfectly aligned before sewing.
Step 2: Stitch the Wig Near Your Ear
Hold the hairline of the wig in place and use your curved needle to make small, neat stitches along the braid closest to your ear. Push the needle through the lace and into the braid, following the natural curve of the needle. Continue stitching along the braid, knotting the thread behind your ear and cutting the excess thread.
Personal Experience: The first few times, my stitches were all over the place. With practice, I’ve gotten better at making them neat and secure.
Step 3: Sew from Ear to Ear
If you’re using a full lace-front wig, part your hair from ear to ear and make 3-4 small stitches in each braid along this part. This will help secure the wig and keep it from shifting.
Pro Tip: Hold the wig tightly while sewing to prevent it from sliding back. A secure wig is a confident wig!
Step 4: Stitch Above the Other Ear
Pull the lace-front down on the opposite side and stitch along the braid above your other ear. Make sure it’s tight enough to be secure but not uncomfortable. Knot the thread just behind your ear when you’re done.
Final Check: After sewing, I always wiggle the wig to ensure it’s secure. If it moves, I add more stitches.
Step 5: Add Extra Stitches if Needed
If the wig doesn’t feel secure, add a row of stitches from front to back. Part your hair where you wouldn’t normally part it and add stitches through each braid. This extra row provides additional security.
Extra Security: I’ve found that adding this row makes a huge difference in how stable the wig feels, especially during windy days!
Part 3: Finishing the Look
Step 1: Install Sew-In Tracks
If you’re wearing a frontal, you’ll need to add extensions or tracks to complete the look. Place a weft of hair along the base of your neck and sew it down to the braids. Continue sewing rows of tracks, spacing them about a quarter to half an inch apart, until you reach the back edge of the frontal.
Layering Tip: This method gives a thicker, more natural look than using a full wig. It’s my go-to for special occasions!
Step 2: Trim Any Visible Lace
After sewing the wig, trim any visible lace around your hairline with nail scissors. Be careful not to cut into the actual wig, only the excess lace.
Careful Cutting: I learned to take my time with this step. Rushing can lead to cutting too much and ruining the wig.
Step 3: Apply Glue Gel
To keep the lace flat against your forehead, apply glue gel along the hairline of the wig. Press the lace into the gel to secure it. This prevents the lace from lifting and gives a seamless look.
Favorite Product: I use Got2b glue gel, but any good quality glue gel will work. It’s a game-changer for keeping the wig in place.
Step 4: Use Edge Control for Baby Hairs
If you like the look of baby hairs, apply edge control to smooth down the fine hairs around your hairline. Use your fingertips to style the hairs naturally or create stylish swoops.
Styling Tip: Edge control gives a polished finish. It’s a small detail that makes a big difference in the overall look.
My Wig Journey: Personal Stories and Tips
When I first started wearing wigs, I was clueless about how to install and care for them. My initial attempts were messy, and my wigs didn’t last long. Over time, with practice and a lot of YouTube tutorials, I got better. Now, installing and styling my wig is like second nature. It’s not just about looking good; it’s about feeling confident and comfortable.
Emotional Connection
For me, wearing a wig is more than just a fashion statement. It boosts my confidence, especially on bad hair days or when I’m going through hair loss. Knowing how to properly install and care for my wig has made a huge difference in my self-esteem. I love experimenting with different styles and colors, and a well-installed wig makes all the difference.
Sharing the Knowledge
One of the best parts of learning these skills is sharing them with others. I’ve helped friends and family improve their wig techniques, and it’s amazing to see the positive impact it has on their confidence. It’s a small thing, but it can make such a big difference.
Conclusion
Installing and caring for a lace front wig might seem daunting at first, but with a little practice, you’ll become a pro. Remember to be patient, take your time, and follow these steps to ensure your wig looks natural and stays secure. Whether you’re getting ready for a special event or just want to switch up your look, a properly installed lace front wig can make you feel fabulous. So, go ahead, give it a try, and enjoy your beautiful, confident new look!


