How to Make Your Own Wig: A Fun DIY Guide
Introduction: Why DIY Your Wig?
Hey! Ever wandered through a wig store and thought, “None of these are exactly what I want”? Or maybe you’ve just got a creative itch you need to scratch. Making your own wig can be super rewarding. It’s not just about saving some bucks; it’s about crafting something that’s all you, from the style to the fit. Whether you’re gearing up for a special occasion, want a fresh look, or need a protective style for your natural hair, making a wig can be a cool project. Let’s jump into how you can whip up a wig that’s totally tailored to your taste!
What You’ll Need to Start
- Synthetic vs. Human Hair: Synthetic hair is cheaper and can look really good, but you can’t style it with heat like human hair. Human hair costs more, but you can curl, straighten, and style it just like your own hair.
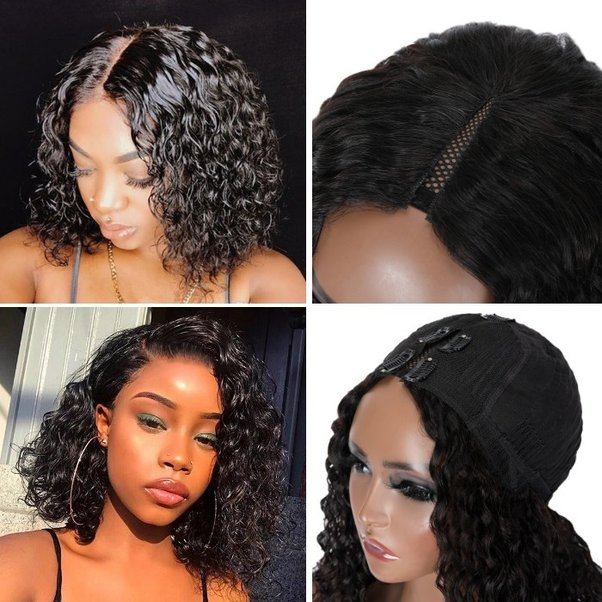
- Types of Wig Caps: There are a few types like lace front, full lace, and monofilament. Each type offers different levels of natural looks and comfort. Lace fronts are great for beginners because they’re pretty forgiving and look really natural around the hairline.
Gathering Your Supplies Here’s what you’ll need to gather:
- A wig cap that fits your head
- Hair wefts or bundles – these can be synthetic or human
- A needle and strong thread for sewing
- A wig head to work on
- Optional: Hair glue if you prefer gluing instead of sewing
- Scissors, combs, and other styling tools
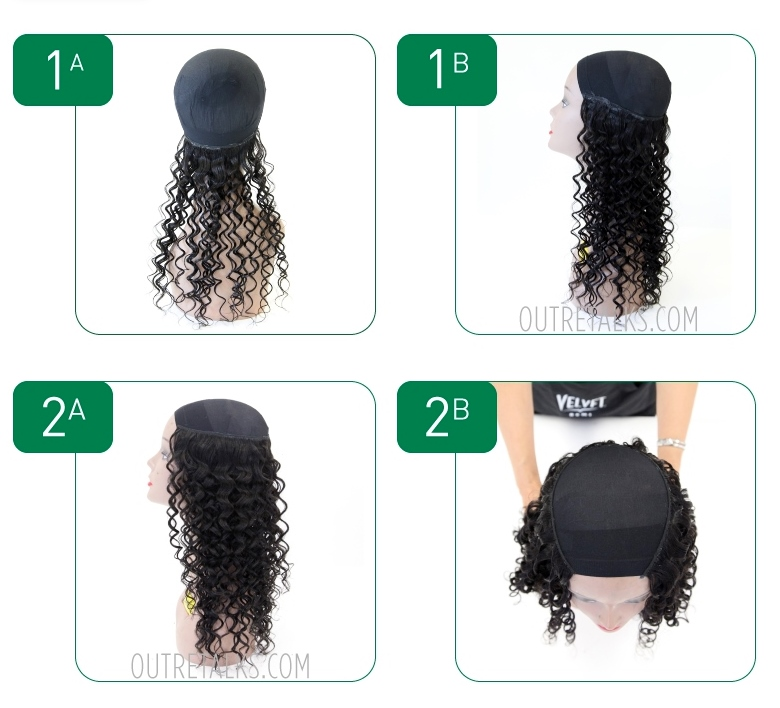
 Choosing the Right Cap Pick a wig cap that feels snug but comfy on your head. Lace front caps are good for starters because they help make the hairline look real.
Setting Up Fix your wig cap onto a wig head and secure it with pins. This helps you see exactly how your wig will shape up as you add the hair.
 Let’s Get Sewing:
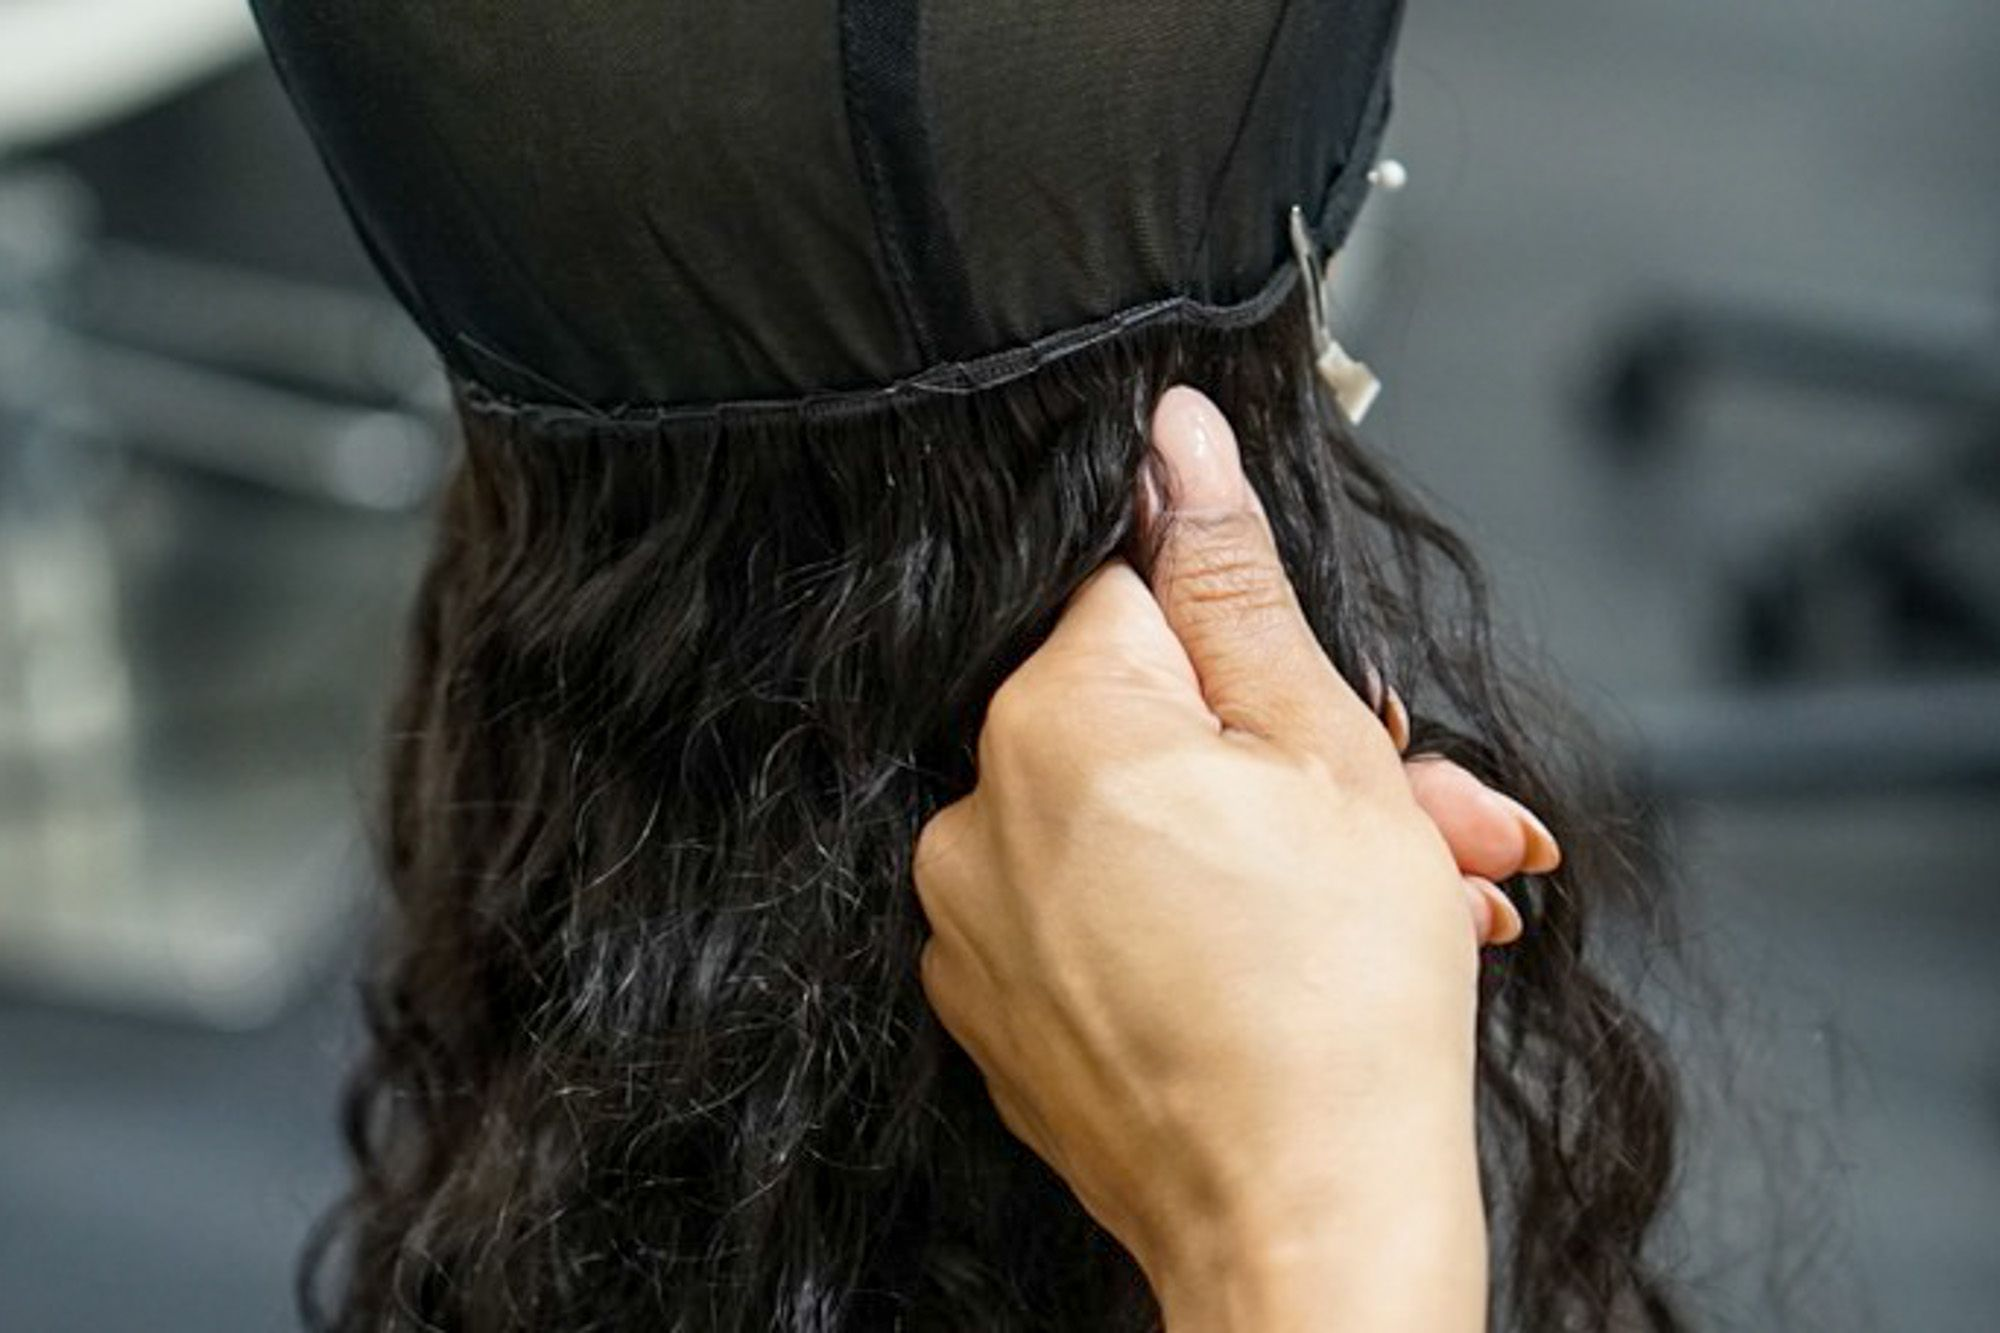
- Measure and Cut: Hold your hair weft up to the wig cap and cut pieces that will fit from one ear to the other.
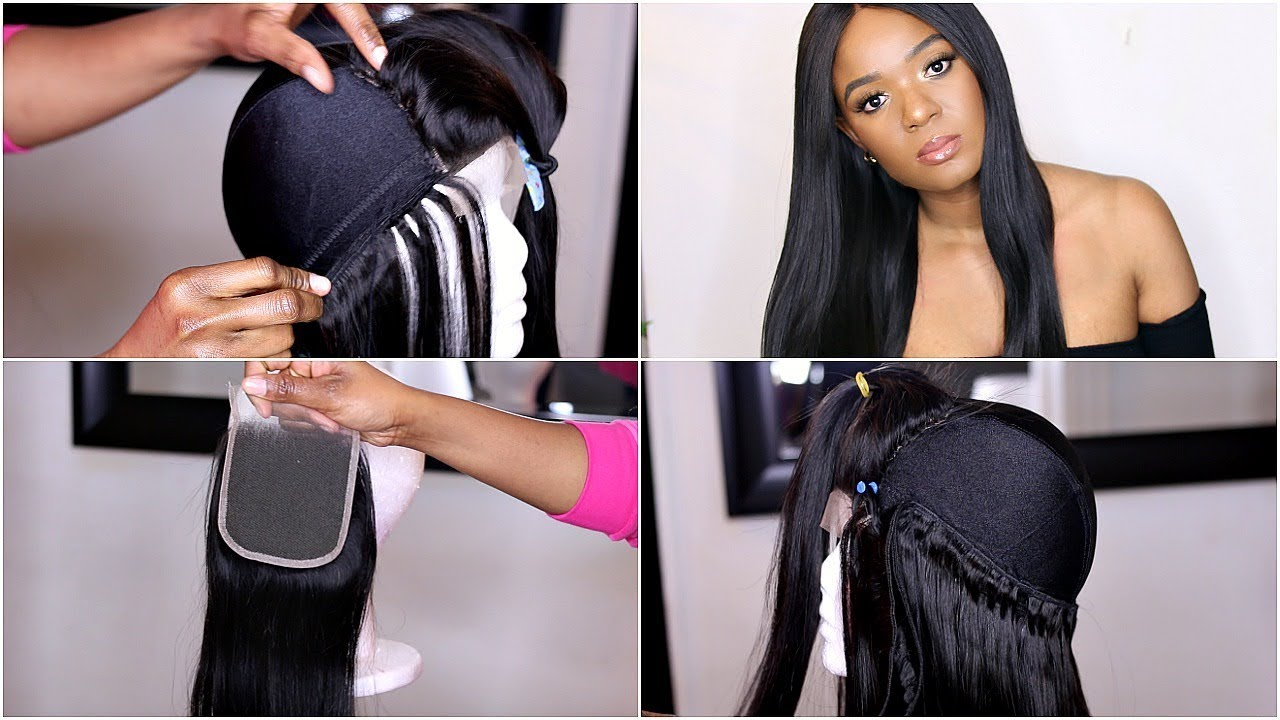
- Sewing Time: Start at the lower back of the cap and sew the wefts from the bottom up towards the crown. Keep your stitches tight and neat for the best hold.
Or Maybe You’re Gluing: Just spread a thin layer of wig glue along the weft and press it firmly onto the cap, starting from the bottom and working your way up. Gluing can be faster, but sewn wigs often last longer.
Step 3: Styling and Customizing
Making It Look Real If your cap is a lace front, you can pluck some hairs along the front to make your hairline look more natural. Just be gentle!
Time to Style Once all the hair is securely in place, style your wig however you like. If it’s human hair, feel free to cut, dye, or heat-style it. If you’re using synthetic hair, be careful with heat and stick to lower temperatures.
 Keep It Tight Make sure your stitches or glue are strong enough to hold everything together. Loose wefts can make your wig fall apart way too soon.
Watch That Hairline Spend some extra time on the hairline if it’s visible. A natural-looking hairline can really make or break your wig’s look.
Wrapping Up: Own Your New Creation!
Making your own wig is a fantastic way to express yourself and get exactly what you want out of a wig. It’s about getting creative and having fun with your style.
Ready to try it out? Grab your materials and get started! Remember, each step is a chance to learn more about making something awesome that’s just for you. Dive in, be patient, and enjoy the process of bringing your custom wig to life!
Leave your comment
Related posts