How to Create Wavy Hair with Braids: Your Ultimate Guide to Effortless Waves
Hey there, wave chaser! If you’ve ever dreamed of having those perfect, beachy waves without frying your hair with a curling iron, you’re in the right place. Braiding your hair to create waves is a classic, heat-free trick that’s been around forever—but there’s so much more to it than just twisting your hair and hoping for the best. In this guide, we’re diving deep into how to create wavy hair with braids, spilling secrets most people don’t talk about, and giving you practical, step-by-step tips to get that wavy look you’ll totally love. Whether your hair is stick-straight, a little curly, or somewhere in between, we’ve got you covered with advice that’s fresh, fun, and super doable.
Let’s unlock the magic of braids together—think of it as your hair’s little overnight adventure! From hidden hacks to the latest science on hair texture, this is your go-to resource for waves that turn heads.
Why Braids Are the Secret to Perfect Waves
Braids aren’t just cute hairstyles your mom did when you were a kid—they’re a legit way to shape your hair into waves without heat or fancy tools. The idea is simple: when you braid your hair, you’re molding it into a pattern. Leave it in long enough (usually overnight), and when you take it out—bam!—you’ve got waves. But here’s the cool part: braids work for almost every hair type, and they’re way gentler than blasting your strands with a 400-degree curling wand.
How Does It Work?
When you braid your hair, you’re bending it into little zigzag shapes. The longer it stays like that, the more your hair “remembers” the pattern. Wet hair works even better because it dries into the shape you set. Think of it like setting dough into a mold—it holds the form once it’s done “baking” (or drying, in this case!).
The Science Behind It
Hair is made of a protein called keratin, and its shape depends on tiny bonds inside each strand. Heat tools break and reset those bonds, but braiding uses a gentler method: it physically holds your hair in place while it dries, letting it take on a new shape without damage. A 2022 study from the Journal of Cosmetic Science found that air-drying in structured styles (like braids) can create temporary waves with zero breakage—pretty awesome, right?
Why You’ll Love It
- ✔️ No heat damage—your hair stays healthy and happy.
- ✔️ It’s free—zero tools needed beyond your hands and maybe a hair tie.
- ✔️ You can sleep on it—wake up with waves like it’s no big deal.
- ❌ Downside? It takes time, so patience is key!
What You’ll Need Before You Start
Before we jump into braiding, let’s get your toolkit ready. You don’t need much, but a few things can make a huge difference in how your waves turn out.
Must-Haves
- Hair ties: Small, soft ones that won’t leave dents (scrunchies are a fan fave).
- Comb or brush: To smooth out tangles—trust me, knots are the enemy of good waves.
- Water spray bottle: Damp hair holds waves better than dry hair.
- Light mousse or leave-in conditioner: For extra hold and softness (optional, but so worth it).
Optional Extras
- Hair clips: To section your hair if it’s thick or long.
- Silk scarf or pillowcase: Keeps frizz away while you sleep.
- Sea salt spray: For that “I just left the beach” vibe after unbraiding.
Pro Tip: The Wetness Factor
Lots of folks don’t realize how much water changes the game. Damp hair sets waves deeper than dry hair because it dries into the braid’s shape. But don’t soak it—too wet, and it won’t dry by morning. Aim for a light mist, like your hair after a quick spritz on a humid day.
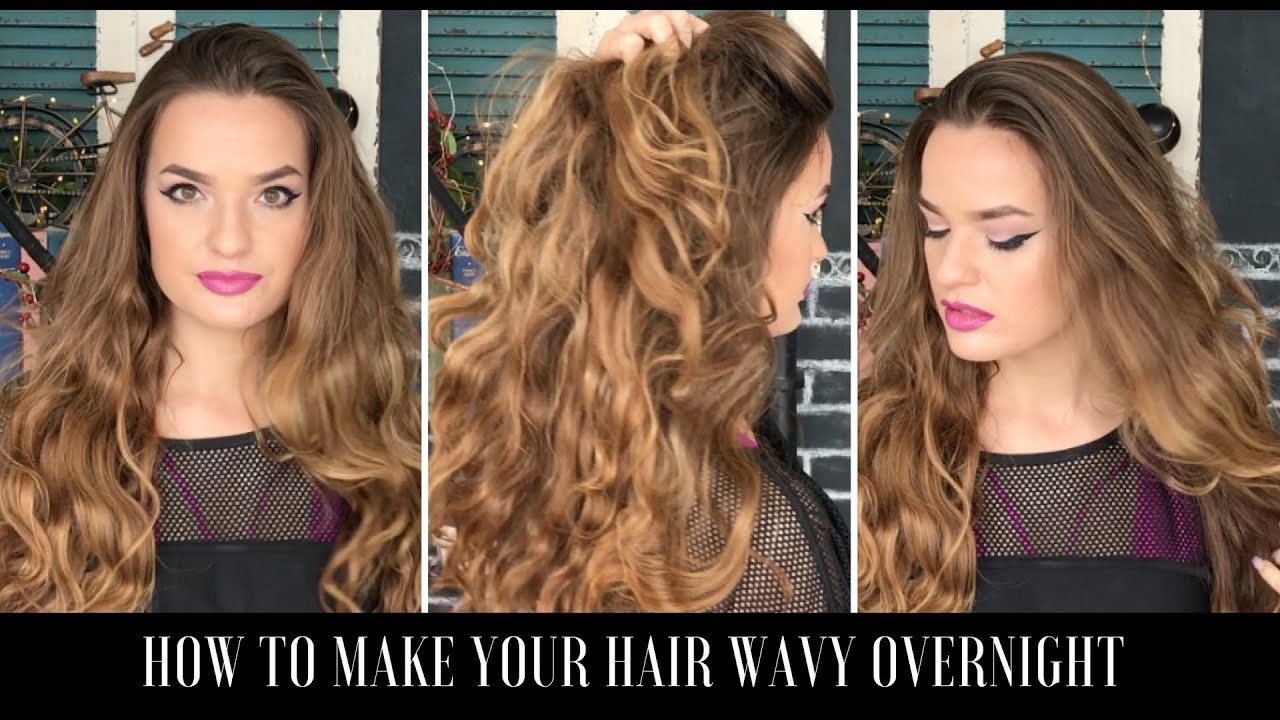
Step-by-Step: How to Braid for Wavy Hair
Ready to braid? Here’s the basic how-to, broken down so anyone can nail it. We’ll start simple, then level up with tricks later.
Step 1: Prep Your Hair
- Wash or dampen your hair with a spray bottle. Freshly washed hair is ideal—it’s clean and moldable.
- Run a comb through to get rid of tangles. Smooth hair = smooth waves.
- Optional: Add a dime-sized blob of mousse or leave-in conditioner. Work it through with your fingers for even coverage.
Step 2: Section It Out
- Split your hair into 2-4 sections, depending on how thick it is. More sections = tighter waves; fewer = looser ones.
- Clip up the sections you’re not working on to keep things neat.
Step 3: Braid Like a Boss
- Take one section and split it into three equal pieces.
- Cross the right piece over the middle, then the left over the new middle. Keep going until you reach the ends.
- Secure with a hair tie, but don’t pull too tight—you don’t want a crease.
Step 4: Sleep on It
- Let your braids sit for at least 6-8 hours. Overnight is perfect—your hair’s doing all the work while you dream!
- Pro tip: Wrap your head in a silk scarf to avoid frizz and keep braids in place.
Step 5: Unbraid and Style
- Gently undo each braid—don’t yank!
- Run your fingers through to separate the waves. Avoid brushing if you want them to stay defined.
- Spritz with sea salt spray or hairspray for hold, if you like.
Quick Recap Table
| Step | What to Do | Why It Matters |
|---|---|---|
| Prep | Dampen, detangle, add product | Sets the stage for great waves |
| Section | Divide into 2-4 parts | Controls wave size |
| Braid | Cross strands evenly | Creates the wave pattern |
| Wait | Leave in 6-8 hours | Lets hair set into shape |
| Unbraid | Finger-comb, add spray | Finishes the look |
Level Up Your Waves: Insider Tricks Most People Miss
Okay, so you’ve got the basics down. Now let’s get into the juicy stuff—secrets that take your waves from “meh” to “whoa!” These are the little tweaks that hairstylists and wavy-hair obsessives (like me!) swear by.
Trick 1: The Double Braid Hack
Instead of one big braid per section, do two smaller ones stacked on top of each other. This creates tighter, more defined waves that look like you spent hours on them. Perfect for shorter hair that doesn’t hold waves as well.
Trick 2: Twist the Ends
Before you tie off your braid, give the last inch or two a little twist. It stops the ends from looking flat or straight, blending them into the waves. It’s a tiny move with a big payoff.
Trick 3: Sleep Position Matters
Ever wake up with one side of your waves crushed? Yeah, me too. Try sleeping on your back or propping your head so the braids aren’t squished. A silk pillowcase helps them slide around less, too.
Trick 4: The Dry Shampoo Boost
If your hair’s oily or flat the next day, hit the roots with dry shampoo before unbraiding. It adds volume and texture, making your waves pop. Bonus: it soaks up any leftover dampness.
What Fans Want to Know
Here’s a fun fact: I’ve been obsessed with braids since I was 12, when I’d sneak into my sister’s room to borrow her scrunchies. Turns out, a lot of wavy-hair lovers are secretly into the “process”—it’s like a mini spa night for your hair! What’s your fave part of braiding?
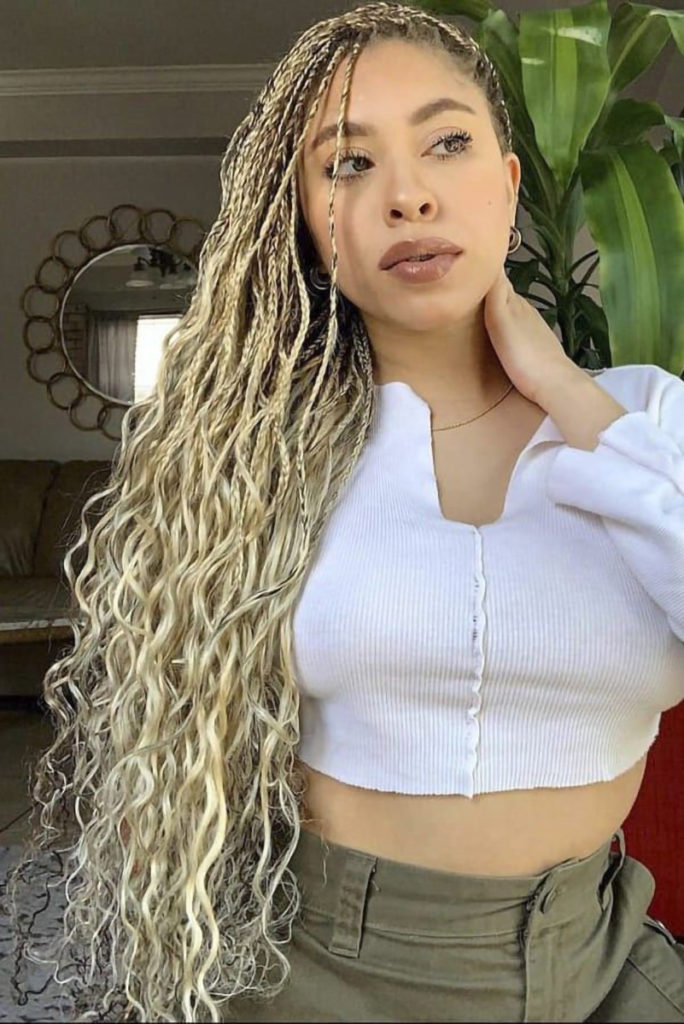
Braid Styles for Every Wave Vibe
Not all braids give you the same waves. Want loose, flowy ones? Tight, crimpy ones? The braid you pick changes everything. Let’s break it down.
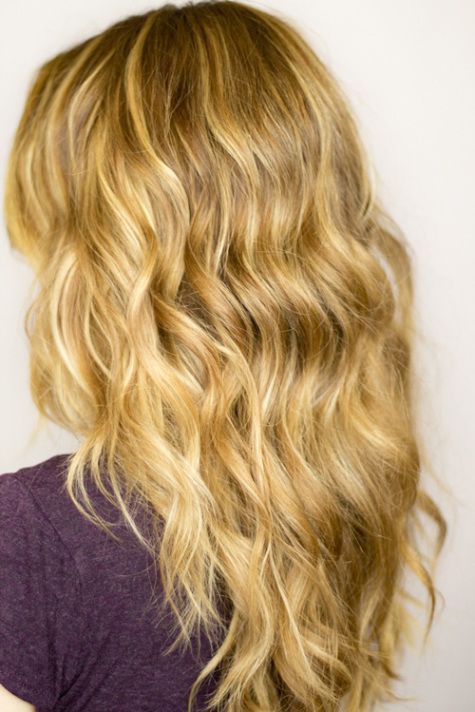
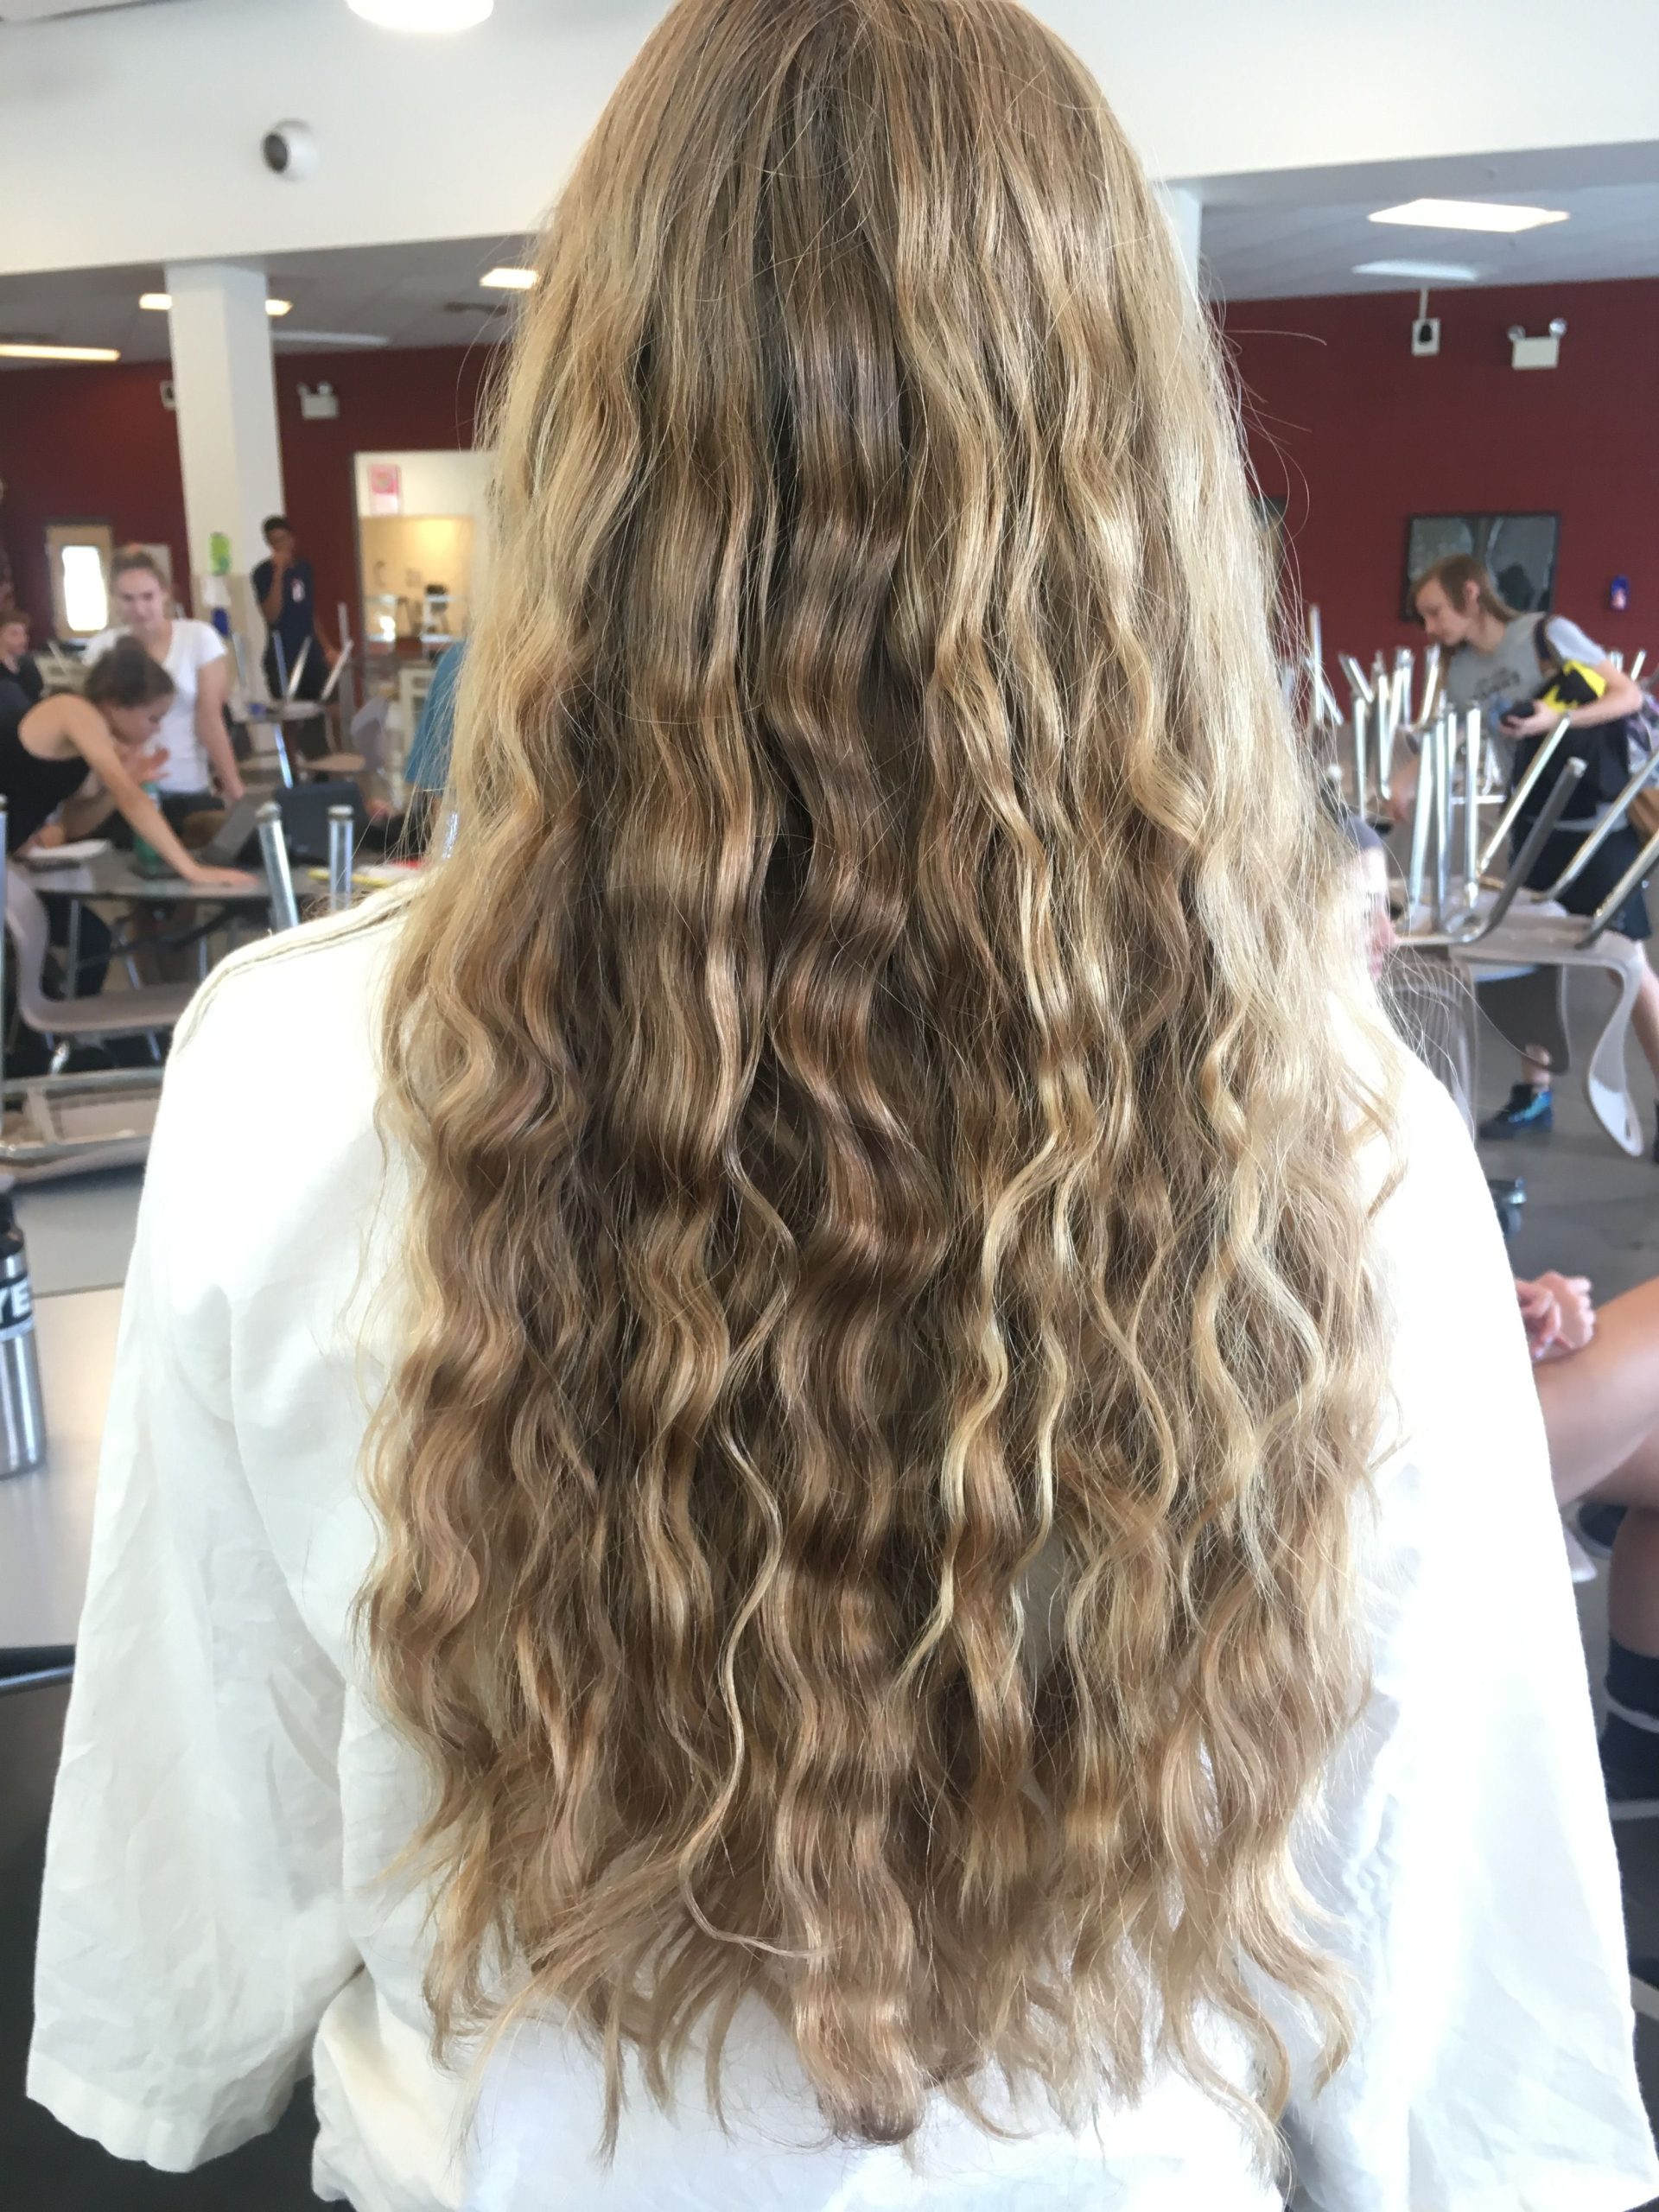
Classic Three-Strand Braid
- Wave Type: Medium, even waves—think classic beach hair.
- How To: Split into three, braid as usual.
- Best For: Most hair lengths and types.
French Braid
- Wave Type: Tight, defined waves that start at the scalp.
- How To: Start at the top, adding hair as you go down.
- Best For: Long hair or bold looks.
Dutch Braid (Inside-Out French)
- Wave Type: Chunky, textured waves with extra volume.
- How To: Cross strands under instead of over.
- Best For: Thick hair that needs control.
Rope Braid
- Wave Type: Soft, twisty waves—less zigzag, more spiral.
- How To: Split into two, twist each section, then twist them together.
- Best For: Short hair or a subtle vibe.
Braid Size Guide
- Small braids (1-2 inches wide): Tight, crimpy waves.
- Medium braids (3-4 inches): Classic beach waves.
- Big braids (5+ inches): Loose, barely-there waves.
Mix It Up!
Try a combo—like one French braid in the front and three-strand in the back. It’s a sneaky way to get variety without much effort.
Hair Type Hacks: Make It Work for You
Not everyone’s hair plays nice with braids. Straight hair might slip out of waves fast, while curly hair might turn into a frizzy mess. Here’s how to tweak the method for your hair type.
Straight Hair
- Challenge: Waves fade quick.
- Fix: Use damp hair and a light mousse. Sleep with braids for a full 8 hours.
- Science Bit: Straight hair has round follicles, so it resists bending. Wetness helps it “stick” to the braid shape longer.
Wavy Hair
- Challenge: Can get too wild or uneven.
- Fix: Stick to bigger braids and smooth with leave-in conditioner first.
- Pro Tip: You’re already halfway there—braids just enhance what you’ve got!
Curly Hair
- Challenge: Frizz or tight coils instead of waves.
- Fix: Use wider braids and a silk scarf to lock in moisture.
- Expert Quote: “Curly hair loves braids, but control the frizz with hydration,” says hairstylist Mia Carter, who’s worked with curly celebs for years.
Thick Hair
- Challenge: Takes forever to dry.
- Fix: Mist lightly (not soak) and split into more sections—think 6-8 braids.
Thin Hair
- Challenge: Waves look flat.
- Fix: Add dry shampoo or texture spray post-braid for a boost.
Timing Is Everything: How Long to Braid
How long you leave your braids in decides how wavy your hair gets. Here’s the scoop.
Short Game (2-4 Hours)
- Result: Super soft, barely-there waves.
- Best For: A quick style or thin hair that sets fast.
- Tip: Use damp hair to speed things up.
Overnight (6-8 Hours)
- Result: Perfect, defined waves that last all day.
- Best For: Most people—this is the sweet spot!
- Tip: Sleep with a scarf to keep them intact.
Long Haul (12+ Hours)
- Result: Deep, crimpy waves that hold for days.
- Best For: Thick or straight hair that needs extra time.
- Tip: Refresh with a spritz of water if they start to loosen.
Real-Life Test
I tried braiding my straight-ish hair for 4 hours once—waves lasted maybe an hour. Overnight? They stuck around till lunchtime. Timing’s a game-changer!
Fixing Common Wave Fails
Even the best braiders mess up sometimes. Here’s how to fix the oops moments.
Problem: Flat Ends
- Why: You didn’t braid all the way down.
- Fix: Next time, braid to the very tips and twist the ends. For now, curl them lightly with your fingers and a dab of mousse.
Problem: Frizz City
- Why: Hair dried weird or rubbed on cotton.
- Fix: Smooth with a tiny bit of argan oil and sleep on silk next time.
Problem: Uneven Waves
- Why: Braids were different sizes.
- Fix: Keep sections even—use a mirror or a friend to check. Finger-comb to blend for now.
Problem: No Waves at All
- Why: Hair was too dry or braids were too loose.
- Fix: Dampen more next time and braid tighter. Retry with mousse for grip.
Boosting Your Waves: Products and Tools
You don’t need products, but they can take your waves to the next level. Here’s what works.
Before Braiding
- Leave-In Conditioner: Keeps hair soft and manageable. Try one with coconut oil for shine.
- Mousse: Adds hold without crunch. A golf-ball size is plenty.
After Unbraiding
- Sea Salt Spray: Mimics ocean texture. Spritz lightly—too much feels sticky.
- Dry Shampoo: Lifts roots and adds grit. Spray 6 inches away from your head.
- Hairspray: Locks waves in. Go light for a natural feel.
Tool Bonus
A wide-tooth comb can fluff waves without killing them—better than a brush, which flattens everything.
The Latest Wave Research: What’s New in 2025
Hair science isn’t standing still, and neither should your braiding game. Here’s what’s fresh from the labs.
Humidity Helps
A 2024 study in Hair Research Quarterly found that braiding in humid conditions (like after a shower) boosts wave retention by 20%. The moisture helps hair bonds settle into the braid shape.
Protein Power
New products with keratin peptides are popping up. They reinforce hair’s structure, making waves last longer. Look for “protein-infused” on labels.
Expert Insight
“Braiding’s making a comeback because it’s sustainable and damage-free,” says Dr. Lena Hayes, a trichologist studying hair trends. “The trick is consistency—same braid size, same timing.”
Wave Maintenance: Keep Them Fresh
Waves don’t last forever, but you can stretch their lifespan with these hacks.
Day 1
- Finger-comb and spritz with sea salt spray. Done!
Day 2
- Dry shampoo at the roots, twist loose sections into mini buns for a few hours, then undo for a refresh.
Day 3
- Braid it back up at night with a light mist. Wake up to revived waves.
Fan Confession
I’m a lazy hair person—Day 2 waves are my vibe. What’s your go-to for keeping them alive?
Wavy Hair Inspo: Styles to Try
Once you’ve got waves, play with them! Here are ideas to rock your new look.
Half-Up Twist
- Pull the top half into a mini bun or clip. Shows off waves and keeps hair out of your face.
Side Part Drama
- Flip your part to one side—waves look fuller and fancier instantly.
Low Pony with Waves
- Gather into a loose ponytail, letting waves spill out the bottom. Chill yet chic.
Your Questions Answered
Got Qs? I’ve got As—based on what wavy-hair fans ask most.
“How do I stop my waves from falling out?”
Damp hair + mousse + overnight timing. Straight hair needs all three to hold.
“Can I braid dry hair?”
Yep, but waves will be softer and fade faster. Damp is the gold standard.
“What if my hair’s super short?”
Go for tiny braids or rope twists—shoulder-length or shorter works fine!
Leave your comment
Related posts