How to Braid with Extensions: Your Ultimate Guide to Stunning, Long-Lasting Styles
Hey there, braid lovers! If you’ve ever dreamed of rocking long, thick, jaw-dropping braids but your natural hair just isn’t quite there yet, you’re in the right place. Braiding with extensions is like giving your hair a superpower—adding length, volume, and style in one go. Whether you’re a beginner or someone who’s tried it before but wants to level up, this guide is packed with everything you need to know. We’re diving deep into the secrets of braiding with extensions, from picking the perfect hair to mastering techniques that even your friends won’t believe you pulled off at home. Let’s get started!
Why Braiding with Extensions is a Game-Changer
Braiding with extensions isn’t just about looking good (though trust me, you will). It’s a way to protect your natural hair, experiment with fun looks, and save time on daily styling. Imagine waking up with perfect hair every day for weeks—sounds like magic, right? Extensions make it happen. Plus, they let you play with colors, lengths, and textures you’d never get otherwise. Want purple box braids or waist-length cornrows? You got it.
But here’s something most people don’t talk about: braiding with extensions can be a confidence boost. It’s not just hair—it’s a vibe. A little-known fact? Tons of celebs (think Beyoncé with her iconic lemonade braids) use extensions to keep their natural hair healthy while slaying on stage. You can too!
Choosing the Right Extensions: Human vs. Synthetic
Before you even touch a braid, you need the right extensions. This is where a lot of folks trip up, so let’s break it down.
Human Hair Extensions: The Luxe Choice
Human hair extensions, like virgin Indian Remy or Brazilian bulk hair, feel just like your own locks. They’re lightweight, blend seamlessly, and last longer than synthetic options—sometimes up to a year with care! Fun fact: stylists say coarser textures (like kinky-curly) grip better for braids, making them easier to work with.
- Pros: Natural look, heat-stylable, durable.
- Cons: Pricier (think $50-$150 per bundle), needs washing before use.
Synthetic Hair Extensions: Budget-Friendly and Bold
Synthetic hair, like Kanekalon or Marley hair, is perfect if you’re on a budget or want wild colors (hello, neon green!). They’re super common for box braids and crochet styles. But here’s a secret: some synthetic hair contains flame retardants that could irritate sensitive scalps—something not everyone knows.
- Pros: Affordable ($5-$15 per pack), pre-styled options.
- Cons: Can’t handle heat, shorter lifespan (4-8 weeks).
Quick Tip: Match Your Goal
- Want micro braids that last months? Go human.
- Testing a funky festival look? Synthetic’s your vibe.
Prepping Your Hair: The Step Most People Skip
Here’s where a lot of tutorials fall short—they don’t stress how crucial prep is. Your natural hair is the foundation, and extensions won’t work miracles if it’s a mess.
Wash and Condition Like a Pro
Start with clean, hydrated hair. Use a sulfate-free shampoo and a deep conditioner—your hair will be tucked away for weeks, so it needs that extra love. Fun twist: some braiders swear by adding a teaspoon of coconut oil to their conditioner for a moisture boost.
- ✔️ Do: Rinse thoroughly to avoid buildup.
- ❌ Don’t: Skip conditioner—dry hair breaks under tension.
Detangle with Patience
Grab a wide-tooth comb and gently work through knots. Wet hair with a leave-in spray makes this easier. Insider tip: detangling in front of a Netflix binge makes it feel less like a chore!
Dry It Right
Air-dry or use a blow dryer with a heat protectant. Damp hair can lead to mildew in braids (yikes!). A stylist once told me, “Wet hair in braids is like leaving wet clothes in a gym bag—smelly disaster.”
Tools You’ll Need: Your Braid Kit Essentials
You don’t need a fancy salon setup, but having the right tools makes a huge difference. Here’s your must-have list:
- Wide-tooth comb: For detangling and parting.
- Rat-tail comb: Perfect for precise sections.
- Hair clips: Keep sections separate.
- Extensions: 3-6 packs, depending on style.
- Edge control gel: Tames flyaways.
- Elastic bands: Secure ends (clear ones look cleaner).
- Spray bottle: With water or oil mix for grip.
Pro tip: Keep a small mirror handy to check the back—trust me, it’s a lifesaver.
Step-by-Step: How to Braid with Extensions
Ready to braid? Let’s walk through it like we’re besties doing hair on a Saturday night. We’ll cover box braids here, but the basics apply to cornrows, twists, and more.
Step 1: Section Your Hair
Part your hair into 3-4 big sections (forehead to nape, ear to ear) with clips. Then, take one section and make smaller parts—¼ inch for micro braids, 1 inch for chunkier ones. Smaller sections = more braids, so plan your time!
- Hack: Use a zigzag part for a cool pattern under your braids.
Step 2: Prep the Extension Hair
Take your extension pack and split it into bundles about the size of your natural section. Fold it in half like a candy cane—short end about 3 inches, long end matching your desired length. This is key for blending.
- ✔️ Do: Comb extensions smooth.
- ❌ Don’t: Grab too much—bulky braids look uneven.
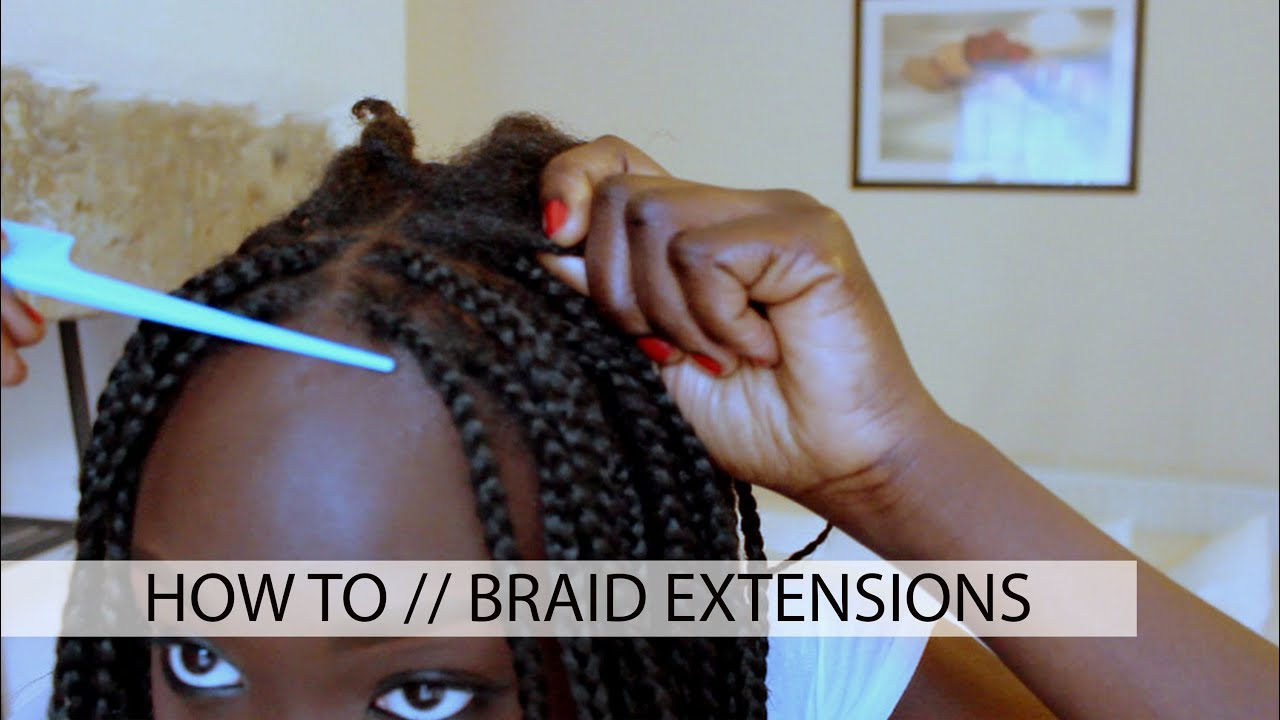
Step 3: Attach the Extension
Hold a natural section in one hand. Loop the folded extension around it so the short end and long end hang on either side. You’ll have three strands now: natural hair, short extension, long extension.
Step 4: Start Braiding
Braid tight at the scalp for the first few stitches to secure it—cross the natural hair over the middle, then the extension pieces. After an inch, loosen up a bit to avoid tension. Keep going until you hit the end.
- Secret: Spritz with water if it’s slipping—wet hair grips better.
Step 5: Seal the Ends
For human hair, dip in hot water (careful!) or use a flat iron on low. For synthetic, a quick dip or tiny elastic works. Trim any strays for a polished look.
Top Braid Styles to Try with Extensions
Not sure what vibe to go for? Here are some fan-favorite styles with extension twists—and why people love them.
Box Braids: The Classic
- Why: Versatile, low-maintenance, protective.
- Extension Tip: Use human hair for a sleek finish or synthetic for bold colors.
- Fan Fact: TikTok braiders say jumbo box braids cut install time in half!
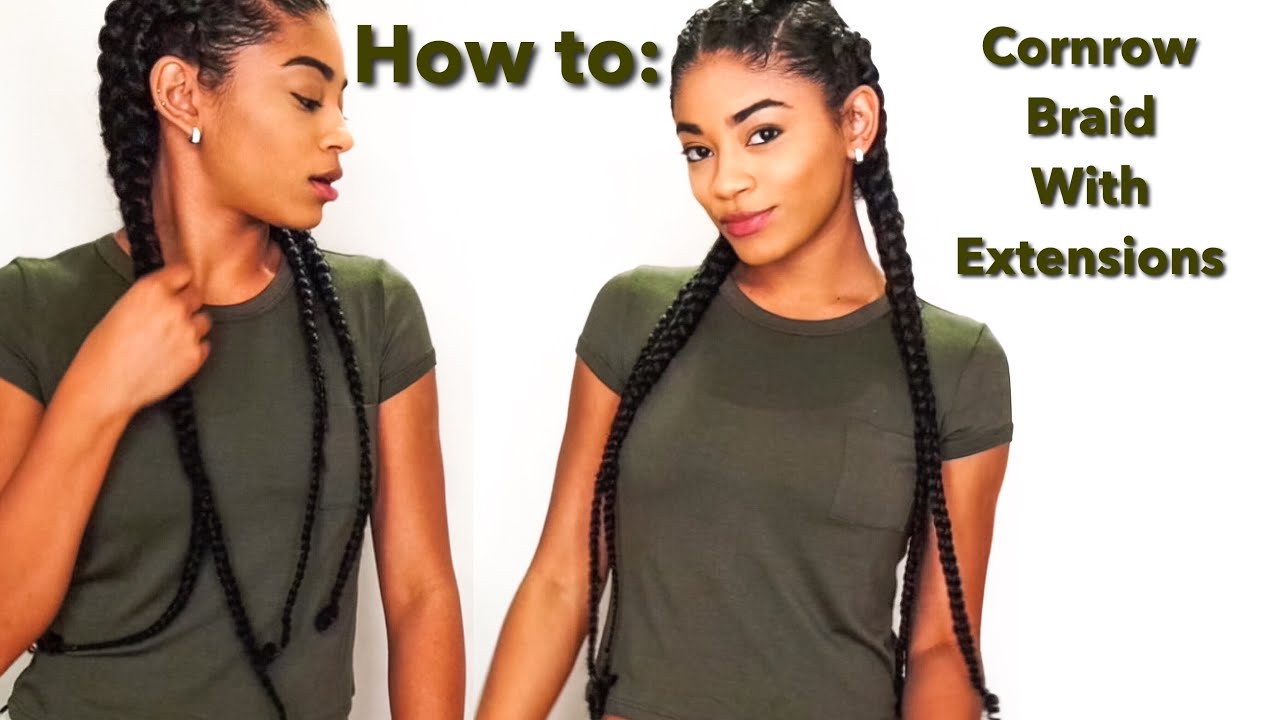
Cornrows: Sleek and Sporty
- Why: Tight to the scalp, great for active lifestyles.
- Extension Tip: Nano or I-tip extensions hide better here.
- Hidden Perk: Add beads for a playful clack-clack sound.
Fishtail Braids: Boho Chic
- Why: Looks complex but super easy with practice.
- Extension Tip: Clip-ins add volume without full commitment.
- Fun Twist: Hair rings make it festival-ready.
Common Mistakes to Avoid (And How to Fix Them)
Even pros mess up sometimes! Here’s what trips people up—and how to dodge it.
Mistake 1: Braiding Too Tight
- Problem: Hurts your scalp, causes breakage.
- Fix: Start snug, then ease up. If it pinches, redo it looser.
- Science Bit: A 2023 study found tight braids increase traction alopecia risk by 40%.
Mistake 2: Wrong Extension Amount
- Problem: Too much = heavy; too little = thin.
- Fix: Match extension thickness to your section size—test one braid first.
Mistake 3: Skipping Maintenance
- Problem: Itchy scalp, tangled mess.
- Fix: Wash every 2-3 weeks with diluted shampoo. Oil your scalp weekly.

Maintenance: Keep Your Braids Fresh for Weeks
Braids with extensions can last 4-12 weeks, but only if you treat them right. Here’s your care plan.
Washing 101
- Mix shampoo with water in a spray bottle.
- Spray scalp, massage gently, rinse with a damp cloth.
- Air-dry fully—damp braids breed bacteria.
Moisturizing Hacks
- Use lightweight oils (jojoba, argan) on your scalp.
- Avoid heavy creams—they clog up fast.
Nighttime Routine
- Wrap with a silk scarf or sleep on a satin pillowcase.
- Bonus: Loose waves when you take them out!
How Long Should You Keep Them In?
Here’s a question tons of people ask: how long is too long? Most braids last 4-8 weeks, but it depends.
| Style | Max Time | Why Remove? |
|---|---|---|
| Micro Braids | 8-12 weeks | New growth gets messy |
| Box Braids | 6-8 weeks | Weight stresses roots |
| Cornrows | 4-6 weeks | Scalp needs a breather |
- Sign to Remove: Itching, buildup, or loose roots.
- Expert Insight: “Six weeks is the sweet spot for most,” says braiding pro Amber Rose. “Past that, you’re risking damage.”
Insider Secrets from the Pros
Want to braid like a salon star? Here are tricks I’ve picked up from chatting with braiders and experimenting myself.
- Tension Trick: Hold strands at a 45-degree angle for even braids.
- Color Play: Mix two extension shades (like black and caramel) for depth.
- Time Saver: Pre-section extensions the night before—cuts hours off!
Busting Myths About Braiding with Extensions
There’s a lot of noise out there. Let’s clear it up.
Myth 1: Extensions Ruin Your Hair
- Truth: Done right, they protect it! A 2022 study showed protective styles reduce breakage by 25% when maintained.
Myth 2: You Can’t Wash Braids
- Truth: You should! Clean scalps stay healthy—just don’t overdo it.
Myth 3: It Takes Forever
- Truth: With practice, a full head takes 4-6 hours. Start small (like two braids) to build speed.
Fun Ways to Personalize Your Braids
Braids are your canvas—get creative! Here’s what fans are obsessed with:
- Beads and Cuffs: Add them mid-braid for a pop.
- Color Pops: Try ombre extensions (dark roots, bright tips).
- Mix Textures: Curly ends on straight braids = wow factor.
Troubleshooting: What If It Goes Wrong?
Panic mode? No need. Here’s your fix-it guide.
- Itchy Scalp: Dab witch hazel on a cotton pad—soothes fast.
- Loose Braid: Re-braid the top inch, secure with gel.
- Frizzy Ends: Trim and seal with hot water (synthetic) or oil (human).
The Emotional Side: Why Braids Matter
Braiding isn’t just a style—it’s a story. For many, it’s a cultural tie, a rite of passage, or a way to feel unstoppable. I’ve heard friends say braids make them feel like warriors. What’s your braid story? It’s deeper than hair—it’s you.
Latest Trends and Research (2025 Edition)
What’s hot right now? Knotless braids are taking over—they’re lighter and gentler on edges. Plus, a new study from the Journal of Cosmetic Science found knotless styles reduce scalp tension by 30% compared to traditional methods. Also, eco-friendly synthetic extensions (made without harsh chemicals) are popping up—keep an eye out!
Your Braid Journey: Tips for Beginners
Starting out? Don’t stress—here’s your roadmap.
- Practice First: Try a single braid on a ponytail.
- Watch and Learn: YouTube is gold—search “box braids with extensions.”
- Ask for Help: Rope in a friend for the back sections.
“Start small and build confidence,” says braider Ndeye Anta Niang. “It’s like riding a bike—wobbly at first, then smooth sailing.”
Taking Them Out: The Gentle Way
When it’s time to say goodbye, don’t yank! Here’s how:
- Step 1: Cut extensions below your natural hair.
- Step 2: Unravel gently from the bottom up.
- Step 3: Detangle with conditioner—tons of it.
Pro tip: Soak in a warm water and oil mix to loosen buildup.
Leave your comment
Related posts