How to Braid Hair for Crochet Braids: Your Ultimate Guide to a Flawless Style
Hey there, hair enthusiasts! If you’ve ever dreamed of rocking a stunning crochet braid hairstyle—those gorgeous, versatile looks that can take you from casual to glam in no time—you’re in the right place. Braiding your hair for crochet braids might sound simple, but there’s a whole world of tips, tricks, and insider secrets that can make or break your final look. Whether you’re a beginner or someone who’s tried it before and wants to level up, this guide is packed with everything you need to know. We’re talking step-by-step instructions, unexpected hacks, and even some fun facts that’ll make you the crochet braid expert among your friends. Ready to dive in? Let’s get braiding!
Why Braiding Matters for Crochet Braids
Before we jump into the “how-to,” let’s talk about why braiding your hair is such a big deal for crochet braids. Crochet braids are a protective style where extensions are looped into your natural hair using a crochet hook. The foundation? Cornrows or similar braids that act like an anchor for those extensions. Get the braiding part right, and your style will last longer, look neater, and feel more comfortable. Mess it up, and you might end up with a lumpy, uneven look—or worse, damage to your natural hair.
Here’s the kicker: the braiding pattern you choose isn’t just about function—it’s also about style. Want a sleek ponytail? A full, voluminous afro? The way you braid sets the stage. Plus, it’s a chance to flex your creativity (and maybe impress your friends with your skills). So, let’s break it down and make it fun!
What You’ll Need Before You Start
Preparation is key, fam! You don’t want to be halfway through braiding and realize you’re missing something. Here’s your must-have checklist:
- Comb: A wide-tooth comb for detangling and a rat-tail comb for parting—trust me, precision matters.
- Hair Clips: To section off your hair and keep things organized.
- Moisturizer: A leave-in conditioner or light oil (like coconut or jojoba) to keep your hair soft and manageable.
- Edge Control Gel: For those flyaways and a polished finish.
- Mirror: A handheld one works wonders for seeing the back of your head.
- Patience: This isn’t a race—good braids take time!
Pro Tip: Ever tried braiding with a playlist going? Pick some chill tunes or a podcast to keep you in the zone. I once braided my hair while listening to a true crime podcast—talk about multitasking!
Step-by-Step: How to Braid Hair for Crochet Braids
Ready to get hands-on? This section walks you through the braiding process, from prepping your hair to finishing those perfect cornrows. Let’s go!
Step 1: Wash and Condition Your Hair
Start with a clean slate. Dirty hair can get itchy under crochet braids, and buildup might make your braids slip. Use a sulfate-free shampoo to cleanse, then follow up with a hydrating conditioner. Why? Hydrated hair is easier to braid and less prone to breakage.
- ✔️ Do: Rinse thoroughly—leftover product can make your scalp flaky later.
- ❌ Don’t: Skip the conditioner; dry hair tangles like crazy.
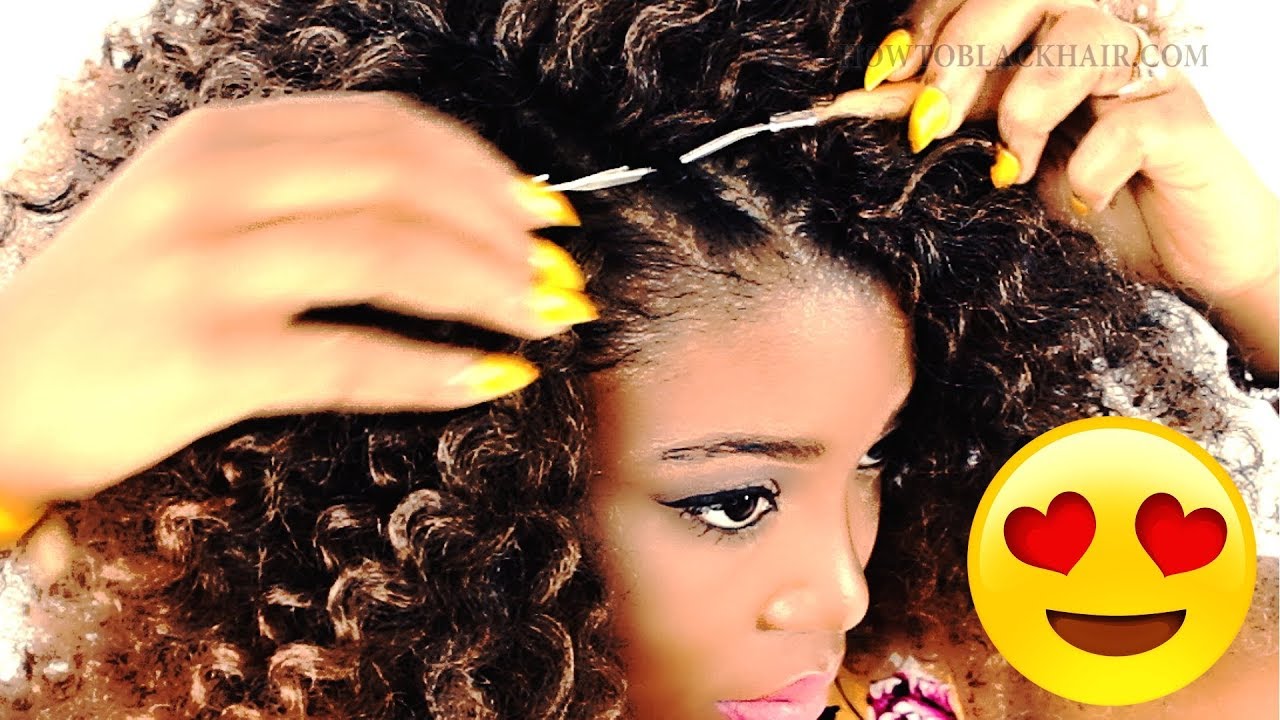
Step 2: Detangle Like a Pro
Grab that wide-tooth comb and gently work through your hair, starting at the ends and moving up to the roots. Wet hair with a little leave-in conditioner detangles easier—think of it like buttering toast before spreading jam.
- Fun Fact: Did you know detangling can take up to 30 minutes for super thick hair? Patience pays off here!
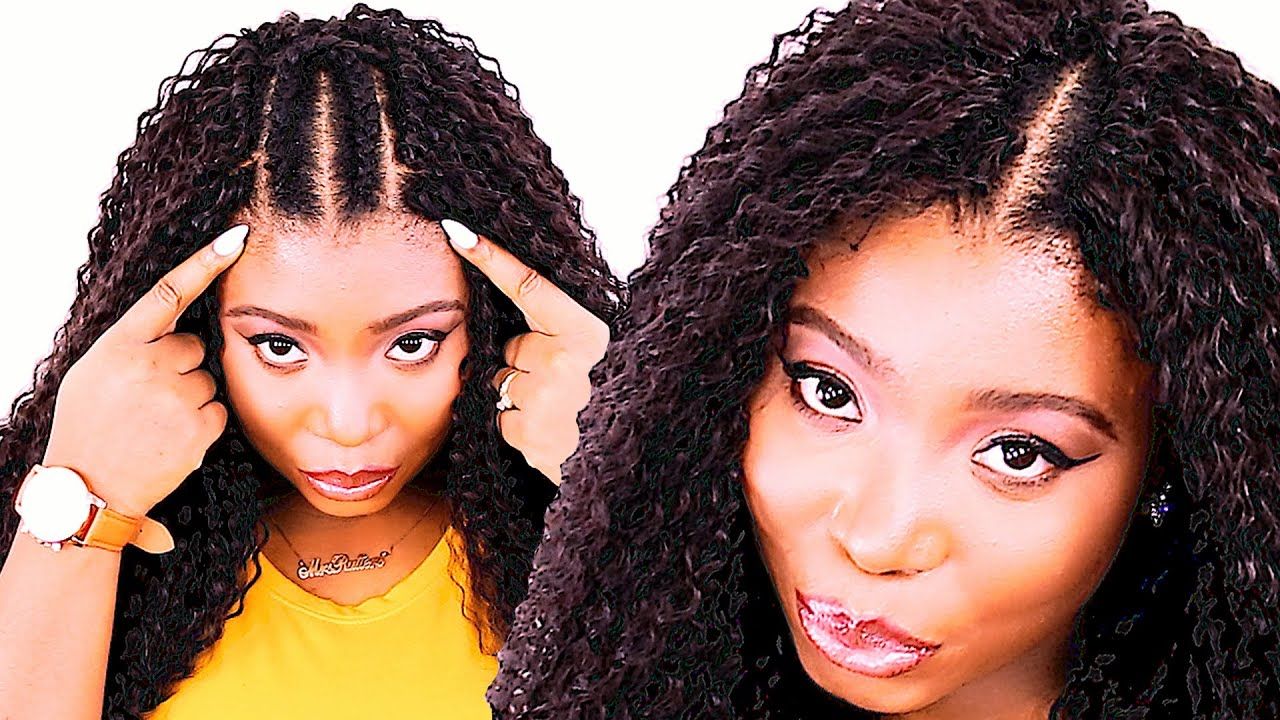
Step 3: Section Your Hair
Divide your hair into manageable chunks using clips. How many sections? That depends on your pattern (more on that later), but 6-8 is a solid start for medium-length hair. Use your rat-tail comb for clean, straight parts—it’s like drawing lines on a canvas.
- Hack: Spritz each section with water or a detangling spray to keep it from drying out while you work.
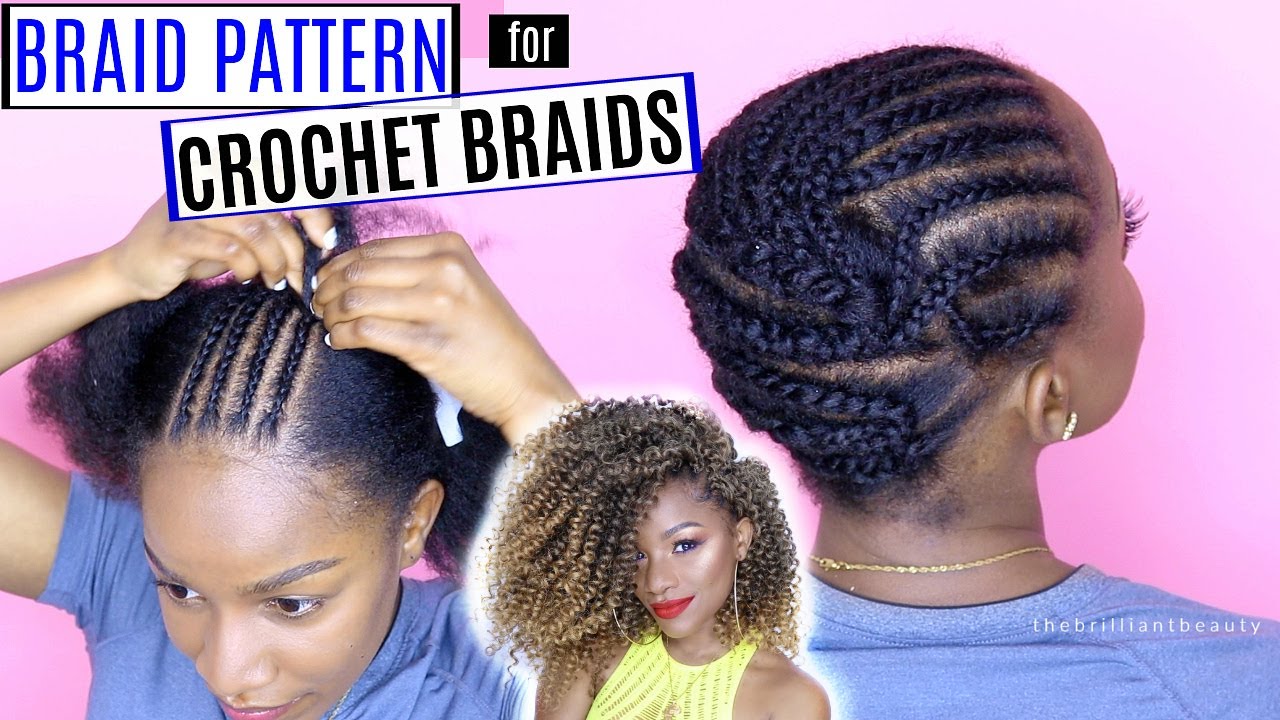
Step 4: Choose Your Braiding Pattern
Here’s where the magic happens! Your pattern decides how your crochet braids will sit. Here are the top three options:
- Straight-Back Cornrows: Classic and simple—braid from forehead to nape. Perfect for long, flowy styles.
- Beehive (Circular) Pattern: Braids spiral around your head like a beehive. Great for ponytails or updos.
- Zig-Zag Pattern: Braids go side-to-side in a funky zigzag. Ideal for a natural, parted look.
Question: Which one’s your vibe? I love the beehive for versatility—makes me feel like a hair artist!
Step 5: Start Braiding
Take a small section (about 1-2 inches wide), split it into three strands, and braid tight but not too tight—your scalp shouldn’t scream. Here’s a quick how-to:
- Cross the right strand over the middle.
- Cross the left strand over the new middle.
- Keep going, adding a little hair from the section each time (like a French braid).
- Secure the end with a tiny elastic or tuck it under.
- ✔️ Do: Keep tension even for a smooth look.
- ❌ Don’t: Pull so hard you get a headache—ouch!
Step 6: Repeat and Refine
Work through each section, keeping your braids consistent in size and direction. Check the mirror often—those back braids can sneakily go wonky. Once done, dab some edge control along your hairline for that snatched finish.
- Insider Secret: I once braided my hair in front of a movie marathon—by the end, I had perfect cornrows and a popcorn coma!
Picking the Perfect Braiding Pattern
Let’s dig deeper into patterns because this is where a lot of folks get stuck. The pattern isn’t just about looks—it affects how long your style lasts and how comfy it feels. Here’s a breakdown:
| Pattern | Best For | Pros | Cons |
|---|---|---|---|
| Straight-Back | Long, loose crochet styles | Easy to do, quick | Limited parting options |
| Beehive | Updos, ponytails | Super versatile, hides ends | Takes longer to braid |
| Zig-Zag | Natural looks, side parts | Mimics real hair flow | Tricky for beginners |
Expert Insight: “The pattern is your foundation,” says Xia Charles, a celebrity braider. “It’s like building a house—get the base wrong, and everything else wobbles.”
Unique Tip: Mix patterns! Try straight-back in the back and zig-zag up front for a hybrid look nobody’s talking about yet. It’s my little secret for a standout style.
Common Mistakes (and How to Fix Them)
Even the best of us mess up sometimes. Here’s what to watch out for:
- Too Tight Braids: Feels like your scalp’s crying? Loosen up next time—tightness isn’t worth the pain.
- Uneven Sizes: Big braids next to tiny ones look sloppy. Measure sections with your fingers for consistency.
- Dry Hair: Braiding dry hair is like trying to mold cracked clay. Keep it moisturized!
Fix-It Hack: If a braid’s off, unravel it while it’s still fresh—waiting makes it harder to redo.
How to Make Your Braids Last Longer
You’ve put in the work—now make it last! Crochet braids can stay fresh for 4-8 weeks with the right care. Here’s how:
- Sleep Smart: Wrap your hair in a satin scarf or use a silk pillowcase. Cotton sucks out moisture like a vampire.
- Cleanse Gently: Mix water and a little shampoo in a spray bottle, spritz your scalp, and wipe with a damp cloth. No soaking needed!
- Moisturize: Lightly oil your scalp with something like tea tree oil—keeps it happy without greasing up your braids.
Research Nugget: A 2023 study from the Journal of Cosmetic Science found that moisturized scalps under protective styles had 20% less breakage. Hydration is queen!
Fun Twists: Personalizing Your Crochet Prep
Here’s where we get juicy—stuff you won’t find in every guide! Braiding for crochet isn’t just a chore; it’s a vibe. Try these:
- Add Beads: Slip tiny beads onto the ends of your cornrows before crocheting. It’s a cute detail that peeks through.
- Color Play: Braid in a strand of colored extension hair with your natural hair for a pop of fun.
- Braid With a Buddy: Turn it into a hangout—my bestie and I once braided each other’s hair while spilling tea. Bonding level: 100.
Story Time: I once braided my hair in a heart-shaped pattern for a Valentine’s Day crochet look. Total hit at the party—and yes, I got pics!
Braiding for Different Hair Types
Not all hair braids the same, right? Here’s how to tweak it for your texture:
- Curly (3C-4C): Use a stretch method (blow-dry or twist out) first to make braiding smoother.
- Wavy (2A-2C): Add a bit of gel to keep those waves from slipping out mid-braid.
- Straight (1A-1C): Lightly dampen your hair—it grips better than bone-dry strands.
Expert Quote: “Texture changes everything,” says Brittany Johnson, a hair expert from Mayvenn Hair. “Know your hair, and the braids will thank you.”

The Science Behind Healthy Braiding
Let’s geek out for a sec. Braiding isn’t just art—it’s science! When you braid, you’re protecting your hair from heat, wind, and over-manipulation. But pull too hard, and you risk traction alopecia (fancy term for hair loss from tension). A 2022 study in Dermatology Reports showed that moderate tension reduces breakage by 15% compared to tight braids. So, keep it snug, not strangling!
Practical Advice: Test your tension—tug a braid gently. If it hurts, ease up. Your scalp will love you for it.
Troubleshooting: What If It Goes Wrong?
Stuff happens. Here’s how to handle it:
- Itchy Scalp: Dab a cotton ball with diluted apple cider vinegar (1:3 with water) to calm it down.
- Loose Braids: Redo them ASAP—loose bases make crochet hair wobbly.
- Frizz: Smooth with a tiny bit of oil or mousse, but don’t overdo it.
Weird Fact: I once had a braid unravel mid-day because I skipped the gel. Lesson learned—don’t skimp!
Leveling Up: Advanced Braiding Techniques
Feeling bold? Try these next-level moves:
- Feed-In Braids: Add extension hair as you braid for a thicker, seamless base.
- Knotless Cornrows: Skip the knot at the start—less tension, more natural flow.
- Micro Braids: Tiny cornrows for a super flat foundation—perfect for short crochet styles.
Hack: Practice on a mannequin head first. I snagged one for $10 at a beauty supply store—game-changer!
Braiding Hacks Nobody Talks About
Here’s some under-the-radar gold:
- Frozen Gel: Chill your edge control in the fridge for a firmer hold on humid days.
- Toothbrush Trick: Use an old toothbrush to smooth baby hairs—better control than a comb.
- Snack Break: Braid in stages with snacks handy—keeps your energy up without sticky fingers.
Personal Confession: I stash gummy bears nearby when braiding. Sweet motivation, right?
Caring for Your Hair Post-Braiding
After the crochet braids go in, your natural hair still needs love. Here’s the plan:
- Nightly Routine: Massage your scalp lightly with oil to boost circulation—think mini spa vibes.
- Takedown Time: When removing crochet hair, cut carefully near the braids, then unravel gently with oiled fingers.
- Recovery: Give your hair a deep conditioning mask after—it’s like a thank-you hug for all that work.
Expert Wisdom: “Post-care is as crucial as prep,” says Amber Rose, a licensed cosmetologist. “Treat your hair right, and it’ll bounce back stronger.”
Busting Myths About Crochet Braiding
Let’s clear the air on some nonsense floating around:
- Myth: “You need long hair for crochet braids.” Nope! Even 2 inches can work with the right pattern.
- Myth: “Braiding takes all day.” Not true—practice cuts it down to 2-3 hours.
- Myth: “It’s only for thick hair.” Wrong—any texture can rock it with tweaks.
Truth Bomb: I’ve seen my thin-haired cousin slay crochet braids with a zig-zag pattern. It’s all about technique!
Inspiration: Crochet Braid Styles to Try
Need ideas for after you braid? Here’s some fire:
- Box Braids: Long, sleek, and timeless.
- Curly Ends: Soft waves that bounce with every step.
- Faux Locs: Edgy and bold—channel your inner goddess.
Quick Poll: Which style’s calling your name? Drop it in the comments—I’m curious!
Let’s Chat: Your Turn!
You’ve got the full scoop on braiding for crochet braids—now it’s your move! What’s your go-to pattern? Any epic fails or wins you want to share? Hit the comments below—I’m all ears. Oh, and if you try a tip from this guide, snap a pic and tag us on social media. Let’s keep the hair love going!
Happy braiding, fam—you’re about to slay this!
Leave your comment
Related posts