How to Bleach Knots on a Wig: A Step-by-Step Guide
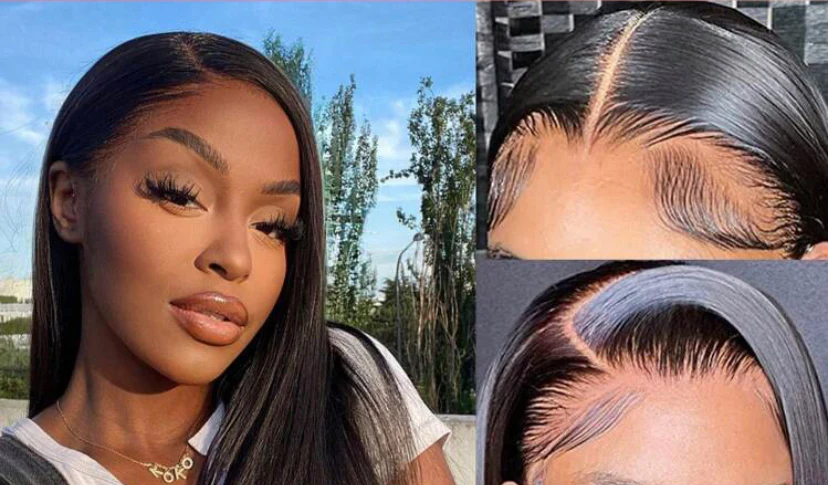
Bleaching the knots on a wig can significantly enhance its natural appearance, making the hair seem to grow directly from your scalp. This guide will walk you through the process of bleaching knots on a wig, from the tools you’ll need to step-by-step instructions and important tips for maintaining your wig’s quality.
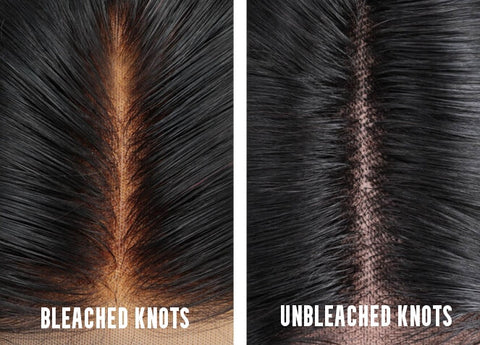
What are Knots on a Wig?
Knots are the tiny ties where hair strands are secured to the wig cap, typically visible at the base of the wig. These knots are often darker than the wearer’s scalp, making the wig look less natural.
Why Bleach Wig Knots?
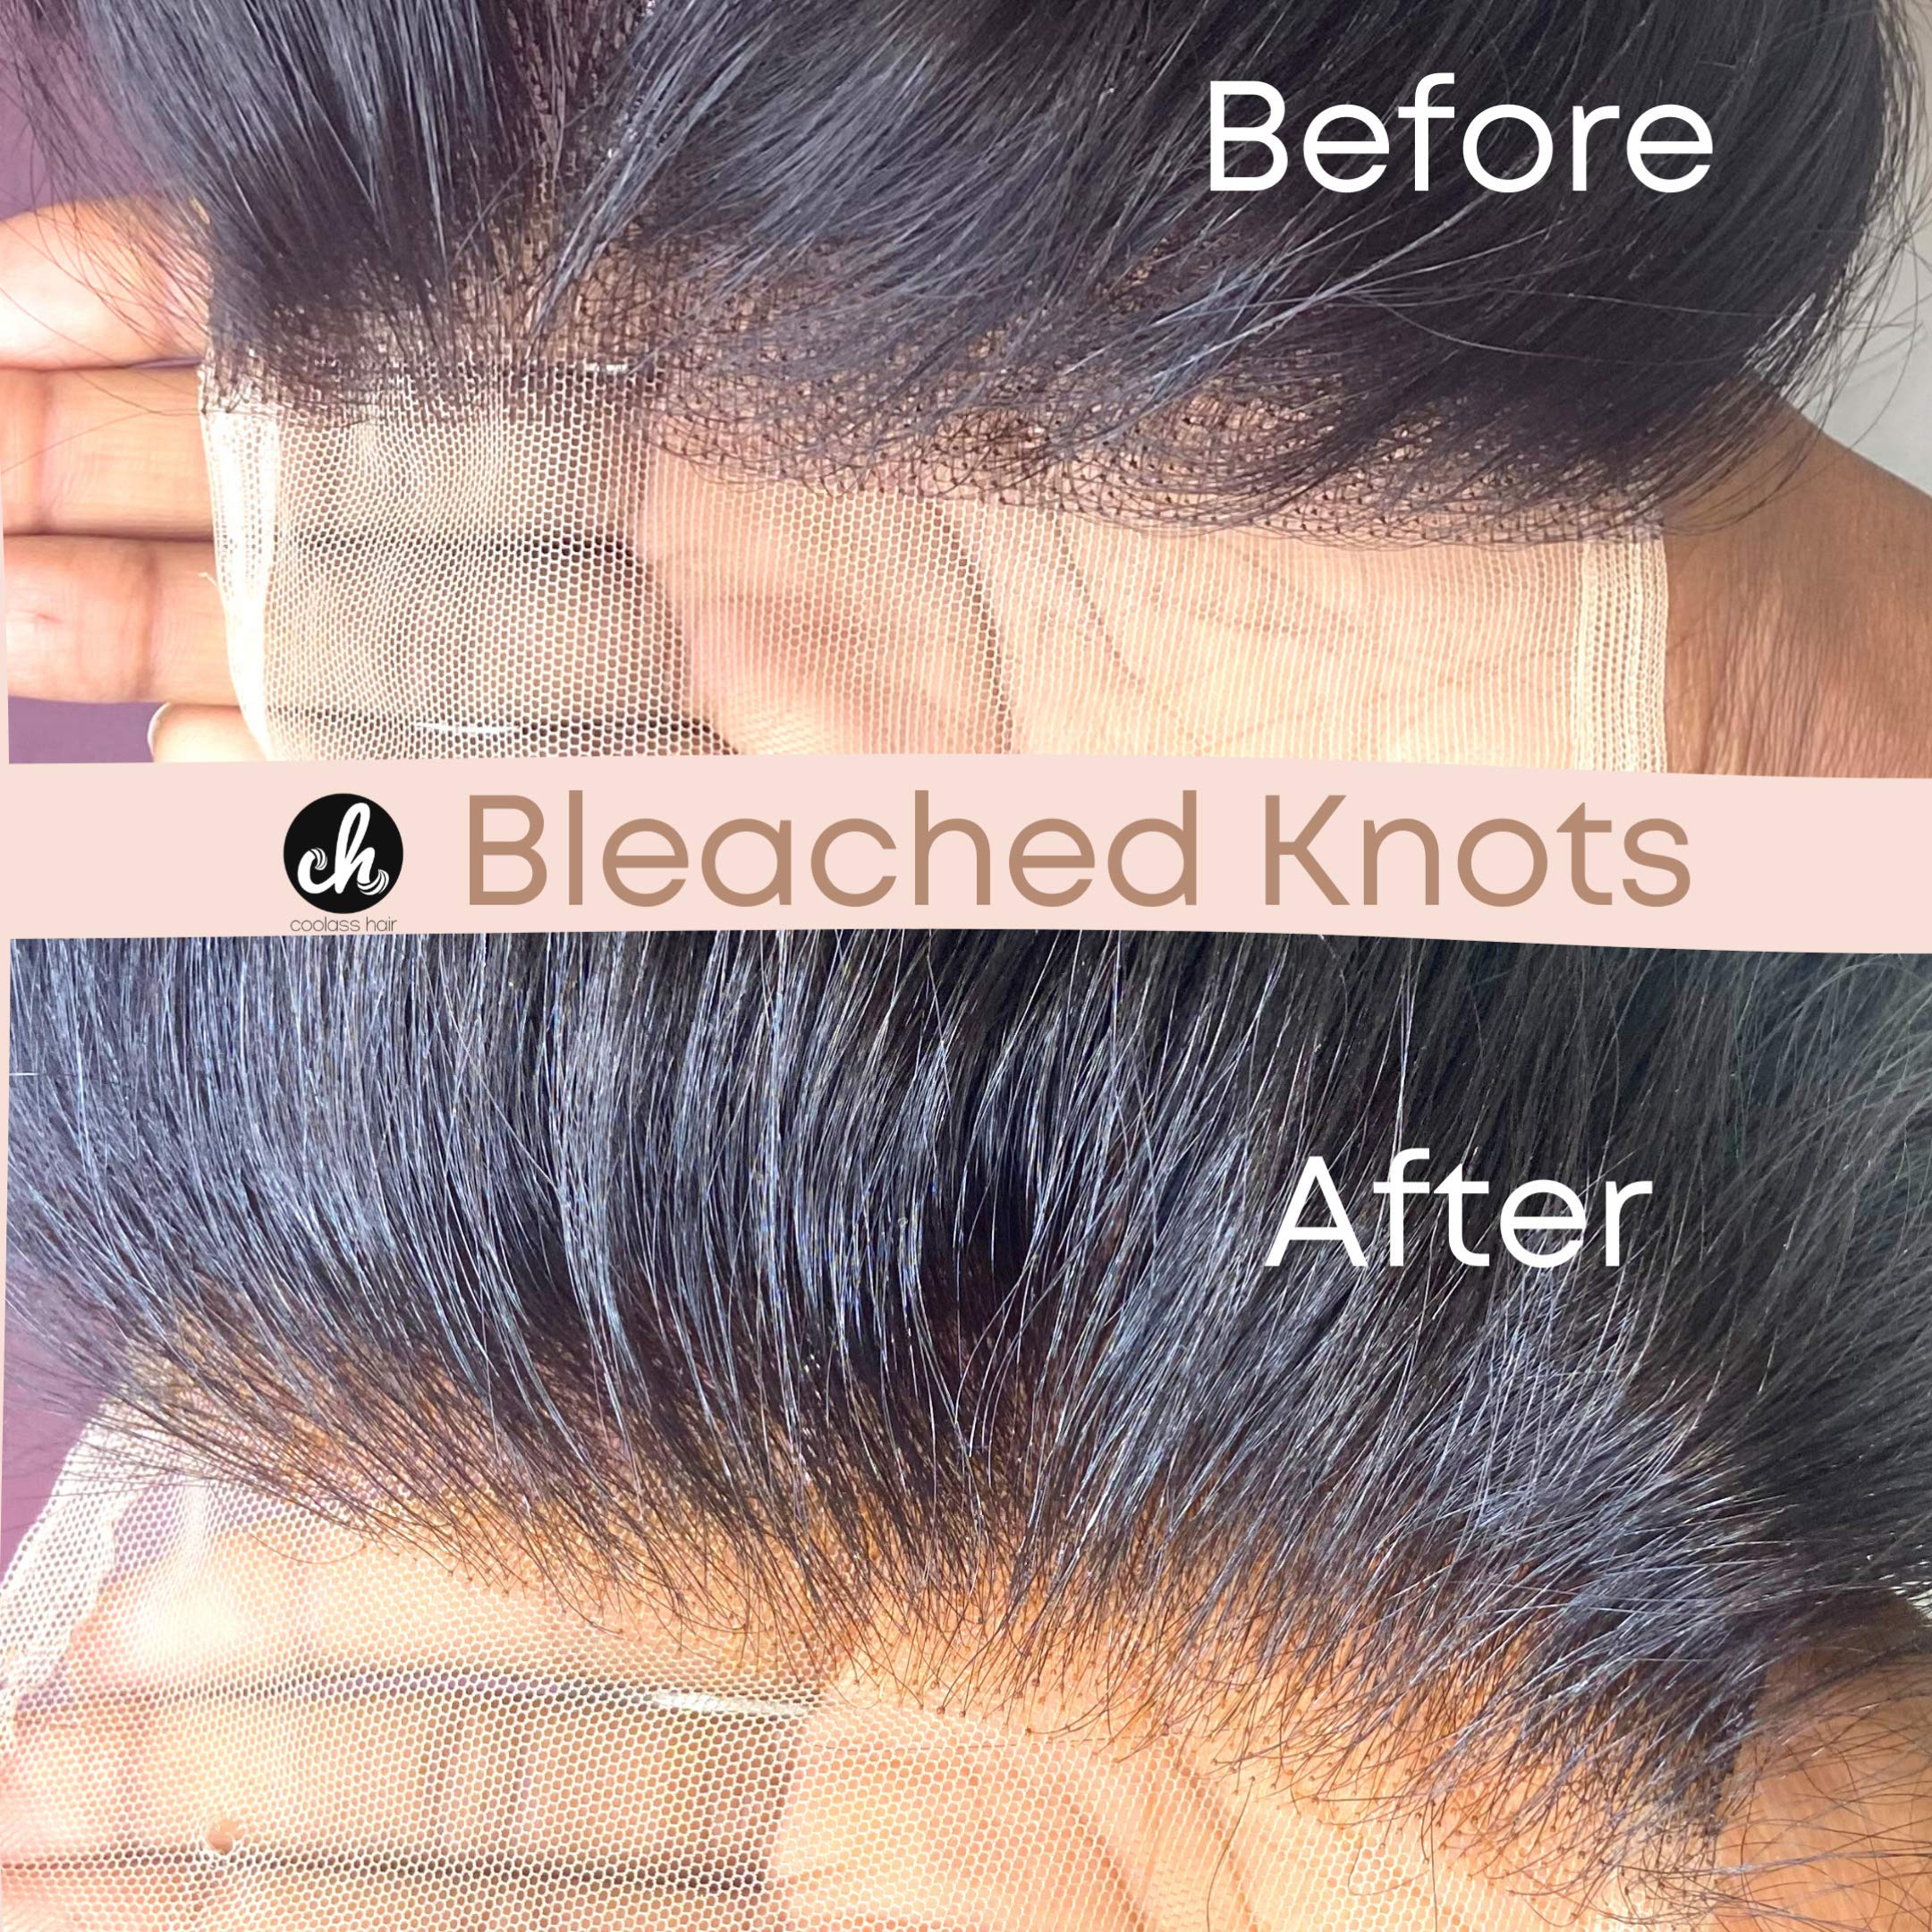
Bleaching these knots lightens them, helping them blend more seamlessly with the scalp. This is especially crucial for lace front wigs or any full lace wigs where the lace is meant to mimic a natural hairline.
Tools and Materials Needed
- Bleaching Powder: Choose a professional-grade bleaching powder for the best results.
- Developer: A 20 or 30 volume developer will be sufficient to gently lift the color without damaging the hair.
- Applicator Brush: To apply the bleach mixture accurately.
- Mixing Bowl: Preferably a non-metallic one to mix the bleach and developer.
- Neutralizing Shampoo: To stop the bleaching process.
- Conditioner: To restore moisture to the hair after bleaching.
- Gloves: To protect your hands during the process.
- Aluminum Foil: To cover the hair during the bleaching process.
- Wig Stand: To keep the wig stable while working on it.
Step-by-Step Guide to Bleaching Knots
Step 1: Prepare the Wig
Place your wig on a wig stand and gently comb it to remove any tangles. Make sure the wig is clean and dry before you start.
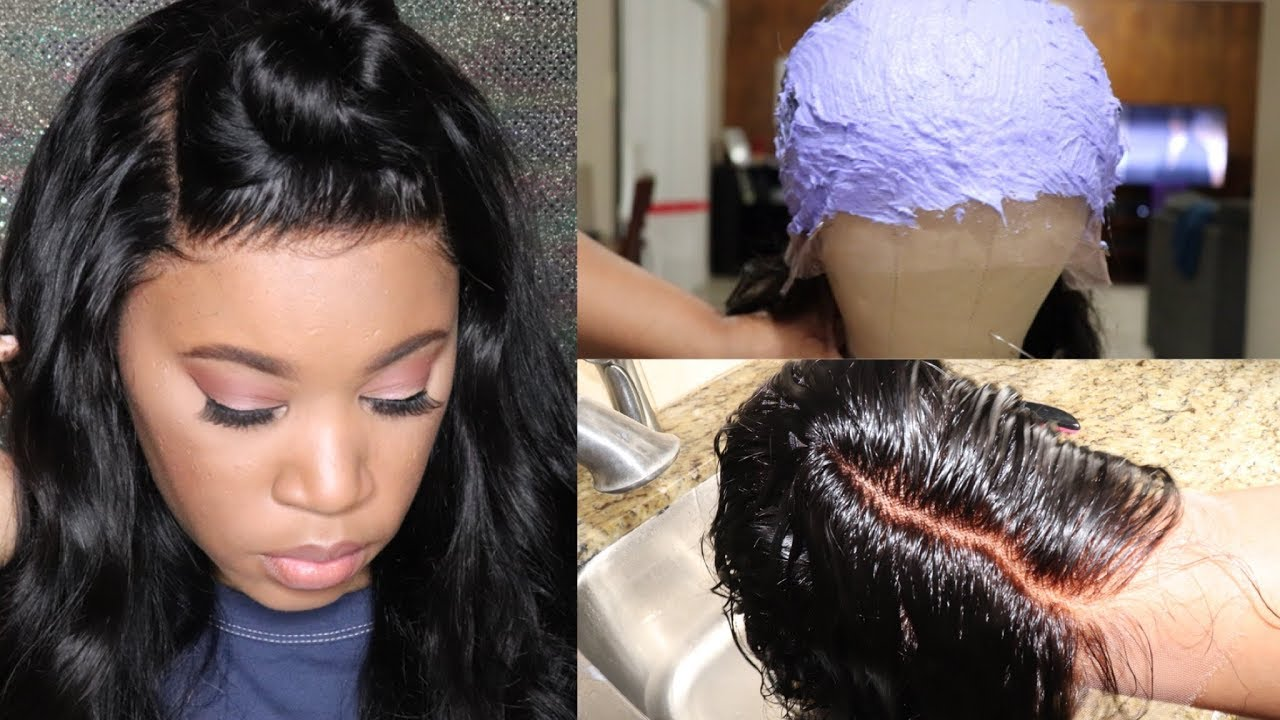
Step 2: Mix the Bleach
In a mixing bowl, combine the bleaching powder with the developer, following the product’s instructions. Aim for a consistency that is thick enough to stay on the knots without dripping into the hair strands.
Step 3: Apply the Bleach
Turn the wig inside out on the wig stand. Using the applicator brush, gently tap the bleach onto the knots. Be careful to avoid getting bleach on the hair strands as much as possible.
Step 4: Allow the Bleach to Process
Cover the bleached area lightly with aluminum foil and let it sit for 15-30 minutes. Check the knots every 10 minutes until they have reached the desired lightness.
Step 5: Wash the Wig
Rinse the bleach out thoroughly with lukewarm water. Apply a neutralizing shampoo to stop the chemical process and then condition the wig. This step is crucial to prevent damage and keep the wig looking healthy.
Step 6: Dry and Style the Wig
Gently pat the wig with a towel and let it air dry on the wig stand. Avoid using heat to dry the wig, as this can cause additional stress to the hair.
Tips for Success
- Test First: Always do a strand test on a small, hidden section of the wig to see how the hair reacts to the bleach.
- Avoid Over-Bleaching: Over-bleaching can weaken the knots, causing hair shedding.
- Use Caution with Colored Wigs: Bleaching knots on colored wigs may alter the overall color, so proceed with caution.
- Regular Maintenance: Regularly condition your wig to keep it hydrated and minimize damage from the bleaching process.
Bleaching the knots on your wig can take your wig from good to great, giving it a much more natural appearance. By following these detailed steps and taking care to maintain the wig’s health, you can achieve a professional-looking result at home. Always remember that patience and attention to detail are key when working with delicate hairpieces like wigs.
Leave your comment
Related posts