How to Add Extensions to a Braid: Your Ultimate Guide to Stunning Hair
Hey there, braid lovers! If you’ve ever dreamed of turning your everyday braids into something extra special, you’re in the right place. Adding extensions to a braid isn’t just about length—it’s about volume, style, and unlocking a world of creativity you didn’t even know you had. Whether you’re a beginner who’s just learning the ropes or someone who’s been braiding for years, this guide is packed with tips, tricks, and secrets to help you nail it every time.
We’re diving deep into everything you need to know: picking the right extensions, prepping your hair, mastering the technique, and even keeping your braids looking fresh for weeks. Plus, I’ve got some hidden gems—think quirky styling ideas and little-known hacks—that’ll make your braids stand out. Ready to level up your hair game? Let’s get started!
Why Add Extensions to Your Braids?
Adding extensions to a braid is like giving your hair a superpower. It’s not just about making it longer (though that’s a big perk!). Extensions can transform thin or short hair into thick, lush braids that turn heads. They also let you play with colors and textures without committing to a permanent change. Want neon pink tips or curly ends? Extensions make it possible.
But here’s a fun fact most people don’t talk about: braiding with extensions can actually be a stress-reliever. Studies from the Journal of Occupational Therapy (2023) show that repetitive hand movements—like braiding—can lower cortisol levels, the hormone tied to stress. So, you’re not just getting gorgeous hair; you’re giving yourself a mini self-care session. Cool, right?
Benefits You’ll Love
- Length & Volume: Go from short to Rapunzel-long in minutes.
- Endless Styles: Try box braids, cornrows, or fishtails with a twist.
- Hair Protection: Extensions can shield your natural hair from damage.
- Low Commitment: Switch it up whenever you feel like it!
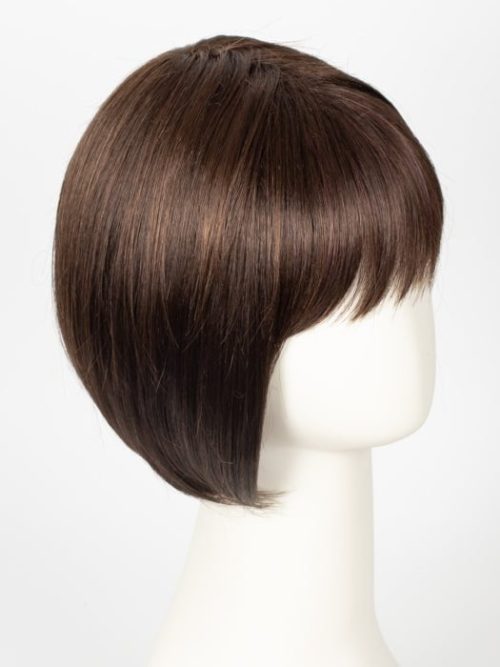
Choosing the Perfect Extensions for Your Braid
Before you start braiding, you’ve got to pick the right extensions. This step is huge because the wrong choice can make your braids look stiff, fake, or even fall apart. Let’s break it down so you can shop like a pro.
Types of Extensions to Consider
- Synthetic Hair: Affordable and comes in wild colors—like electric blue or ombre purple. Perfect if you’re on a budget or want a bold look.
- Human Hair: Feels natural, lasts longer, and blends seamlessly with your own hair. It’s pricier but worth it for a polished vibe.
- Kanekalon: A popular synthetic option that’s lightweight and easy to braid. It’s heat-resistant too, so you can style it with hot water.
What to Look For
✔️ Texture Match: Pick extensions that mimic your hair’s natural curl or wave for a flawless blend.
✔️ Length: Want dramatic floor-length braids or just a little boost? Measure twice, buy once!
✔️ Color: Match your roots or go wild with highlights—think caramel streaks or a pop of lavender.
❌ Avoid Heavy Bundles: Too much weight can strain your scalp and ruin the fun.
Insider Tip: The “Stretch Test”
Here’s a trick I learned from my cousin, a hairstylist: gently stretch a strand of the extension. If it snaps right away, it’s low quality and won’t hold up in a braid. Good extensions should have a little give without breaking.
Prepping Your Hair and Extensions Like a Pro
You wouldn’t bake a cake without preheating the oven, right? Same goes for braiding. Prepping your hair and extensions sets you up for success. Skip this, and you’re risking frizz, tangles, or braids that unravel faster than a cheap sweater.
Step 1: Clean and Moisturize Your Hair
Start with a fresh canvas. Wash your hair with a sulfate-free shampoo, then follow up with a conditioner that hydrates without weighing it down. Dry your hair completely—damp hair can lead to mildew in braids (yuck!).
Pro Tip: Add a leave-in conditioner or a lightweight oil (like jojoba) to keep your strands soft and manageable.
Step 2: Detangle Everything
Grab a wide-tooth comb and gently work through your natural hair and the extensions. This prevents knots from messing up your braid later. Fun fact: detangling is my secret Netflix binge time—I pop on a show and get lost in the rhythm.
Step 3: Section Your Hair
Divide your hair into even parts based on the style you want. Use clips or hair ties to keep sections neat. For box braids, go for small squares; for cornrows, stick to straight rows. This part’s like sketching before you paint—it makes the whole process smoother.
Tools You’ll Need
| Item | Why It’s Awesome |
|---|---|
| Rat-tail comb | Perfect for precise parting |
| Hair clips | Keeps sections organized |
| Spray bottle | Lightly mist extensions for control |
| Edge control gel | Smooths flyaways for a sleek finish |
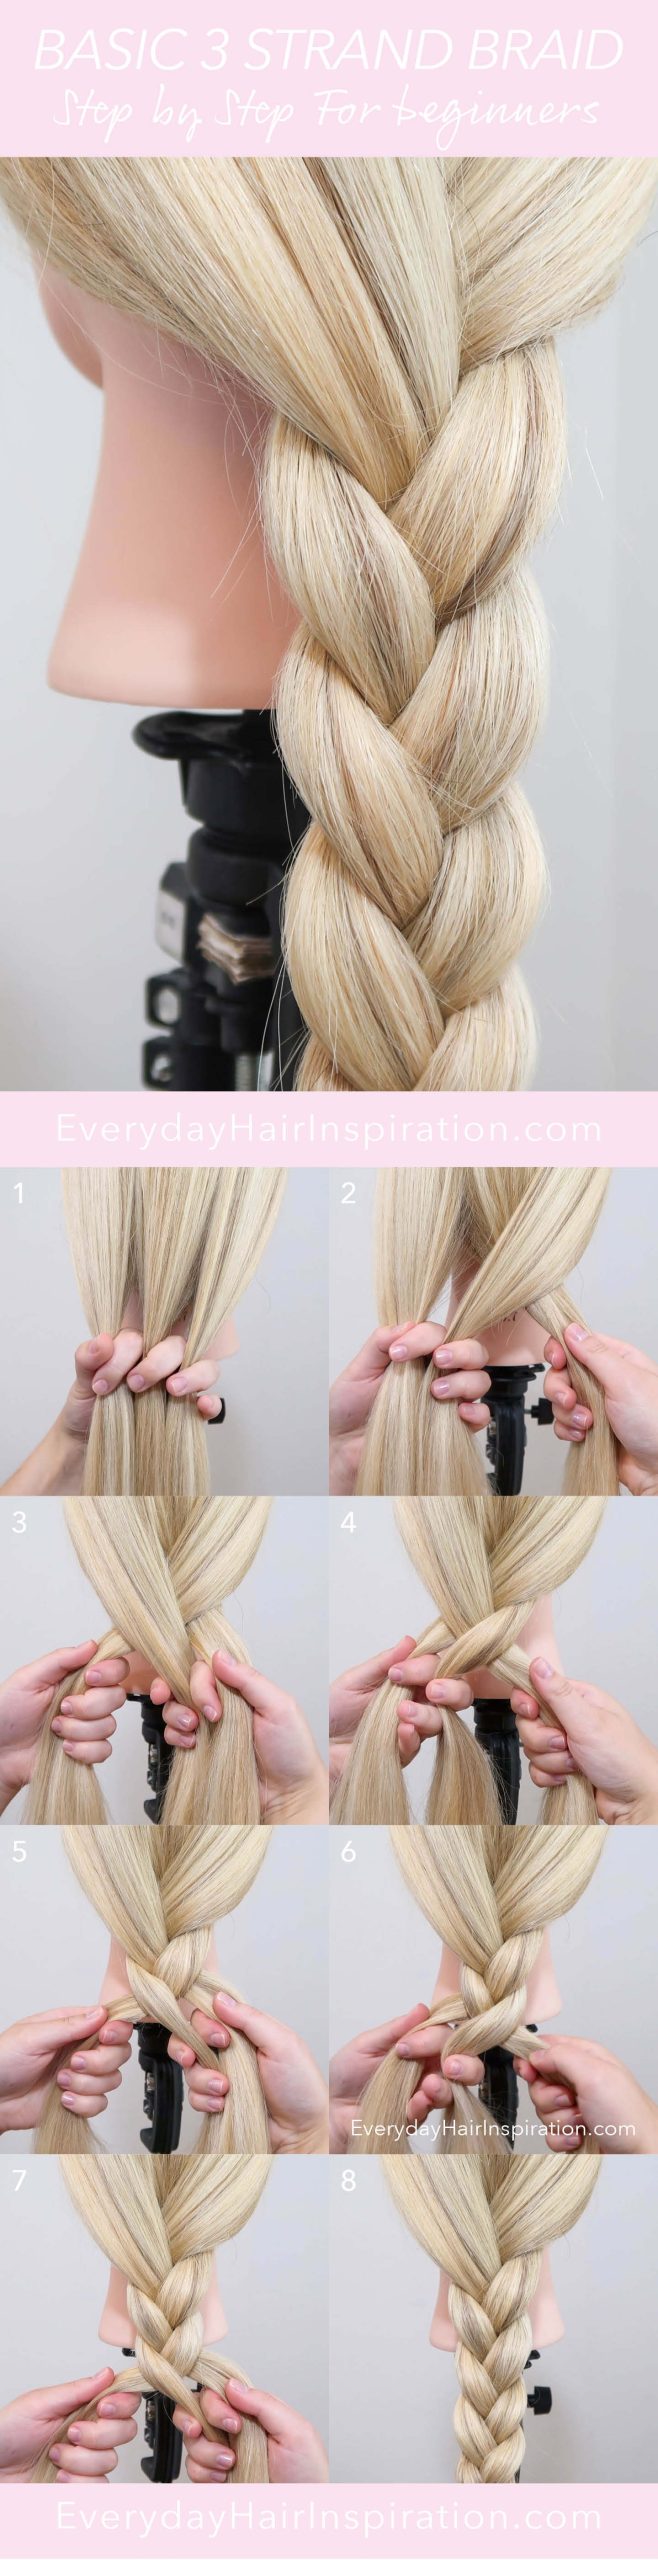
How to Add Extensions to Your Braid: Step-by-Step Guide
Alright, let’s get to the good stuff—actually adding those extensions! I’ll walk you through a basic technique that works for most braid styles, plus some variations to spice things up. Grab your extensions, and let’s braid!
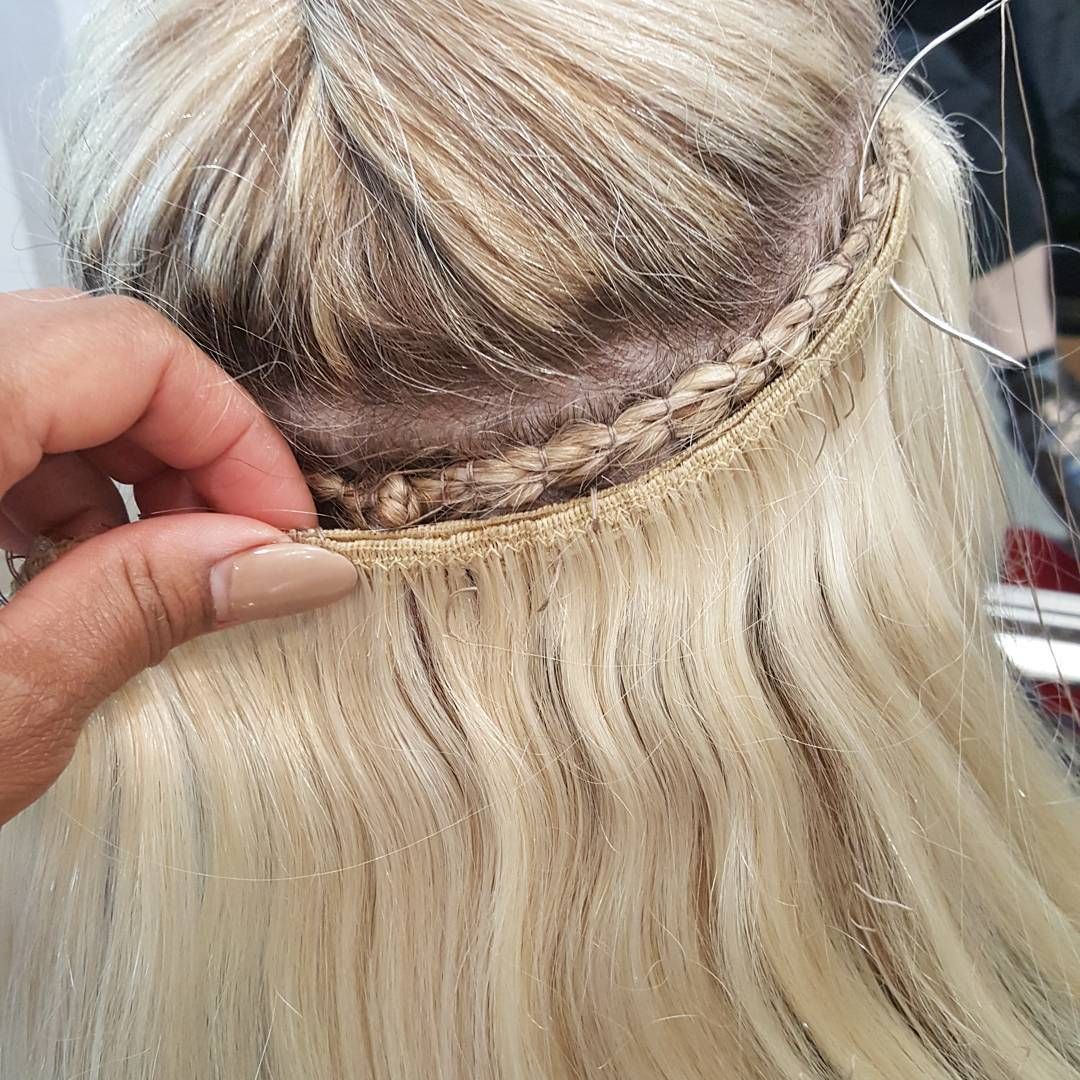
Basic Feed-In Method
This is the go-to way to blend extensions into your braid naturally. It’s simple, beginner-friendly, and looks amazing.
- Start Small: Take a small section of your natural hair and split it into three tiny strands.
- Add the Extension: Fold a piece of extension hair in half, then loop it over one of your strands. Twist it in so it’s secure.
- Braid Away: Begin braiding, mixing the extension with your hair. Keep the tension even—not too tight, not too loose.
- Feed In More: As you braid down, add small pieces of extension hair to each strand. This builds thickness gradually.
- Seal the Ends: When you’re done, dip the tips in hot water (for synthetic hair) or use a tiny elastic.
Why It Works: The gradual “feed-in” makes the braid look like it’s all your hair—no awkward lumps or obvious starts.
Variation: The Invisible Root Trick
Want your braids to look like they grow right out of your scalp? Start with a tiny knot. Tie the extension to your hair with a small, tight loop, then braid over it. It’s a bit fiddly at first, but the seamless result is worth it.
Expert Quote
“Hair extensions are like the secret ingredient in your favorite recipe—used right, they elevate everything,” says Mia Jackson, a braiding expert with over 15 years in the game.
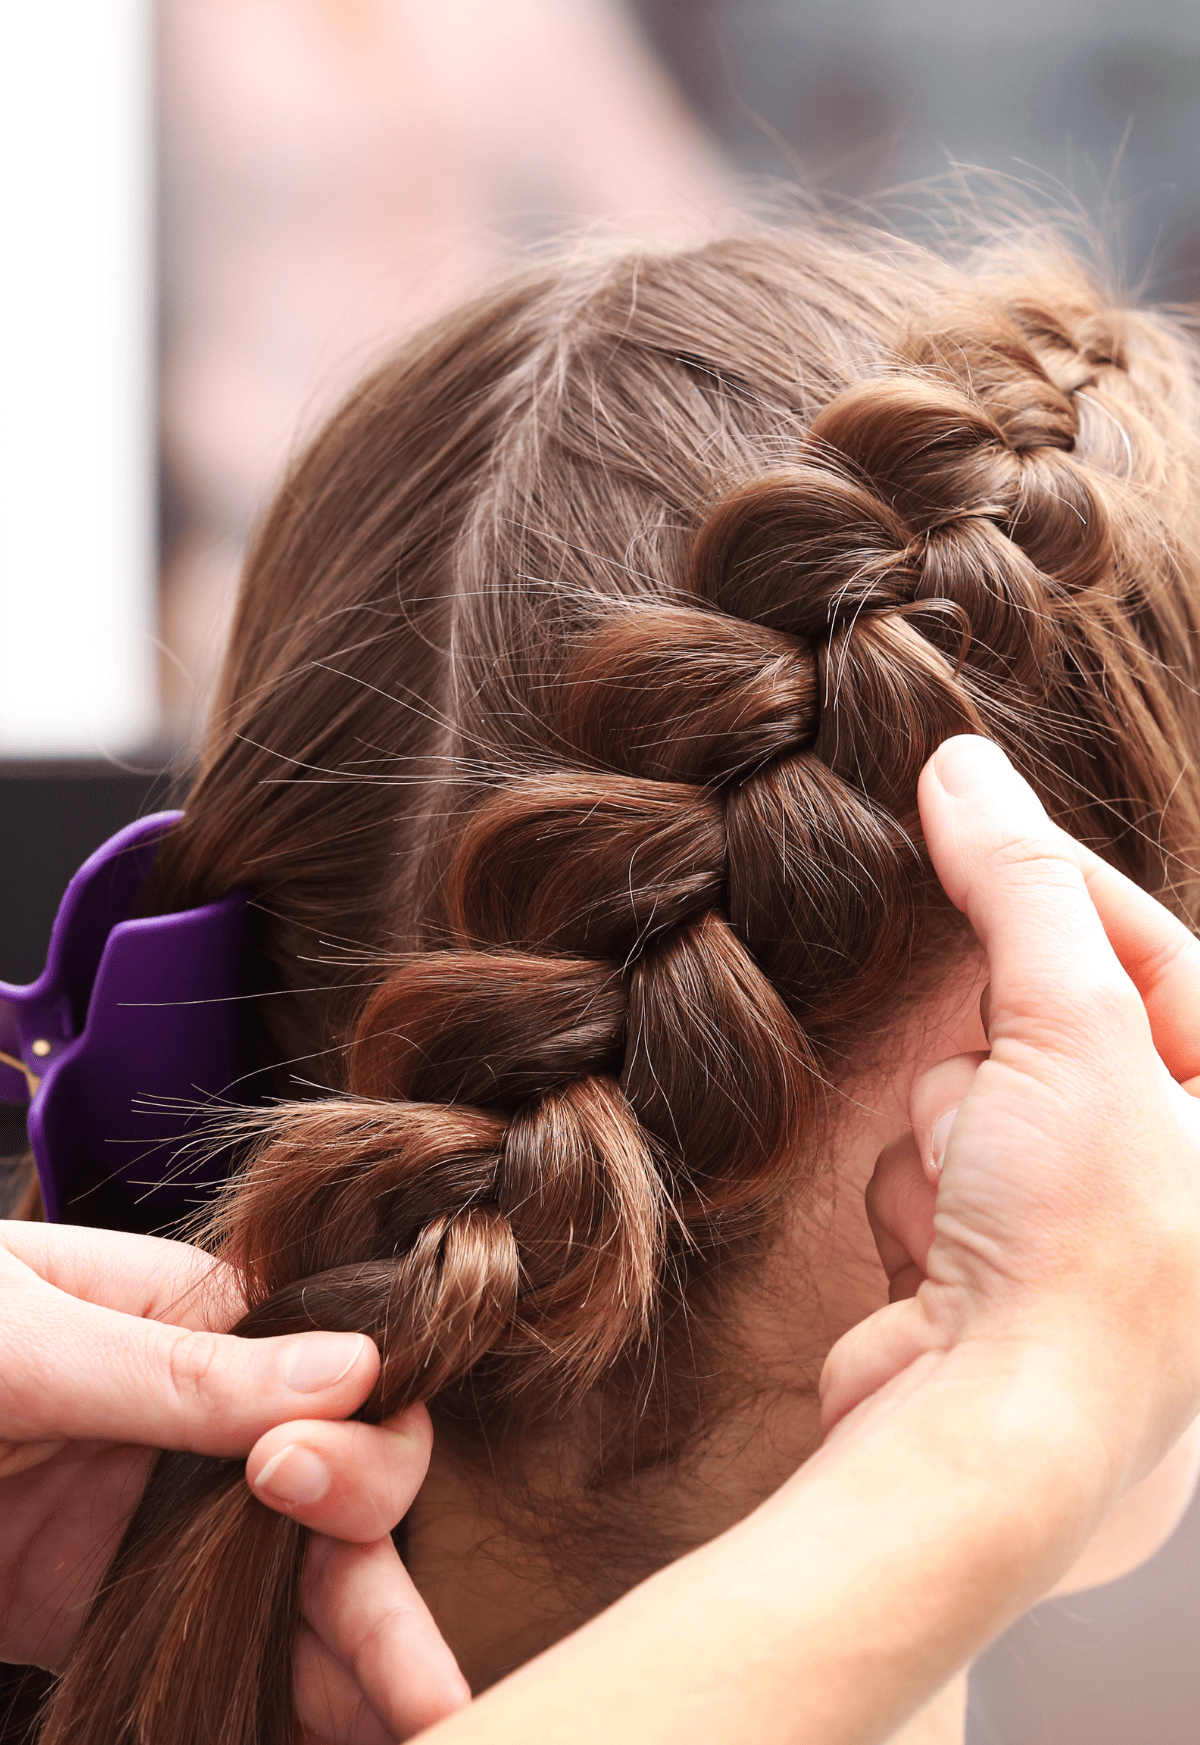
Top Braid Styles to Try with Extensions
Now that you’ve got the basics down, let’s play with some styles! Extensions open up a playground of possibilities. Here are three fan-favorites, plus tips to make them pop.
1. Box Braids with a Twist
- Core Idea: Medium or large square-parted braids that hang loose.
- Unique Twist: Add metallic beads or colored threads halfway down for a funky vibe.
- How-To: Use the feed-in method, keeping sections uniform. Thread beads on with a needle for extra flair.
2. Cornrows with Curly Ends
- Core Idea: Tight braids against the scalp with loose, curly extension ends.
- Unique Twist: Mix in human hair extensions for bouncy curls that sway when you move.
- How-To: Braid tight to the scalp, then attach curly extensions at the ends with a knot or hot water seal.
3. Fishtail Braid Fantasy
- Core Idea: A two-strand braid that looks intricate but is super easy.
- Unique Twist: Use ombre extensions (like purple fading to pink) for a mermaid effect.
- How-To: Split hair into two sections, weave in extensions, and alternate small strands from each side.
Common Mistakes to Avoid (And How to Fix Them)
Even the best braiders mess up sometimes. Here’s what trips people up—and how to dodge the drama.
Mistake 1: Too Much Tension
- Problem: Pulling too hard hurts your scalp and can cause breakage.
- Fix: Keep your grip firm but gentle. If it stings, loosen up!
Mistake 2: Uneven Extensions
- Problem: Lumpy or thin spots make braids look sloppy.
- Fix: Feed in small, equal amounts of hair each time. Practice makes perfect.
Mistake 3: Ignoring Maintenance
- Problem: Dirty or dry braids get itchy and dull fast.
- Fix: Spritz with a water-and-oil mix weekly, and sleep with a satin scarf.
Keeping Your Braided Extensions Fresh
You’ve worked hard on those braids—let’s make them last! With the right care, you can rock your style for 4-8 weeks. Here’s how.
Daily Habits
✔️ Cover Up: Sleep with a satin bonnet or pillowcase to cut down on frizz.
✔️ Moisturize: Use a spray bottle with water and a drop of conditioner to refresh your scalp.
❌ Don’t Overdo Products: Heavy gels or oils can build up and weigh braids down.
Weekly TLC
- Wash Smart: Mix shampoo with water in a bottle, squirt it onto your scalp, and rinse gently. Pat dry with a towel.
- Re-Tighten: If roots get fuzzy, re-braid the first inch with a little extension hair.
Fun Fact
A 2024 survey by Hair Care Trends found that 68% of people with braided extensions said their confidence spiked after styling. Your braids aren’t just hair—they’re a mood boost!
Secret Hacks Fans Will Obsess Over
Want to wow your friends (and maybe your Instagram followers)? These lesser-known tips will take your braids to the next level.
Hack 1: The Glitter Trick
Sprinkle a tiny bit of biodegradable glitter into your extensions before braiding. It catches the light and gives a subtle sparkle—perfect for festivals or a night out.
Hack 2: Braid-In Accessories
Weave in thin ribbons or yarn as you go. It’s a cute way to add personality without extra tools. I once did this with gold thread for a wedding—total showstopper!
Hack 3: The Volume Boost
Tease the extensions lightly with a comb before braiding. It adds fluffiness without extra weight. Trust me, it’s a game-changer for thin hair.
Expert Quote
“Little details like accessories or texture tricks can turn a good braid into a masterpiece,” notes Kayla Rivera, a celebrity stylist who’s worked with stars like Zendaya.
Troubleshooting: Answers to Your Burning Questions
Got a braid dilemma? I’ve got you covered with solutions to the stuff people whisper about at sleepovers.
Q: Why Do My Braids Feel Itchy?
- A: Could be a dry scalp or product buildup. Massage in a mix of tea tree oil and water—it’s soothing and fights irritation.
Q: How Do I Stop Flyaways?
- A: Dab a pea-sized amount of edge control gel on a toothbrush and brush them down. It’s precise and won’t make your hair greasy.
Q: Can I Swim with Braided Extensions?
- A: Yep! Just rinse with fresh water after to remove chlorine or salt, and let them air dry.
The Science Behind Long-Lasting Braids
Ever wonder why some braids stay tight while others flop? It’s not just luck—there’s science at play. A 2023 study from Cosmetic Chemistry Review found that synthetic extensions like Kanekalon hold tension 20% better than human hair because of their smooth, uniform fibers. Meanwhile, human hair extensions absorb moisture, which can loosen braids over time.
Practical Takeaway: If you live in a humid spot, synthetic might be your best bet for staying power. But if you love a natural feel, seal human hair ends with heat to lock in the style.
Mixing It Up: Creative Ideas to Try
Bored of the same old braids? Extensions let you experiment like crazy. Here are some ideas to spark your next look.
Idea 1: Half-and-Half Braids
Braid the top half of your head with extensions, then leave the bottom loose for a cool contrast. Add some curls to the free section for extra drama.
Idea 2: Hidden Patterns
Cornrow a zigzag or heart shape under a layer of loose braids. It’s a surprise detail that peeks out when you move.
Idea 3: Jumbo Braid Bun
Use thick extensions to create one massive braid, then twist it into a high bun. It’s bold, easy, and screams confidence.
How Long Should You Keep Your Braids In?
Timing matters. Leave braids in too long, and you risk matting or breakage. Here’s a quick guide:
| Style | Max Time | Why It Matters |
|---|---|---|
| Box Braids | 6-8 weeks | Roots grow out, tension increases |
| Cornrows | 4-6 weeks | Scalp needs a breather |
| Fishtail | 2-4 weeks | Looser style unravels faster |
Tip: If your scalp feels sore or you see lots of new growth, it’s time to take them out. Listen to your hair—it’ll thank you!
Taking Your Braids Out Without Tears
When it’s time to say goodbye, don’t just yank—be gentle. Here’s the stress-free way to remove extensions.
- Cut Carefully: Snip the extension ends below the seal (not your hair!).
- Unravel Slowly: Start from the bottom and work up, using your fingers or a comb.
- Detangle: Spray with water and conditioner to loosen knots.
- Wash Up: Shampoo and deep condition to pamper your natural hair.
Pro Move: Play some music and take your time. I once turned braid removal into a spa night with candles and a face mask—pure bliss!
Bonus: What Your Braids Say About You
Ever thought your braid style might spill some tea about your personality? Fans love this stuff, so here’s a playful take:
- Box Braids: You’re a planner who loves control—and probably have a killer playlist.
- Cornrows: You’re practical but stylish, always ready for an adventure.
- Fishtail: You’re a dreamer with a soft spot for fairy tales.
What’s your braid vibe? Drop it in the comments—I’m dying to know!
Let’s Get Interactive!
You’ve made it to the end—congrats! Now, let’s keep the fun going. Try these out and share your thoughts:
- Challenge: Braid one section with an extension using a hack from this guide. Snap a pic and tag us!
- Question: What’s the wildest braid style you’ve ever tried? Spill the details below.
- Poll: Synthetic or human hair extensions—which do you swear by? Vote in the comments!
I’ll be popping in to chat and cheer you on. Let’s make this a braid party—see you there!
Leave your comment
Related posts