How to Braid Your Own Hair: A Fun, Step-by-Step Guide to Mastering the Art
Braiding your own hair might sound tricky at first—like trying to pat your head and rub your tummy at the same time—but trust me, it’s a skill anyone can learn with a little practice. Whether you’re aiming for a sleek French braid to impress your friends or a messy fishtail for a chill weekend vibe, this guide has you covered. We’re diving deep into everything you need to know, from the basics to some hidden tips that’ll make you feel like a pro. Plus, I’ll sprinkle in some fun secrets—like why braiding can be your go-to stress-buster—and answer the questions you didn’t even know you had. Ready to transform your hair game? Let’s get started!
Why Braiding Your Own Hair Is Worth It
Braiding isn’t just about looking cute (though that’s a big perk!). It’s a superpower that saves time, protects your hair, and lets you flex your creative side. Imagine waking up late, throwing your hair into a quick braid, and still turning heads all day. Or picture this: you’re binge-watching your favorite show, and instead of scrolling your phone, you’re braiding your hair into something Instagram-worthy. It’s practical, fun, and honestly, kind of addicting once you get the hang of it.
Here’s the kicker: braiding can actually keep your hair healthier. Studies from the Journal of Cosmetic Dermatology (2023) show that loose hairstyles like braids reduce breakage by keeping strands tucked away from daily wear and tear—like wind, brushing, or that moment you accidentally snag your hair on your backpack. Plus, it’s a low-maintenance style that lasts for hours—or even days if you’re rocking a protective braid.
What You’ll Get Out of This Guide
- Step-by-step instructions for beginner, intermediate, and advanced braids.
- Insider tricks most people overlook (spoiler: your hairbrush isn’t always your friend!).
- Answers to burning questions like “Why does my braid keep falling apart?”
- Practical tips to make braiding easier, faster, and more fun.
Let’s braid our way to fabulous hair—one strand at a time!
Getting Started: What You Need Before You Braid
Before you dive into braiding, let’s set you up for success. You don’t need a fancy kit, but a few basics will make a huge difference. Think of this as your braiding toolbox—simple stuff you probably already have lying around.
Must-Have Tools
- Comb: A wide-tooth comb is your bestie for detangling without snapping your hair.
- Hair Ties: Small, clear elastics work great for securing ends without bulk.
- Mirror: A handheld one helps you see the back—trust me, it’s a game-changer.
- Spray Bottle: A little water keeps things smooth and manageable.
- Optional Goodies: Clips to section hair, a light leave-in conditioner for grip, or even a cute scrunchie for flair.
Hair Prep 101
Your hair’s condition can make or break your braid. Here’s how to get it ready:
✔️ Start Clean(ish): Freshly washed hair is great, but day-old hair has more texture and holds better.
✔️ Detangle First: Knots are the enemy—gently comb from ends to roots to avoid pain.
✔️ Damp or Dry?: Damp hair is easier to control, but dry hair works too—just add a spritz of water if it’s slippery.
❌ Skip Heavy Products: Too much gel or oil makes strands slide out of place.
Pro Tip: If your hair’s super fine, try a light mist of dry shampoo. It adds grip without weighing it down. I learned this the hard way after my first braid unraveled faster than my patience!
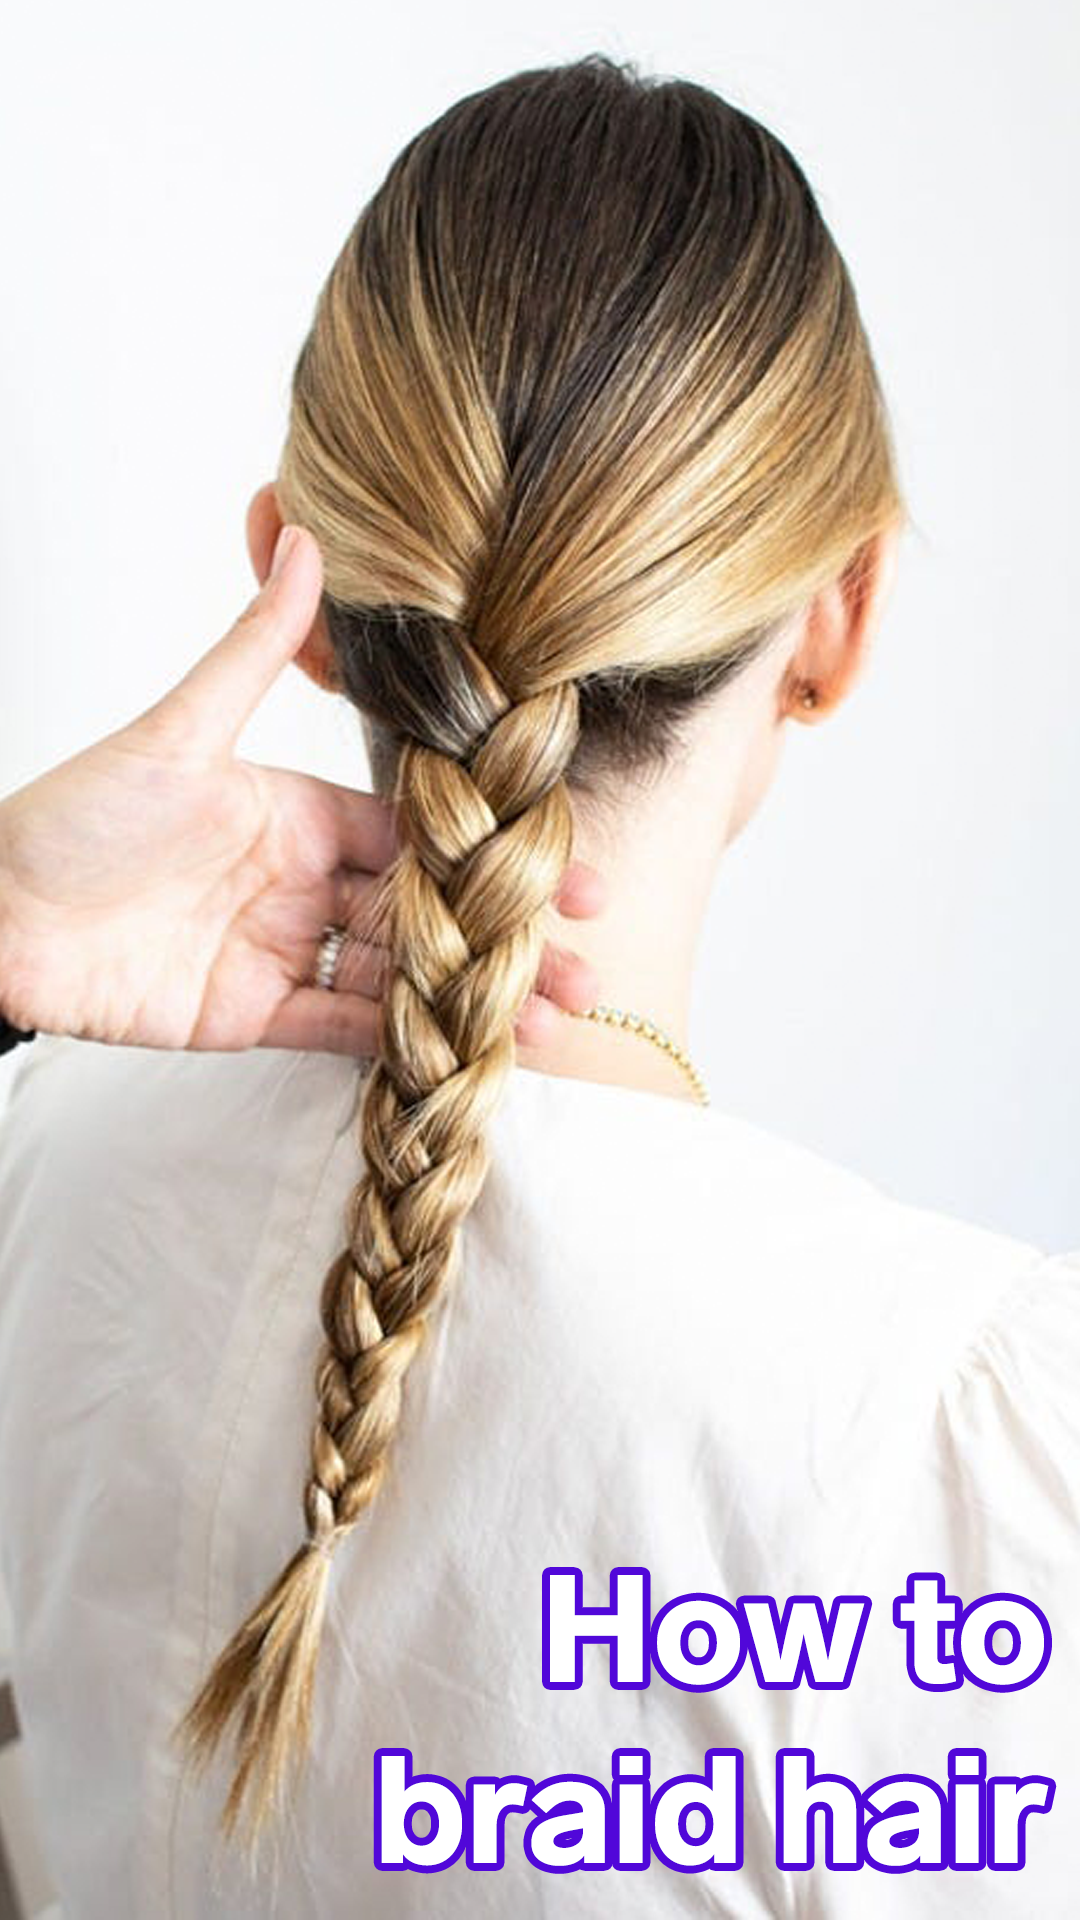
The Classic Three-Strand Braid: Your Braiding Foundation
Let’s kick things off with the simplest braid—the three-strand. It’s the one you probably learned as a kid, but we’re leveling it up with some tweaks to make it flawless.
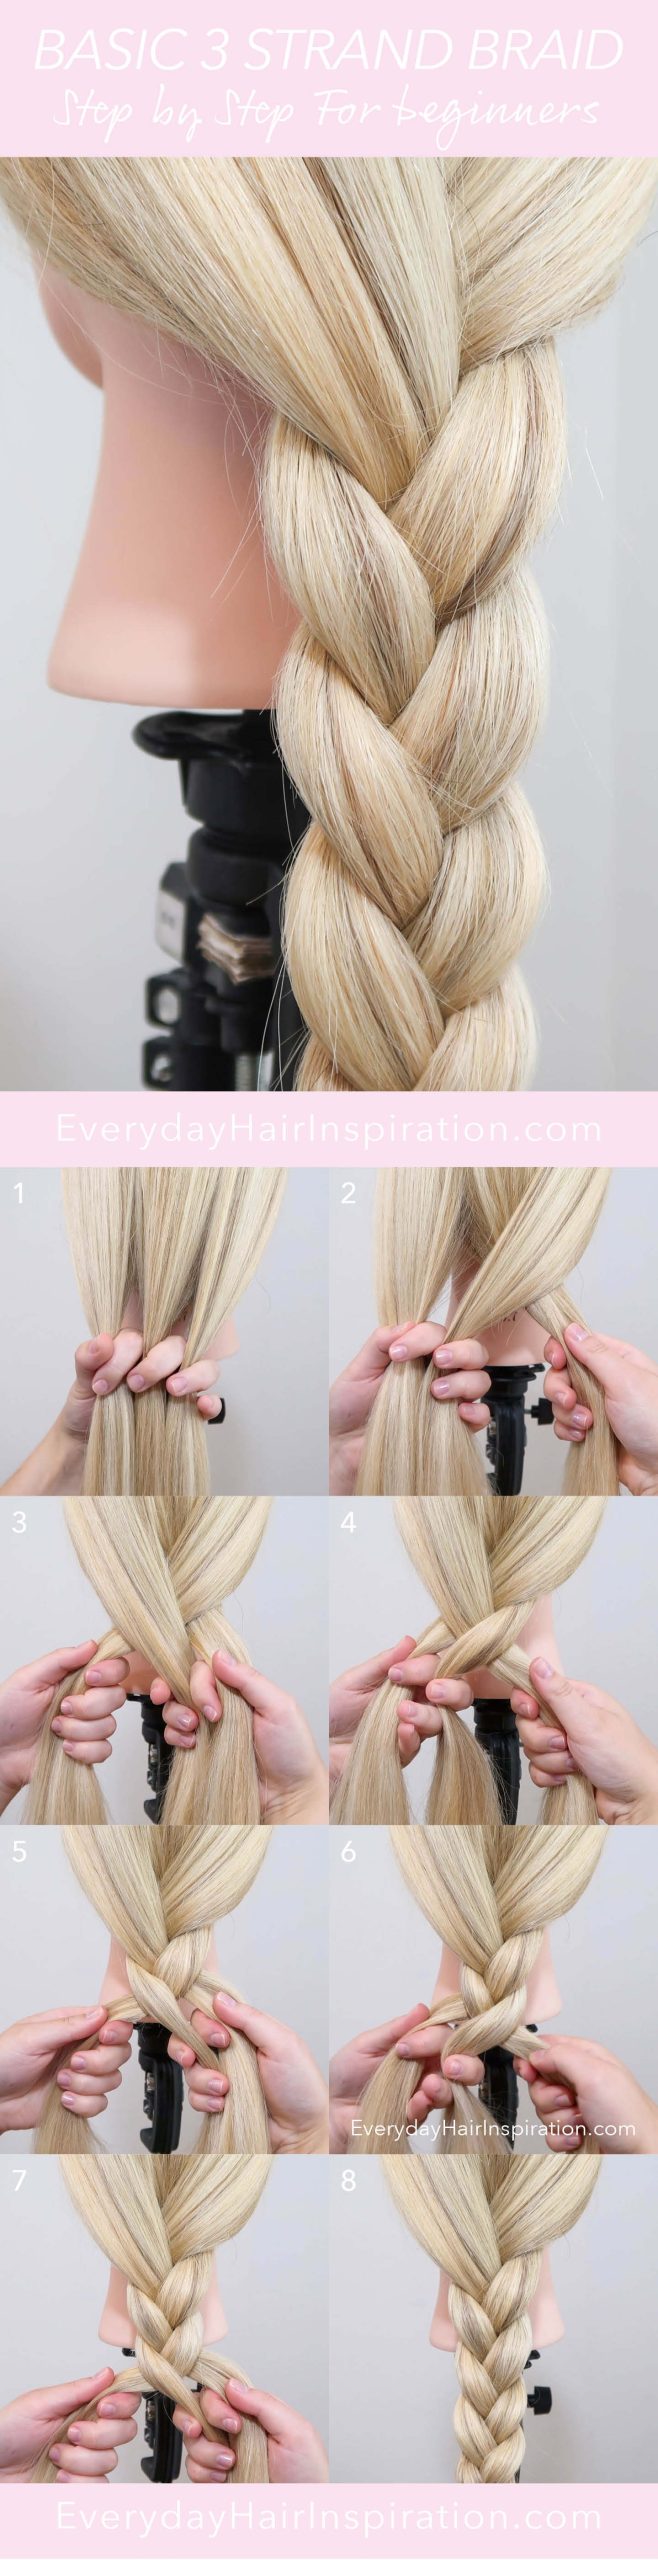
How to Do It
- Section Your Hair: Brush it all back and split it into three equal parts. Hold the left section in your left hand, the right in your right, and let the middle chill for a sec.
- Start Crossing: Take the right section and cross it over the middle. Now the right piece is the new middle.
- Switch Sides: Cross the left section over the new middle. Keep alternating like this—right over middle, left over middle.
- Keep It Tight: Pull gently as you go to avoid a floppy braid, but don’t yank too hard or it’ll hurt.
- Secure the End: Tie it off with a hair tie when you’re a couple inches from the bottom.
Why It’s Awesome
This braid is like the little black dress of hairstyles—simple, timeless, and works for everyone. It’s perfect for school, a quick workout, or even dressing up with some sparkly clips.
Common Struggles (And Fixes!)
- Uneven Sections: If one strand’s thicker, your braid looks lumpy. Fix it by double-checking your split at the start.
- Loose Ends: Strands slipping out? Wet your fingers slightly for extra grip.
- Arm Fatigue: Yeah, it’s a workout! Take breaks if you need to—your biceps will thank you.
Fun Fact: Did you know braiding’s been around for over 5,000 years? Archaeologists found braided hairstyles on ancient Egyptian mummies. Talk about a style with staying power!
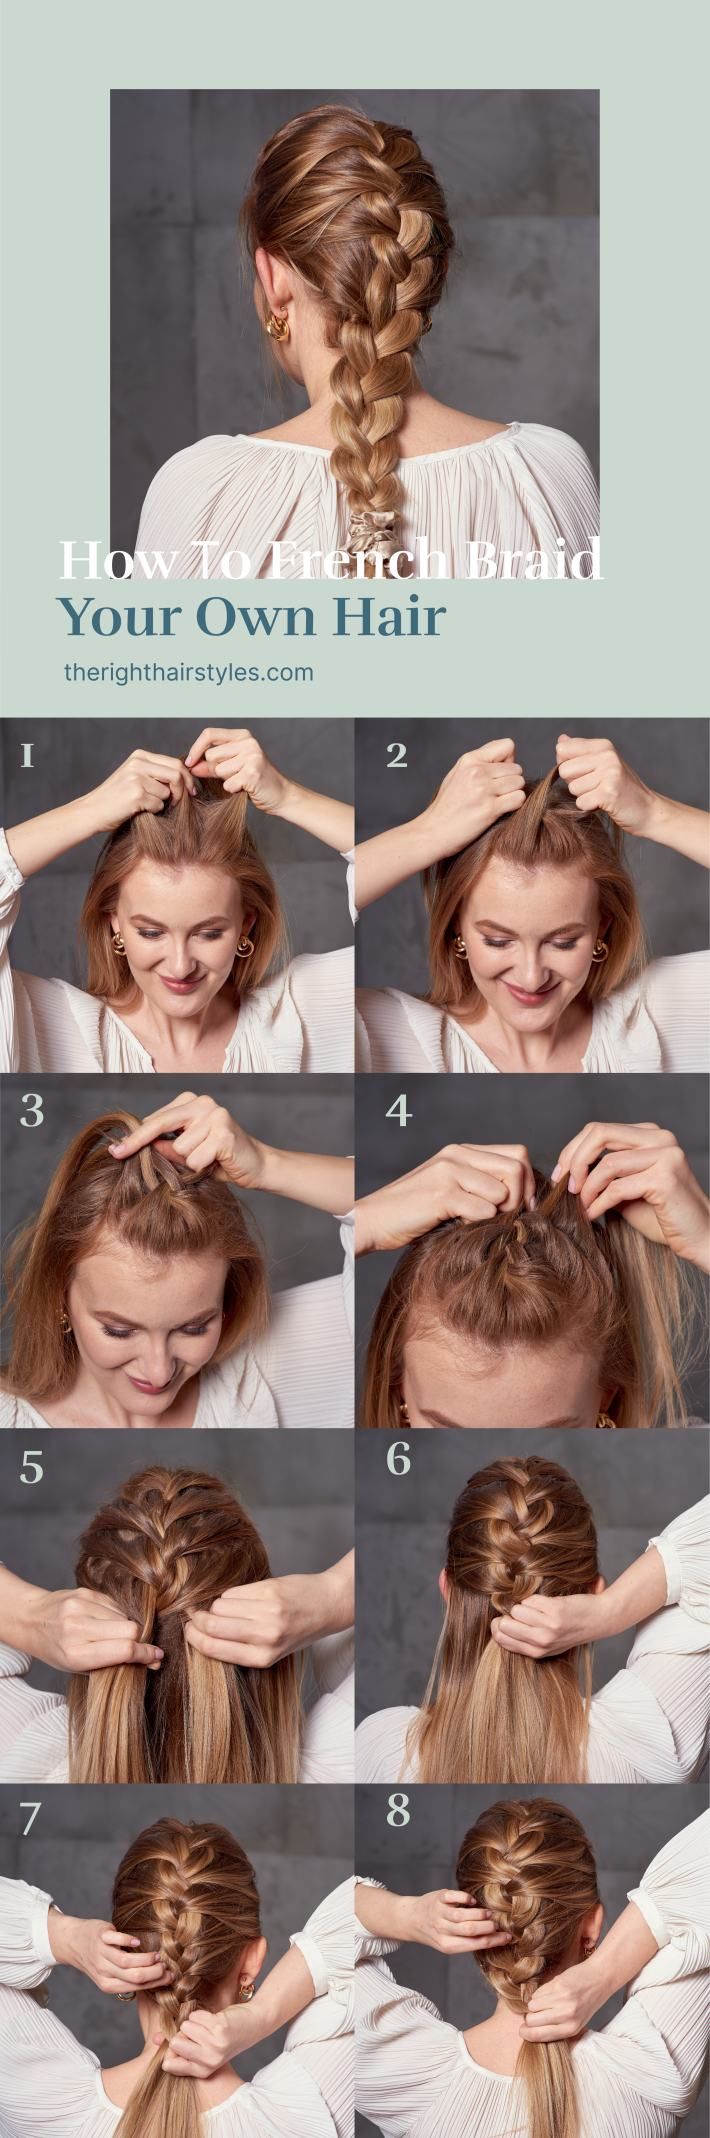
Level Up: The French Braid Made Easy
Once you’ve nailed the three-strand, it’s time to try a French braid. It looks fancy, but it’s just a matter of adding hair as you go. Think of it like leveling up in a video game—same moves, just a cool twist.
Step-by-Step French Braid
- Start at the Top: Grab a small section of hair from the crown of your head and split it into three.
- Begin Braiding: Do one or two rounds of the three-strand braid to anchor it.
- Add More Hair: Before each cross, grab a little extra hair from the side and mix it into the section you’re crossing over.
- Work Down: Keep adding hair from both sides until you reach the nape of your neck.
- Finish It Off: Braid the rest like a regular three-strand and tie it up.
Insider Secret
Here’s something you won’t find everywhere: tilt your head slightly forward while braiding. It gives you better control and stops the top from getting too loose. I figured this out after my first French braid looked more like a bird’s nest!
Why Fans Love It
- Keeps hair out of your face all day.
- Looks polished without much effort.
- Works for thick, thin, curly, or straight hair.
Expert Quote: “The French braid is a timeless classic because it’s both functional and beautiful,” says hairstylist Mia Carter, who’s worked with celebs like Zendaya. “It’s all about practice—once you get the rhythm, it’s like riding a bike.”
The Fishtail Braid: Messy, Cool, and Totally Doable
If you’re into that effortless, boho vibe, the fishtail braid is your new best friend. It looks complicated, but it’s actually just two sections instead of three. Let’s break it down.
How to Fishtail Like a Pro
- Divide Your Hair: Split it into two big sections—left and right.
- Take a Tiny Piece: From the outside of the left section, grab a thin strand (like a pinky-width) and cross it over to join the right section.
- Repeat on the Other Side: Take a thin strand from the outside of the right section and cross it to the left.
- Keep Going: Alternate sides, pulling small pieces each time, until you reach the end.
- Tie It Up: Secure with a hair tie, then gently tug the sides for that messy-chic look.
Why It’s Unique
Unlike other braids, the fishtail gives you that “I woke up like this” coolness. It’s perfect for festivals, beach days, or just when you want to feel artsy. Plus, it’s forgiving—mistakes just add to the vibe.
Troubleshooting Tips
- Too Tight?: Loosen it by pancaking—gently pulling the edges outward after you’re done.
- Slipping Out?: Use a tiny bit of texturizing spray for grip.
- Takes Forever?: Practice with bigger strands first, then go smaller as you get faster.
Did You Know?: A 2024 survey by Hair Trends Magazine found that 68% of teens say the fishtail is their favorite braid because it’s “cute but not try-hard.” That’s the energy we’re bringing here!
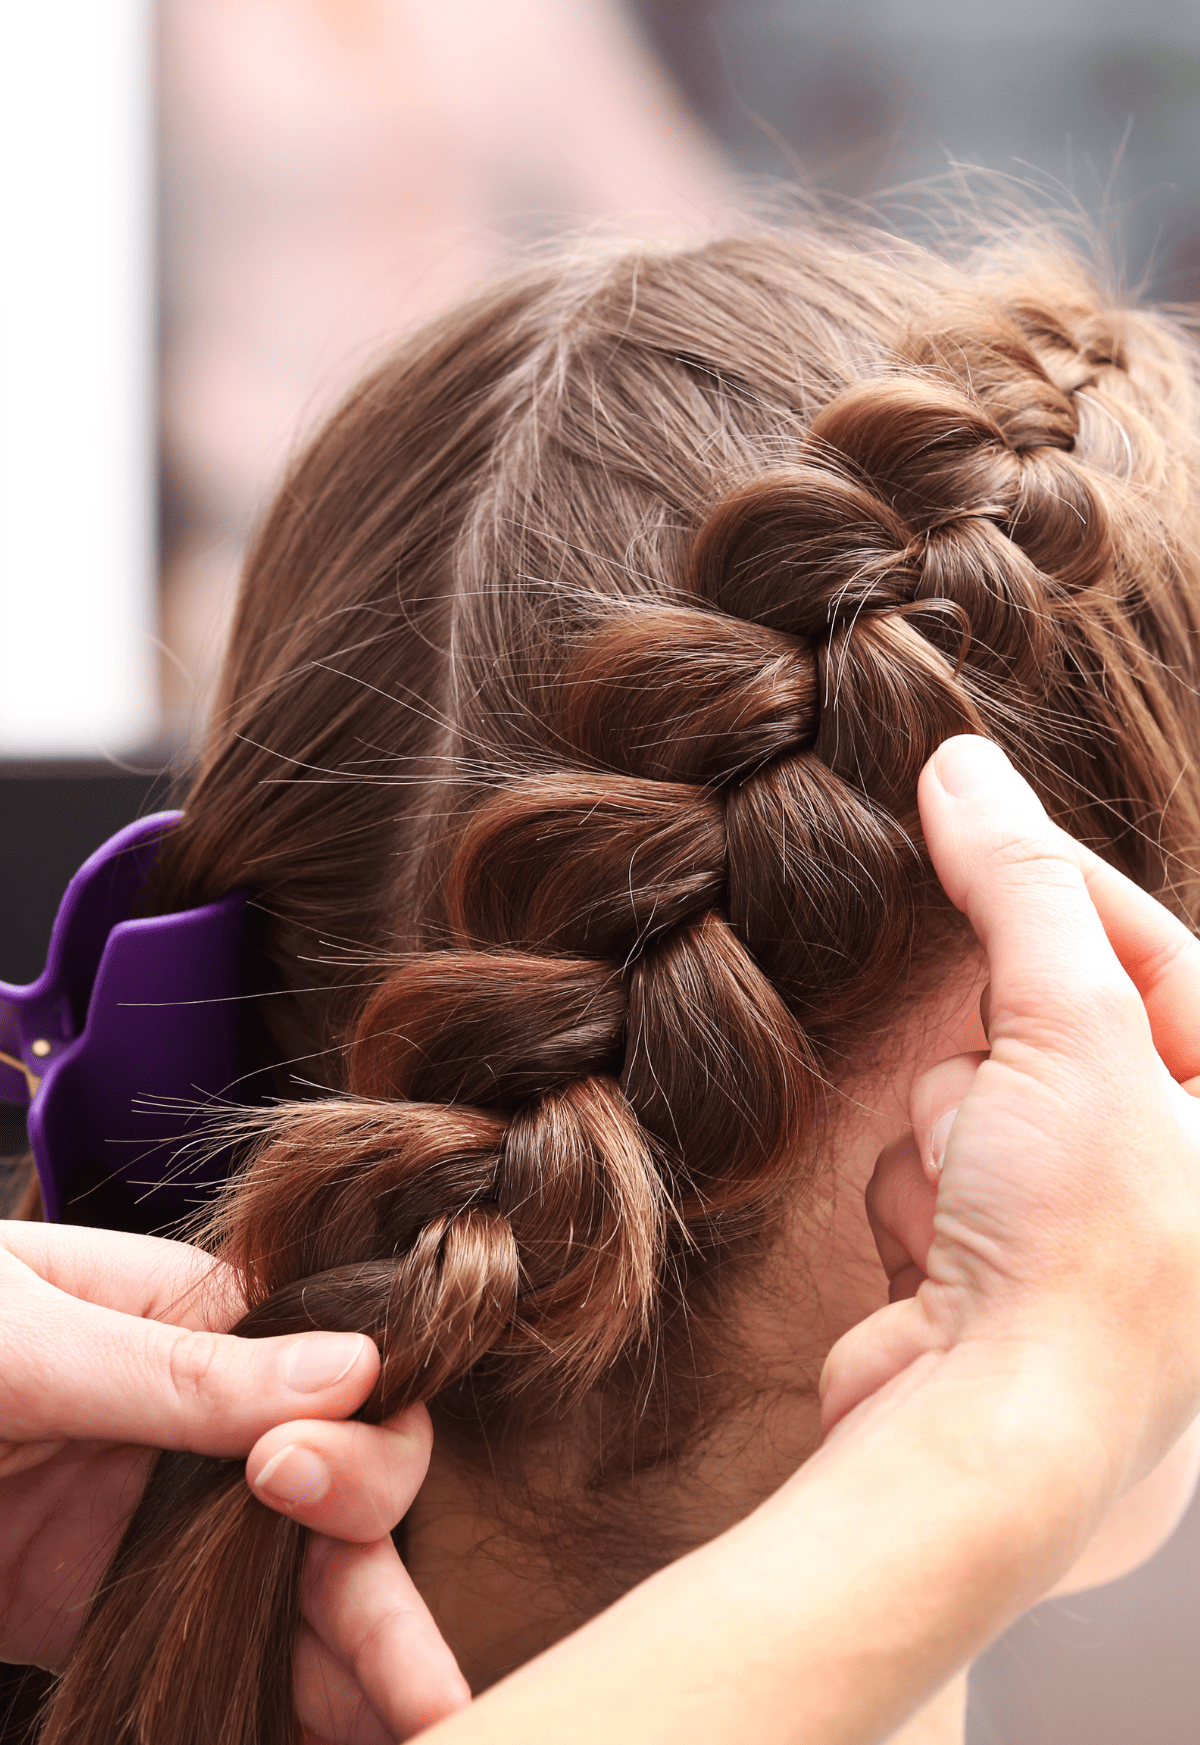
Dutch Braid: The Bold, Inside-Out Style
The Dutch braid (aka reverse French braid) is like the French braid’s edgier cousin. Instead of crossing strands over, you go under, making the braid pop out like a rope. It’s bold, badass, and surprisingly simple.
Dutch Braid Steps
- Grab a Section: Start at the top with a small chunk of hair, split into three.
- Go Under: Cross the right strand under the middle, then the left under the new middle.
- Add Hair: Pick up extra hair from the sides before each under-cross, just like a French braid.
- Braid Down: Keep it tight until you hit the nape, then finish with a regular braid.
- Secure It: Tie off and admire how it stands out.
Why It Stands Out
This braid literally stands out—its raised look makes it perfect for showing off your skills. It’s a fave for athletes too, since it stays put during sweaty workouts.
Little-Known Hack
Rub a tiny bit of pomade between your fingers before starting. It smooths flyaways and keeps the braid sleek. I stumbled on this after a windy day turned my Dutch braid into a frizzy mess!
Braiding Hacks You’ll Wish You Knew Sooner
Now that you’ve got the basics, let’s talk hacks. These are the game-changers that take your braids from “meh” to “wow”—and they’re so easy, you’ll wonder why no one told you sooner.
Hack #1: The Sock Trick
- What: Use a clean sock to practice braiding before tackling your hair.
- Why: It’s less slippery than hair, so you can focus on the technique.
- How: Cut the toe off, unravel it into strands, and braid away.
Hack #2: Mirror Magic
- What: Use two mirrors—one in front, one handheld—to see every angle.
- Why: No more guessing what’s happening back there.
- How: Hold the small mirror with one hand while braiding with the other.
Hack #3: Nighttime Prep
- What: Braid damp hair before bed for waves in the morning.
- Why: Two styles in one—braid by night, waves by day.
- How: Loose French or three-strand works best; undo when you wake up.
Expert Quote: “Little tweaks like these can cut your learning curve in half,” says braiding guru Lena Ortiz, who teaches workshops across the U.S. “It’s all about making it fun and stress-free.”
Answers to Your Top Braiding Questions
You’ve got questions, I’ve got answers. Let’s tackle the stuff that’s been tripping you up, based on what real people are asking online and in life.
Why Does My Braid Fall Apart?
- Reason: Too much slip or not enough tension.
- Fix: Spritz with water or add a light holding spray mid-braid. Pull tighter (but not painfully) as you go.
How Do I Braid Short Hair?
- Challenge: Strands slip out easier.
- Solution: Start with mini French or Dutch braids near your scalp. Use bobby pins to tuck in loose ends.
Can Curly Hair Be Braided?
- Truth: Yes, and it looks amazing!
- Tip: Stretch curls slightly with your fingers while braiding to keep it neat. A little leave-in conditioner helps too.
How Long Should It Take?
- Beginner: 15-20 minutes per braid.
- Pro: 5-10 minutes once you’ve got it down.
- Hack: Time yourself—it’s motivating to see progress!
Protective Braiding: Keep Your Hair Happy
Braids aren’t just cute—they can protect your hair too. If you’re someone who loves low-maintenance styles or wants to give your strands a break, this section’s for you.
What Makes a Braid Protective?
- Keeps ends tucked away from damage.
- Reduces brushing and heat styling.
- Locks in moisture if you prep right.
Best Protective Braid: Cornrows
- Part Hair: Use a comb to make straight lines (think rows of corn!).
- Braid Close to Scalp: Start with three strands, adding hair like a French braid, but keep it flat.
- Repeat: Do multiple rows for full coverage.
- Seal It: Dab a bit of oil on your scalp to avoid dryness.
Care Tips
✔️ Moisturize: Use a spray bottle with water and oil weekly.
✔️ Sleep Smart: Wrap in a silk scarf to avoid frizz.
❌ Don’t Overdo It: Take braids out after 4-6 weeks to avoid buildup.
Science Bit: A 2024 study from Trichology Today found that protective styles like braids can cut split ends by up to 30% compared to loose hair. That’s a win for healthy locks!
Advanced Braiding: Take It to the Next Level
Ready to show off? These advanced styles will have everyone asking, “How’d you do that?” They’re not as hard as they look—promise.
Waterfall Braid
- Look: Strands “fall” like a waterfall while the rest braids along.
- How: Start a French braid, but drop the bottom strand each time and pick up a new one from below.
- Perfect For: Date night or a fancy brunch.
Four-Strand Braid
- Look: Wider and more intricate than a three-strand.
- How: Number strands 1-4. Cross 1 under 2, over 3, then 4 under 3, over 2. Repeat the pattern.
- Tip: Watch your hands—it’s like a dance!
Bonus: Add Beads or Threads
- What: Slide beads onto strands or wrap colorful thread around sections.
- Why: Instant personality boost.
- How: Thread beads before braiding or weave thread in as you go.
Braiding for Every Hair Type
Not all hair braids the same, and that’s okay! Here’s how to tweak your technique for your unique texture.
Straight Hair
- Challenge: Slippery and hard to grip.
- Fix: Add texture with dry shampoo or a light mist of hairspray.
Curly Hair
- Challenge: Frizz and uneven sections.
- Fix: Braid while damp and use a bit of cream to smooth it out.
Thick Hair
- Challenge: Takes longer and can feel heavy.
- Fix: Split into smaller braids (like two French braids) for control.
Thin Hair
- Challenge: Braids look flat.
- Fix: Pancake the braid by tugging edges for volume.
The Mental Perks of Braiding (Yes, Really!)
Braiding isn’t just about hair—it’s a mini mental health boost too. Ever notice how calming it feels to twist those strands? There’s a reason for that.
Why It’s Relaxing
- Focus: It’s like a puzzle that pulls you into the moment.
- Repetition: The rhythm soothes your brain, kind of like knitting or doodling.
- Creativity: Making something pretty feels good inside.
Science Says: A 2023 study in Mindfulness Journal found that repetitive hand tasks (like braiding) lower stress hormones by 15% in just 20 minutes. So next time you’re frazzled, grab your comb and braid away!
My Story
I started braiding during a tough week—exams, drama, the works. Ten minutes in, I forgot all about it. Now it’s my go-to when I need a breather. What’s your chill-out trick?
Fixing Braiding Fails: What to Do When It Goes Wrong
Even pros mess up sometimes. Here’s how to save your braid when it’s not cooperating.
Problem: Bumpy Braid
- Why: Uneven tension or lumpy sections.
- Fix: Undo to the bump, smooth it out, and re-braid with steady pulls.
Problem: Flyaways Everywhere
- Why: Dry hair or static.
- Fix: Rub a dryer sheet over your hair (seriously!) or use a tiny bit of pomade.
Problem: Hurts Your Scalp
- Why: Too tight near the roots.
- Fix: Loosen the top sections and massage your scalp—ouchies begone!
Expert Quote: “Mistakes are part of the fun,” says stylist Jamal Evans, who’s braided for music videos. “Every oops is a chance to learn something new.”
Braiding Trends to Try in 2025
What’s hot right now? Let’s peek at the latest braid crazes sweeping social media and runways.
Micro Braids
- What: Super tiny braids all over.
- Why: Bold and long-lasting (up to 8 weeks!).
- How: Section into tiny parts and braid tight—patience required.
Mixed Textures
- What: Combine braids with loose waves or curls.
- Why: Playful and eye-catching.
- How: Braid half, leave the rest free, and curl if you want.
Colorful Accents
- What: Add bright threads or extensions.
- Why: Pops of color without dye.
- How: Weave in as you braid—easy peasy.
Trend Alert: TikTok’s #BraidChallenge racked up 2 million views in January 2025, with teens showing off wild combos. What’s your twist?
Your Braiding Routine: Make It a Habit
Want braiding to feel as natural as brushing your teeth? Build it into your life with these tips.
Daily Practice
- Time: 10 minutes a day—before bed or during TV time.
- Goal: Try one new style a week.
- Reward: Snap a pic when you nail it—bragging rights!
Weekly Care
- Cleanse: Wash every 7-10 days to avoid buildup.
- Moisturize: Spritz with water and oil to keep it fresh.
- Rest: Give your scalp a break between styles.
Track Your Progress
- Day 1: Three-strand (messy but done!)
- Day 7: French braid (not bad!)
- Day 30: Fishtail like a boss.
Let’s Get Interactive: Your Turn!
You’ve got the tools, the tricks, and the know-how—now it’s time to braid! Here’s how to join the fun:
Try This Challenge
- Pick one braid from this guide.
- Do it this week (yes, even if it’s wonky at first).
- Share a pic or tell me how it went in the comments below!
Ask Me Anything
- Stuck on a step? Hair too short? Too curly?
- Drop your question below—I’ll help you out.
Fun Poll
Which braid are you dying to try?
- A) Classic Three-Strand
- B) French Braid
- C) Fishtail
- D) Dutch Braid
Let me know—I’m curious!
Braiding’s all about experimenting and having a good time. So grab your comb, crank some tunes, and let’s make your hair the star of the show. What’s your first braid gonna be?
Leave your comment
Related posts