How to Do Individual Crochet Braids: Your Ultimate DIY Guide
Hey there, hair enthusiasts! If you’ve ever dreamed of rocking a fresh, protective hairstyle without spending hours in a salon chair or breaking the bank, individual crochet braids might just be your new best friend. This style is all about giving you that natural, free-flowing look while keeping your real hair tucked away safely. Plus, it’s something you can totally do at home—no fancy skills required! Whether you’re new to the game or a seasoned DIY-er looking to level up, this guide is packed with everything you need to know to master individual crochet braids. From secret tips I’ve picked up over the years to the latest hacks trending in 2025, I’ve got you covered. Let’s dive in!
What Are Individual Crochet Braids, Anyway?
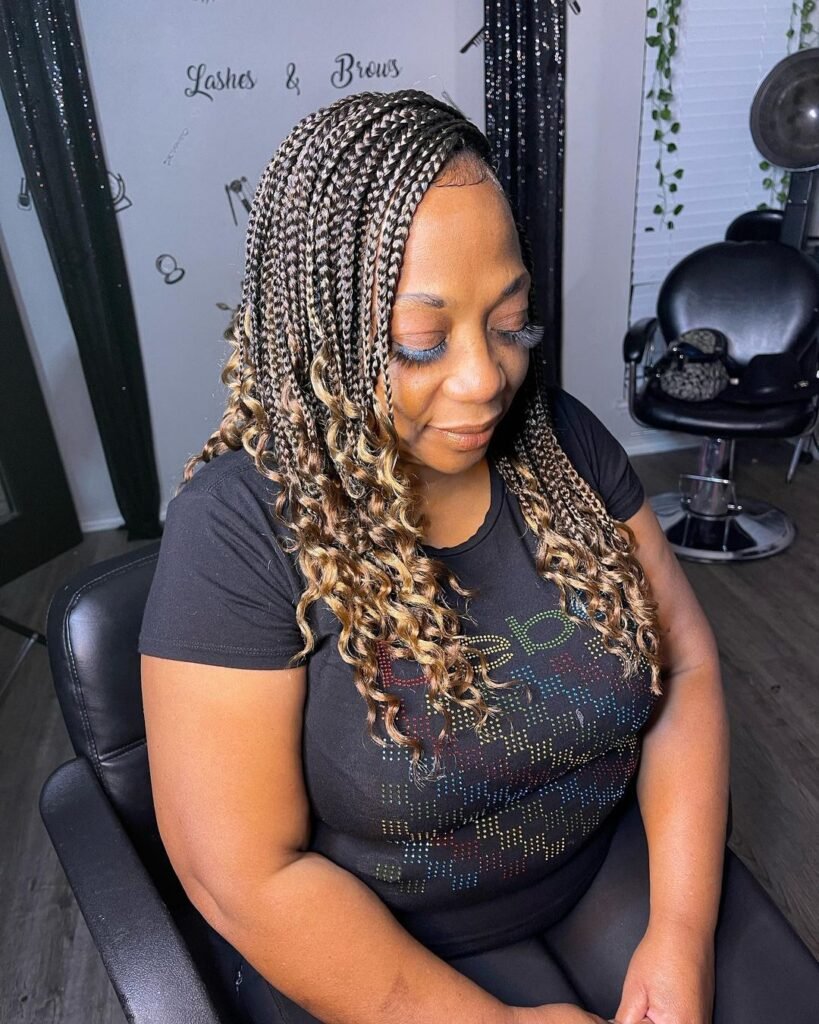
First things first: what makes individual crochet braids different from the usual crochet styles? Unlike traditional crochet braids, where you cornrow your hair and loop extensions through the braids, the individual method skips the cornrows. Instead, you braid your natural hair into small, single plaits and attach pre-made braids or twists directly to them. Think of it like giving each strand its own little VIP treatment—more movement, more natural vibes, and way less bulk at the scalp.
Why do people love this style? It’s lightweight, versatile, and perfect for anyone who wants a break from tight cornrows or heavy weaves. Plus, it’s a total game-changer if you’ve got short hair or just want a quicker install. I’ve been hooked ever since I tried it during a rainy weekend when I was too cozy to leave the house—true story!
Why Choose Individual Crochet Braids?
Before we get into the how-to, let’s talk about why this style deserves a spot in your hair routine. Here’s the lowdown:
- Time-Saver Alert: You can finish this in 2-3 hours, compared to 6-8 hours for box braids. Who doesn’t love that?
- Scalp-Friendly: No tight cornrows means less tension and happier edges.
- Natural Look: The individual method mimics real hair growth, so you can fool anyone into thinking it’s all yours.
- DIY Heaven: You don’t need a pro—just a little patience and some Netflix to keep you company.
Fun fact: I once did my braids while binge-watching a true-crime series. By the time I solved the mystery, my hair was done! It’s that easy.
Tools and Supplies You’ll Need
Ready to get started? Here’s your shopping list. Don’t worry—most of this stuff is probably already lying around your house or super cheap to grab.
Must-Haves
✔️ Crochet Hook: A latch hook (around 1mm-2mm) works best for hair. It’s like a mini magic wand for weaving in extensions.
✔️ Pre-Braided Hair: Go for synthetic options like Kanekalon or Toyotress box braids. You’ll need 5-7 packs depending on your head size and desired fullness.
✔️ Scissors: For trimming ends or cutting hair packs.
✔️ Rat-Tail Comb: Perfect for parting your hair into neat sections.
✔️ Hair Clips: To keep sections out of the way while you work.
✔️ Moisturizer or Oil: Think coconut oil or a leave-in conditioner to prep your natural hair.
✔️ Spray Bottle: Filled with water to keep your hair manageable.
Nice-to-Haves
✔️ Mirror with a Stand: So you can see the back of your head without twisting into a pretzel.
✔️ Edge Control Gel: For slicking down your hairline post-install.
✔️ Satin Bonnet: To protect your masterpiece while you sleep.
Pro tip: I stash my supplies in a cute little basket I got from a thrift store. It’s my “hair day survival kit,” and it makes me feel like a crafting queen every time I pull it out.
Step-by-Step: How to Install Individual Crochet Braids
Now, let’s get to the good stuff—the actual process! Follow these steps, and you’ll be slaying in no time. I’ll break it down so even if you’ve never touched a crochet hook, you’ll feel like a pro by the end.
Step 1: Prep Your Natural Hair
Your hair is the foundation, so treat it right! Start with clean, moisturized locks to avoid breakage or dryness later.
- Wash your hair with a gentle shampoo and follow up with a deep conditioner. I love adding a few drops of tea tree oil—it’s my secret for a fresh scalp.
- Detangle with a wide-tooth comb while it’s wet. Trust me, this saves you a headache later.
- Lightly blow-dry or air-dry until it’s damp, not soaking. Then, apply a light oil or leave-in conditioner to lock in moisture.
Why bother? Healthy hair holds up better under extensions, and you’ll thank yourself when it’s time to take them down.
Step 2: Section and Braid Your Hair
This is where the individual magic happens. You’re creating tiny plaits that’ll anchor your crochet braids.
- Use your rat-tail comb to part your hair into small, even sections. Aim for 1-inch squares—about the size of a dime.
- Braid each section into a small, single plait. Don’t make them too tight; you want your scalp to breathe. Secure the ends with a twist—no rubber bands needed!
- Work from the back to the front so you can hide any wonky braids under the top layers.
Real talk: My first time, I made my braids way too big, and the extensions looked clunky. Smaller is better—think bite-sized, not chunky!
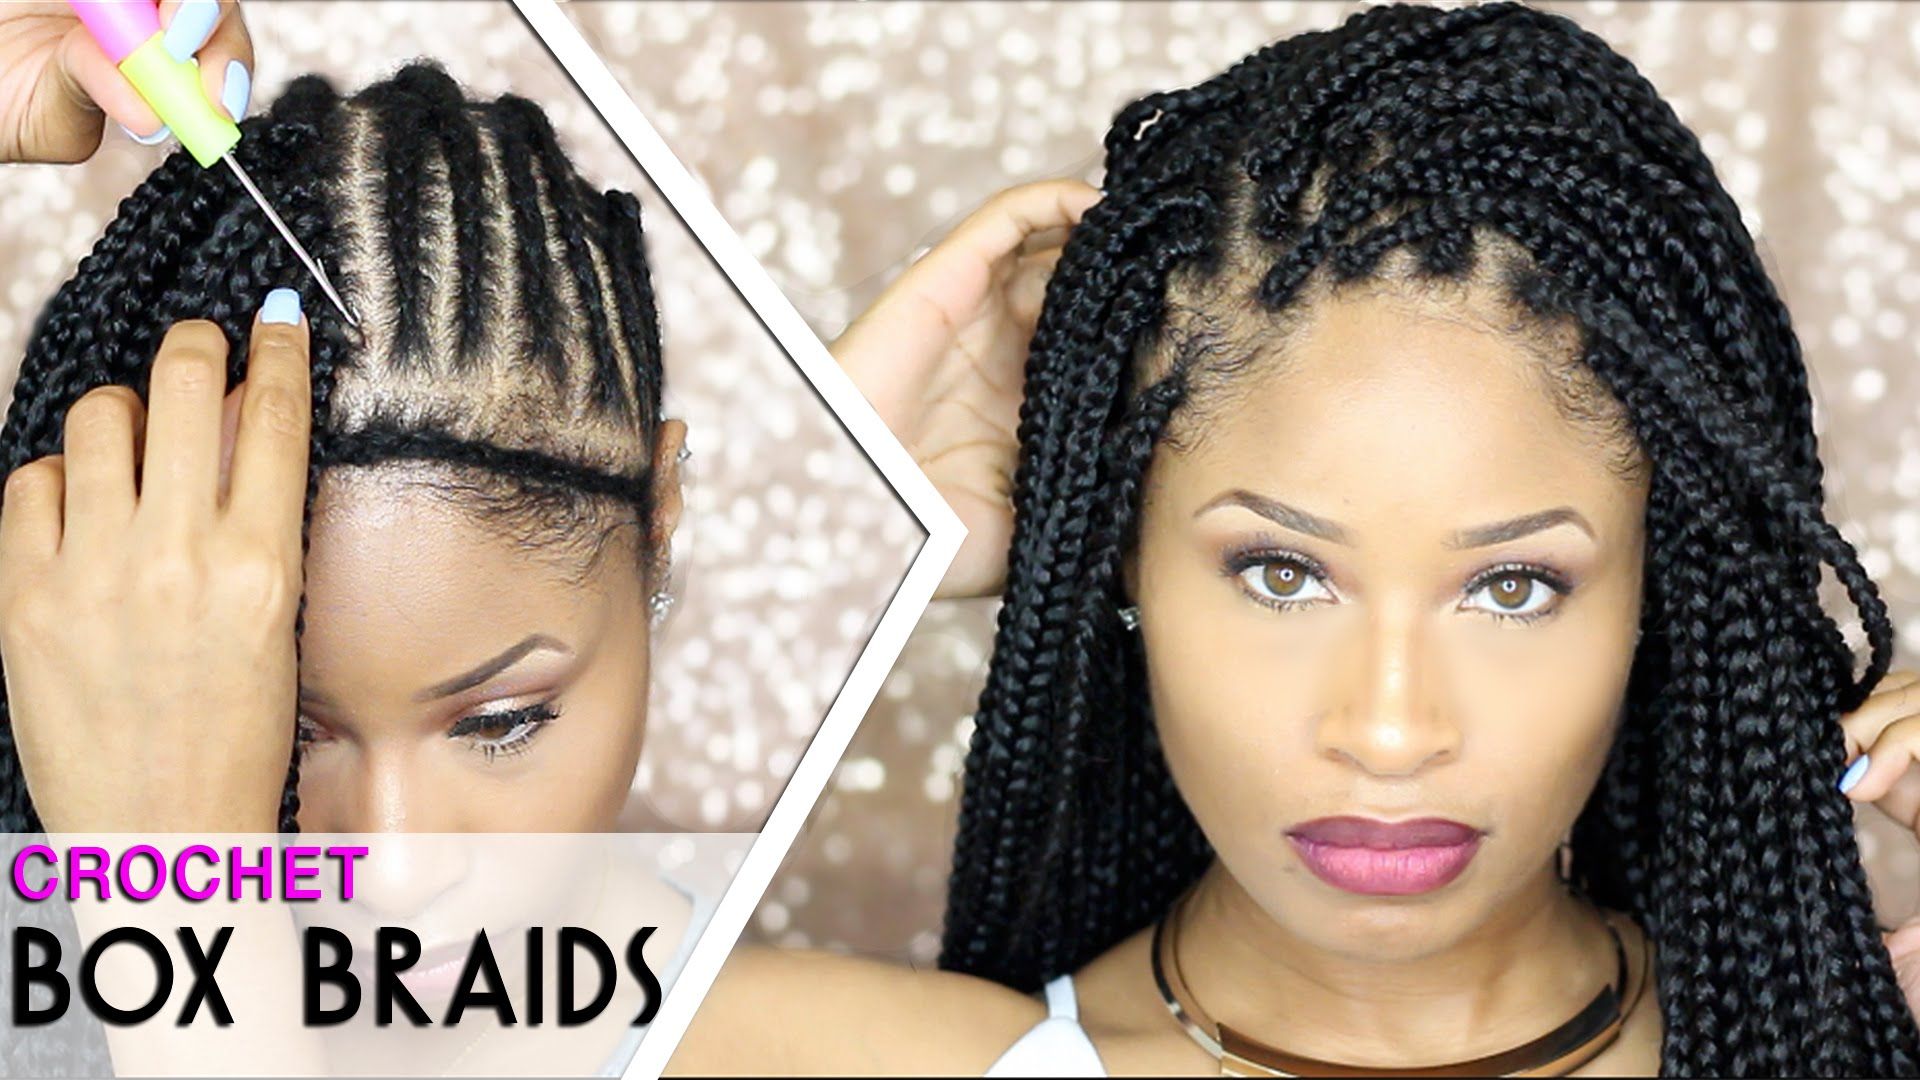
Step 3: Attach the Crochet Braids
Here’s where the fun begins. Grab your latch hook and let’s weave some magic.
- Pick Your Extension: Take one pre-braided piece (like a box braid or twist) and fold it in half to find the loop.
- Hook It Up: Slide your latch hook under the base of one plait, near the scalp. Catch the loop of the extension with the hook and pull it halfway through the plait.
- Secure It: Take the loose ends of the extension and thread them through the loop you just pulled through. Pull tight to lock it in place.
- Hide the Plait: Tuck your natural plait into the extension braid for a seamless look. You can use the hook to pull it through if it’s stubborn.
- Repeat: Move on to the next plait and keep going until your whole head is done.
Insider tip: I like to start at the nape and work up in rows—it’s like painting a canvas, one stroke at a time.
Step 4: Trim and Style
Once all the braids are in, it’s time to polish things up.
- Trim any uneven ends with scissors for a clean finish.
- Use edge control to smooth down your hairline if you want a sleek vibe.
- Fluff the braids with your fingers for volume or leave them tight for a polished look.
I once left my ends untrimmed for a boho vibe, and my friends thought I’d paid a stylist—little did they know it was just me and my scissors!
How Long Does It Take to Learn?
Here’s a question I get a lot: “How fast can I get good at this?” The truth? It depends on you, but most people nail it after a couple of tries.
- First Attempt: Expect 4-5 hours as you figure out the hook and braiding rhythm. My debut took me all afternoon, but I was hooked (pun intended).
- Second Go: You’ll shave it down to 3-4 hours as your hands get the hang of it.
- Pro Status: After a few installs, you’re looking at 2-3 hours tops.
“Practice makes perfect,” says hairstylist Amber Rose, who’s been braiding for over a decade. “The more you do it, the faster your muscle memory kicks in.” So don’t stress if your first try isn’t flawless—it’s all part of the journey!
Choosing the Right Hair: Synthetic vs. Human
Picking the right hair can make or break your style. Let’s break it down.
| Type | Pros | Cons | Best For |
|---|---|---|---|
| Synthetic | Affordable, lightweight, lots of colors | Can tangle, less durable | Beginners, short-term wear |
| Human Hair | Natural feel, lasts longer | Pricey, heavier | Long-term wear, special occasions |
Most folks start with synthetic—like Kanekalon or Marley hair—because it’s budget-friendly (around $5-$10 per pack) and easy to find. I’m obsessed with trying funky colors like purple or ombre, which you’d never get with human hair without dyeing it first. But if you’re feeling bougie, human hair is worth the splurge for that silky, real-hair flex.
Latest scoop: A 2025 Consumer Reports study found some synthetic braiding hair contains VOCs (volatile organic compounds) that can irritate your scalp. Look for brands labeled “non-toxic” or “plant-based” like Rebundle to play it safe.
Top Mistakes to Avoid (And How to Fix Them)
Even the best of us mess up sometimes. Here’s what to watch out for—and how to bounce back.
❌ Braiding Too Tight: Hurts your scalp and can cause breakage.
✔️ Fix: Keep your plaits loose enough to slide a finger under them.
❌ Using Too Much Hair: Makes your head feel heavy and looks unnatural.
✔️ Fix: Stick to 5-6 packs max for medium fullness—less is more!
❌ Skipping Moisture: Dry hair under braids leads to itchiness and damage.
✔️ Fix: Spritz with a water-and-oil mix every few days.
My biggest flop? I once used eight packs because I wanted “extra volume”—ended up looking like a lion and took it all out the next day. Lesson learned!
Maintenance Tips to Keep Your Braids Fresh
You’ve put in the work—now let’s make it last! Individual crochet braids can stay fly for 4-6 weeks with the right care.
Daily Care
- Sleep Smart: Pop on a satin bonnet or use a silk pillowcase to cut down on frizz. I’ve got a leopard-print bonnet that’s my nightly must-have.
- Scalp Love: Massage in a light oil (like jojoba) every 2-3 days to stop itching. Avoid heavy creams—they build up fast.
Weekly TLC
- Clean It Up: Mix water, shampoo, and a drop of conditioner in a spray bottle. Mist your scalp, massage gently, and rinse with a damp cloth.
- Refresh the Ends: Dip the tips in hot water (not boiling!) to reseal synthetic hair and kill frizz.
“Moisture is your hair’s lifeline,” says celebrity braider Xia Charles. “Skip it, and you’re asking for trouble.” She’s right—my longest-lasting install was when I stayed on top of my spray bottle game.
Taking Them Down Without Tears
When it’s time to say goodbye (usually after 4-6 weeks), don’t just yank them out—your hair deserves better!
- Cut Carefully: Snip the extensions close to the knot, leaving your natural plait intact.
- Unloop: Gently slide the leftover knot off your plait. If it’s stuck, use a little conditioner to loosen it.
- Detangle: Comb out your natural hair with a wide-tooth comb, starting at the ends.
- Wash & Treat: Give your hair a deep conditioning session to bring it back to life.
I’ve cried over a bad takedown before—tangles everywhere! Now, I blast music and take my time. It’s like a little self-care party.
Creative Styling Ideas to Switch It Up
Individual crochet braids aren’t just a set-it-and-forget-it style. Here’s how to keep things fun:
- Half-Up Bun: Pull the top half into a messy bun—perfect for lazy days.
- Side Part Vibes: Flip your braids to one side for a bold, asymmetrical look.
- Bead It: Add wooden or metal beads to the ends for a playful touch. I raided my old jewelry box for mine!
- Color Pop: Mix in a few colored braids (think pink or blue) for a festival-ready style.
Last summer, I rocked a high ponytail with gold beads for a barbecue—got so many compliments, I felt like a hair influencer!
The Science Behind Protective Styles
Did you know there’s actual research backing up why styles like this are so good for your hair? A 2023 study from the Journal of Cosmetic Dermatology found that protective styles reduce mechanical damage (like brushing or heat styling) by up to 60%. That means less split ends and more growth over time. Another cool tidbit: keeping your ends tucked away cuts down on environmental stress—like wind or sun exposure—by nearly half. So yeah, you’re not just looking cute—you’re giving your hair a legit break!
Insider Secrets Fans Are Dying to Know
Alright, let’s spill some tea—stuff you won’t find in every tutorial out there.
- My Weird Habit: I talk to my hair while I braid. “You’re doing great, little strand!” It’s silly, but it keeps me chill during the process.
- Hidden Hobby: I collect funky crochet hooks—like ones with glitter handles or animal shapes. My fave is a panda hook I found online!
- Scalp Soother: Mix aloe vera gel with water in a spray bottle for an instant itch fix. It’s my go-to when I’m too lazy to oil up.
Fans always ask about my playlist—think chill lo-fi beats or throwback R&B. It’s my secret weapon for staying in the zone.
Troubleshooting Q&A: Your Burning Questions Answered
Got a snag? I’ve heard it all—here’s what to do.
Q: My braids look bulky at the scalp. Help!
A: You might be using too much extension hair per plait. Try splitting the pre-braided pieces in half before attaching.
Q: My scalp itches like crazy—what gives?
A: Could be dryness or product buildup. Spritz with that aloe mix I mentioned and ease up on heavy gels.
Q: How do I make it look more natural?
A: Leave a few of your own braids peeking out near the hairline—it blends everything together like magic.
Level Up: Advanced Tips for Pros
Already a crochet wiz? Take it to the next level with these tricks:
- Mix Textures: Combine box braids with twists for a cool, layered effect.
- Custom Length: Cut your extensions to match your natural hair for a subtle grow-out look.
- No-Heat Curl: Wrap damp braids around flexi-rods overnight for bouncy ends without frying them.
I once mixed Marley twists with box braids for a wedding—people thought I’d spent hours at a salon. Nope, just me and my trusty hook!
How to Shop Smart for Hair
Buying hair can feel overwhelming, so here’s my foolproof guide:
- In-Store: Feel the texture and check the weight. Lighter packs = comfier wear.
- Online: Stick to trusted brands (Freetress, X-Pression) and read reviews for tangle warnings.
- Quantity: 5 packs for a sleek look, 6-7 for full-on drama. I always grab an extra pack—just in case!
Hot tip: Hit up your local beauty supply store during a sale. I snagged six packs for $25 once—score!
The Emotional Perks No One Talks About
Here’s something deeper: doing your own hair is a mood-lifter. There’s this quiet pride in looking in the mirror and knowing you made it happen. Studies from the American Psychological Association (2024) show crafting boosts self-esteem by 30%—and hair totally counts! For me, it’s therapy—better than scrolling TikTok for hours. Have you ever felt that rush after finishing a style? It’s unbeatable.
Let’s Chat: Your Turn!
You’ve got the full scoop—now I want to hear from you! Drop a comment below and tell me:
- What’s your fave braid style to crochet?
- Got any secret tips I missed?
- How do you keep yourself entertained while installing?
Let’s build a little hair community right here. Oh, and if you try this out, tag me on X with a pic—I’d love to hype you up! Happy braiding, fam!
Leave your comment
Related posts