Hey there! Wigs can be a game-changer whether you need them for necessity or just for fun. But getting that natural look can be a bit tricky. Don’t worry, I’ve got you covered. Here’s a step-by-step guide to making your wig look as real as possible. Let’s dive in!

Part 1: Prepping Your Hair and Head
Step 1: Choose Your Wig Type
First things first, you need to pick the right wig. There are three main types: full lace, partial or front lace, and non-lace wigs. Plus, they come in different materials like human hair, animal hair, and synthetic hair. Each type has its pros and cons, so choose the one that fits your needs and budget.
Full Lace Wig: These wigs have a lace mesh cap with hair sewn all over. They give a super natural look and can be parted anywhere. They are usually made with human or animal hair and are breathable, making them comfy to wear. However, they can be pricey and are more delicate.
Front or Partial Lace Wig: These wigs have lace only at the front, giving you a natural-looking hairline. They are made with more durable materials for the rest of the wig. They can be made from human, animal, or synthetic hair and are cheaper than full lace wigs. But they might not look as natural or be as easy to style.
Non-Lace Wig: Made with materials like nylon mesh, these wigs are durable and affordable. They can be made from any type of hair but don’t look as realistic and might not blend as well with your natural hairline.
Step 2: Prepare Your Hair
To avoid bumps or uneven places under your wig, you need to prep your natural hair. Whether your hair is long or short, make sure it’s pulled back from your hairline.
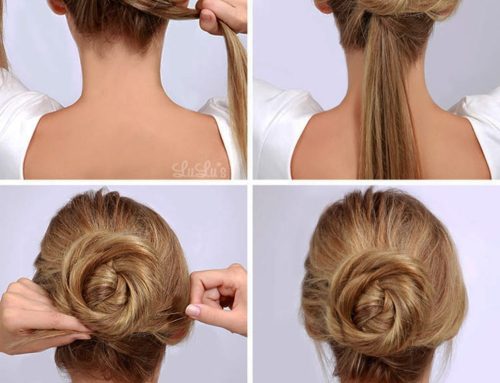
For Long Hair: Divide your hair into two sections, twist them, and cross them at the back of your head. Secure with bobby pins.
For Thick Hair: Create small twists and pin them flat against your head with bobby pins.
For Short Hair: Simply comb and pin your hair away from your hairline. You can also use a stretchy headband to keep your hair in place.
Step 3: Prepare Your Skin
Clean the skin around your hairline with a cotton pad dipped in alcohol. This removes oils and impurities, helping the glue or tape stick better. Next, apply a scalp protector to prevent irritation from the adhesive.
Step 4: Put on a Wig Cap
A wig cap helps keep your natural hair in place and makes the wig fit better. You can choose a net cap for breathability or a skin-toned nylon cap for a natural look. Stretch the cap over your head, aligning it with your hairline, and secure it with bobby pins.
Step 5: Apply Glue or Adhesive Tape
For wig glue, use a small makeup brush to apply a thin layer around your hairline. Let it dry until it’s tacky. For adhesive tape, place double-sided strips along your hairline, leaving small gaps for ventilation. You can use a combination of both methods for extra security.
Part 2: Applying the Wig
Step 1: Prepare the Wig
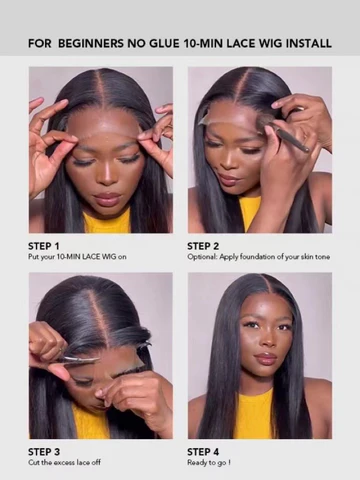
Before you apply the wig, tie back the hair or clip it to avoid getting it caught in the glue or tape. If you have a lace wig, trim the lace to match your hairline, leaving a little extra for a natural look.
Step 2: Place the Wig
Hold the wig at the front and position it on your forehead. Gently pull it over your head, keeping the sides away from the adhesive until you’re ready to secure it. Take your time to adjust it properly.
Step 3: Secure the Wig
Press down the front edges of the wig with a fine-toothed comb to secure it. Make sure the lace lies flat against your head for a natural hairline. Wait 15 minutes for the adhesive to set, then secure the back. You can use bobby pins for extra security.
Step 4: Style and Accessorize
Once the wig is secure, you can style it however you like. Braids, curls, or accessories – the choice is yours! Just remember, if it’s a synthetic wig, avoid using heat as it can damage the fibers.
Personal Story
The first time I wore a wig, I was so nervous it wouldn’t look natural. I remember spending hours in front of the mirror, adjusting and readjusting. But with practice, it became easier. Now, putting on a wig is like second nature to me. It’s all about finding what works for you and feeling confident in your look.
Conclusion
Applying a wig doesn’t have to be complicated. With these steps, you can make your wig look natural and feel comfortable. Take your time, be gentle, and soon you’ll be rocking that wig with confidence. Happy styling!
How to Apply a Wig: 7 Essential FAQs
1. What’s the best type of wig for a natural look?
Great question! If you’re after a super natural look, go for a full lace wig. It has a lace mesh cap with hair sewn all over, which means you can part it anywhere. It’s breathable and comfy too. Just remember, these can be a bit pricier and more delicate than other types. If you’re on a budget, a front lace wig is a good middle-ground option, giving you a natural hairline with more durable materials.
2. How should I prepare my hair before putting on a wig?
You want to make sure your natural hair is as flat and smooth as possible. For long hair, divide it into two sections, twist, and pin it flat against your head. If your hair is short, just comb it back away from your hairline and secure it with a few bobby pins. The goal is to avoid any bumps or lumps under your wig.
3. Do I really need to use a wig cap?
Yes, a wig cap is super helpful! It keeps your natural hair in place and gives the wig something to grip onto. You can choose a net cap for breathability or a skin-toned nylon cap for a more natural look. Even if you don’t have hair, a wig cap can prevent slippage.
4. How do I make sure my wig stays put?
To keep your wig secure, you can use wig glue or adhesive tape. Apply a thin layer of glue around your hairline and let it dry until it’s tacky. If you’re using tape, place strips along your hairline, leaving small gaps for ventilation. You can use both methods for extra hold. Make sure to overlap the cap slightly to keep everything in place.
5. How do I put the wig on without messing it up?
First, tie back or clip the wig hair to keep it out of the glue or tape. Hold the wig at the front and place it on your forehead, then gently pull it over your head. Adjust it carefully to avoid sticking the sides before you’re ready. Take your time to get it centered and smooth.
6. How do I secure the wig once it’s on my head?
Once you’ve positioned the wig, use a fine-toothed comb to press down the edges, ensuring the lace lies flat against your head. Wait about 15 minutes for the adhesive to set. You can also use bobby pins for extra security, hooking them through the wig and into your wig cap.
7. Can I style my wig after applying it?
Absolutely! Once your wig is securely in place, you can style it however you like. Feel free to braid, curl, or accessorize it. Just be gentle, especially if it’s a synthetic wig, as heat can damage the fibers. Have fun with it and make it your own!


